How to create custom Snap layouts on Windows 11
On Windows 11, “Snap Layouts” is a feature (part of Snap Assist) that provides a visual aid for snapping windows on the screen more efficiently by hovering over the maximize button or dragging a window to the top. The caveat with this solution is that you can only snap windows with a predefined set of layouts, depending on the screen’s size and aspect ratio.
Since Snap Layouts are limited and cannot be edited, you will need to use an alternative solution to create custom layouts for snapping windows on your computer, and this is when “FancyZones” comes in handy.
FancyZones is a tool in the PowerToys app that allows you to arrange windows. Unlike Snap Layouts, with FancyZones, you can create custom layouts and access more customization settings that allow you to snap windows exactly the way you like, making you more productive. Although you can use this tool on any display, it is especially useful for large monitors or multi-monitor setups since you can create unique layouts per display.
In this guide, I’ll teach you how to use the FancyZones feature in PowerToys to create custom layouts to snap apps any way you want on Windows. (You can also refer to these instructions on Windows 10.)
Create custom snap layouts on Windows 11
To create custom snap layouts with FancyZones on Windows 11, install PowerToys and use these steps:
-
Open PowerToys.
-
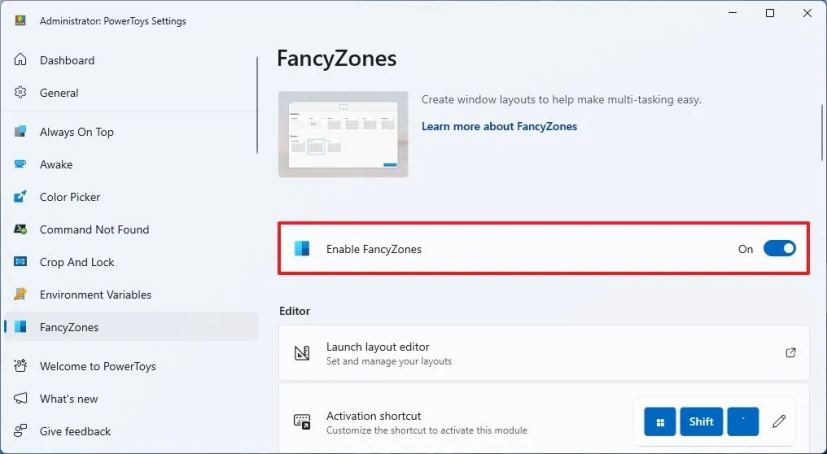
Click on FancyZones.
-
Turn on the Enable FancyZones toggle switch (if applicable).
-
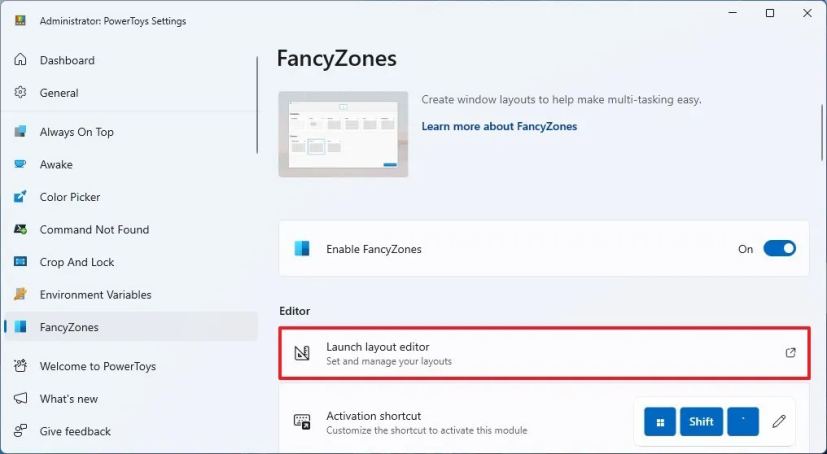
Click the “Launch layout editor” button.
-
Select the monitor to create the snap layout with FancyZones (if you have multiple monitors).
-
(Optional) Choose one of the pre-defined layout templates, including Focus, Columns, Rows, Grid, or Priority Grid.
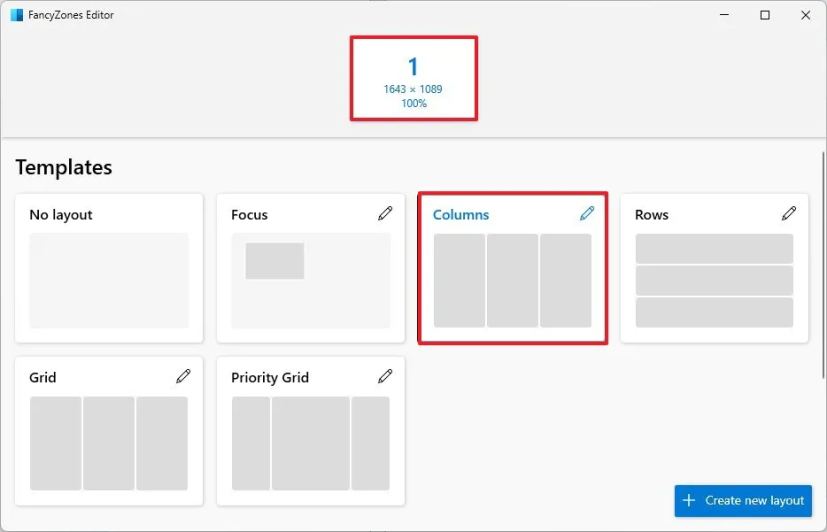 Quick tip: You can always click the “Edit” (pen) button to customize the layout with more zones, distances, and other options. If you want a more unique layout, skip this step and continue with step 7.
 -
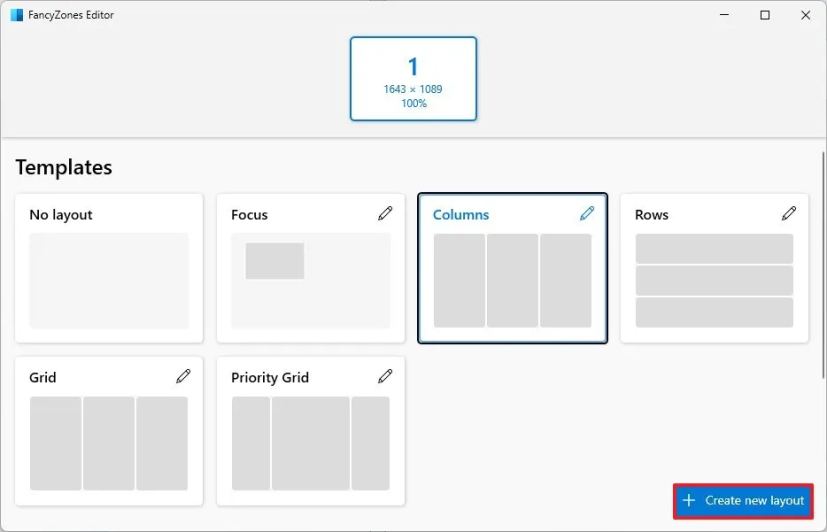
Click the “Create new layout” button in the bottom-right corner.
-
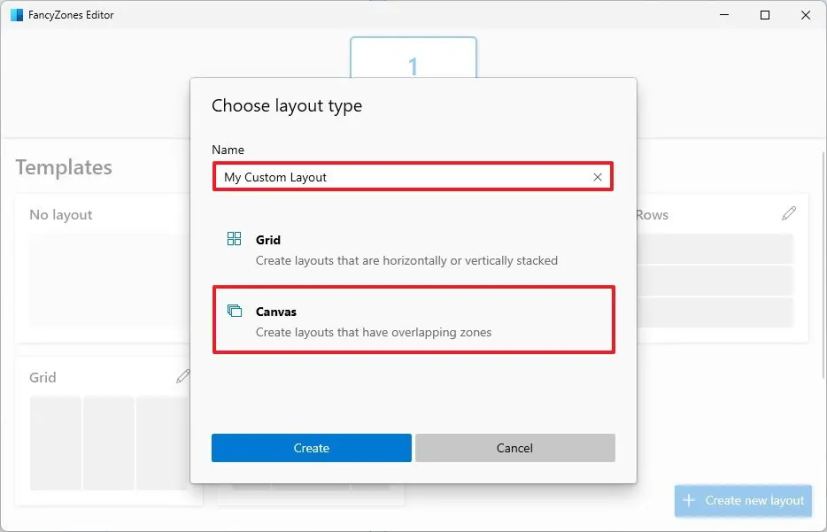
Confirm a name for the layout – for example, My Custom Layout.
-
Select the layout type. The “Grid” creates horizontal or vertical layouts, and the “Canvas” (recommended) option helps you to create layouts freely.
 /li>
/li> -
Click the Create button.
-
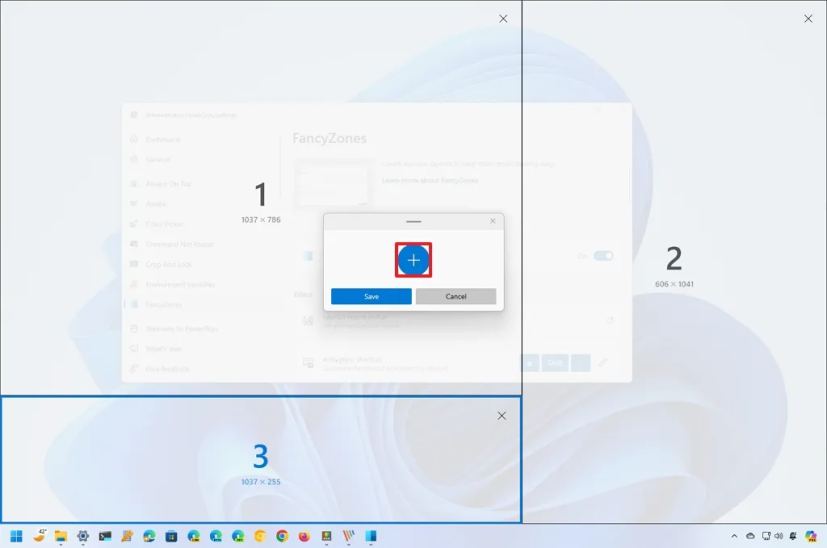
Click the “Add new zone” (+) button to create new snapping zones.
-
Position the snap zone in your desired location and resize it like any other window using the mouse.
-
Repeat steps 9 and 10 to create additional zones depending on how many windows you want to snap on the screen.
-
Click the “Save” button.
Once you complete the steps, the layout will be set up, and you can start dropping windows on each zone. You would do this by holding down the “Shift” key, dragging, and dropping the window to its position.
On the “FancyZones Editor” page, you always click the “Edit” button for the custom layout to customize the zone, duplicate it, change the name and distance to highlight adjacent zones or delete it.
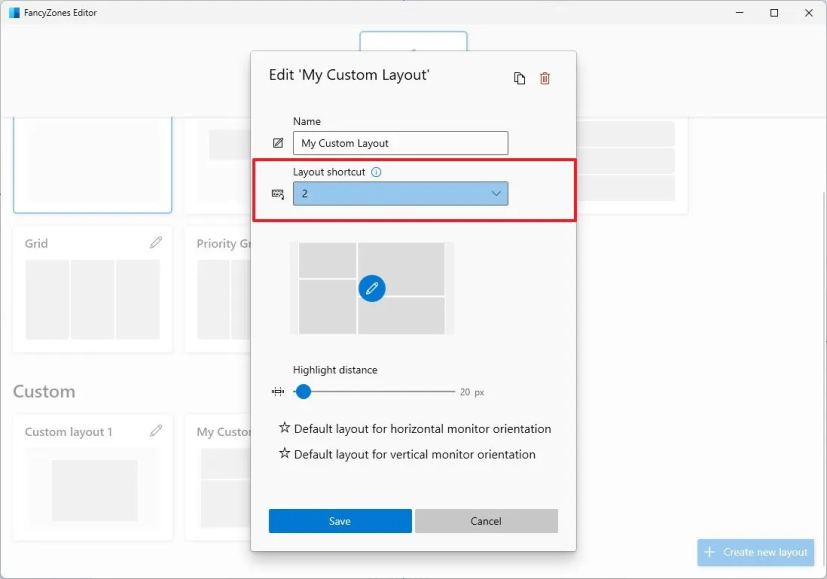
The most interesting option is the “Layout shortcut,” which allows you to assign a shortcut for a specific layout when pressing the “Windows key + Ctrl + ALT + Number” keyboard shortcut. For example, you can create multiple layouts, but when you want to use a specific layout, you can simply switch between them with the shortcut and specify the number of the custom layout.
Customize FancyZones settings
The FancyZones tool includes several settings you can customize to control the layouts and window behaviors. You can adjust these settings to your preferences, but the instructions below will recommend the best settings you should consider enabling.
To customize the FancyZones settings for the best snapping experience on Windows 11, use these steps:
-
Open PowerToys.
-
Click on FancyZones.
-
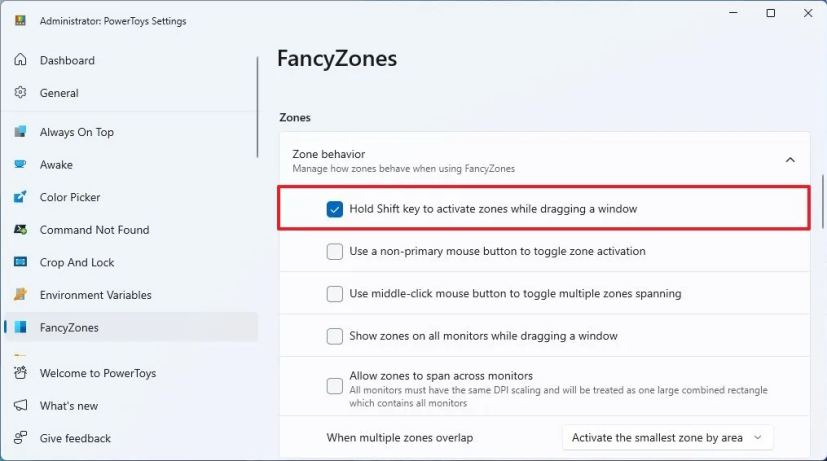
Under the “Zone” section, check the “Hold the Shift key to activate zones while dragging” option to snap windows using your custom layouts.
-
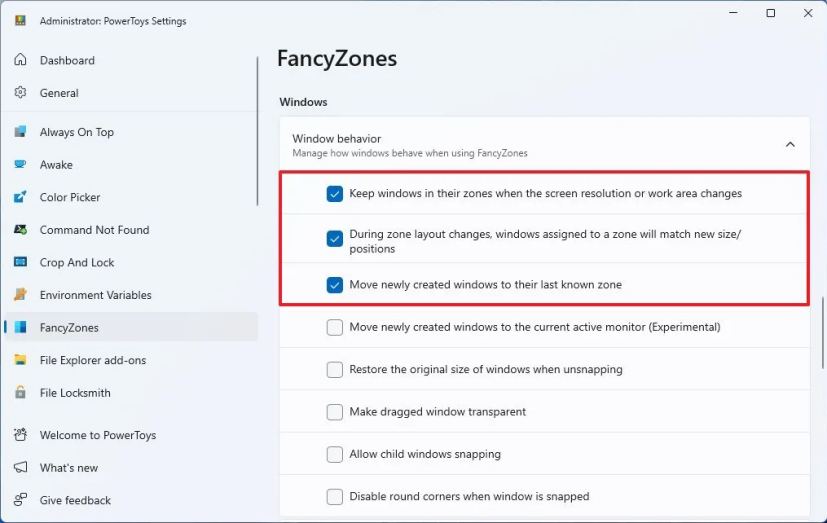
Under the “Windows” section, check the following options:
- Keep Windows in their zones when the screen resolution changes.
- During zone layout changes, windows assigned to a zone will match new size/positions.
- Move newly created windows to their last known zone.
-
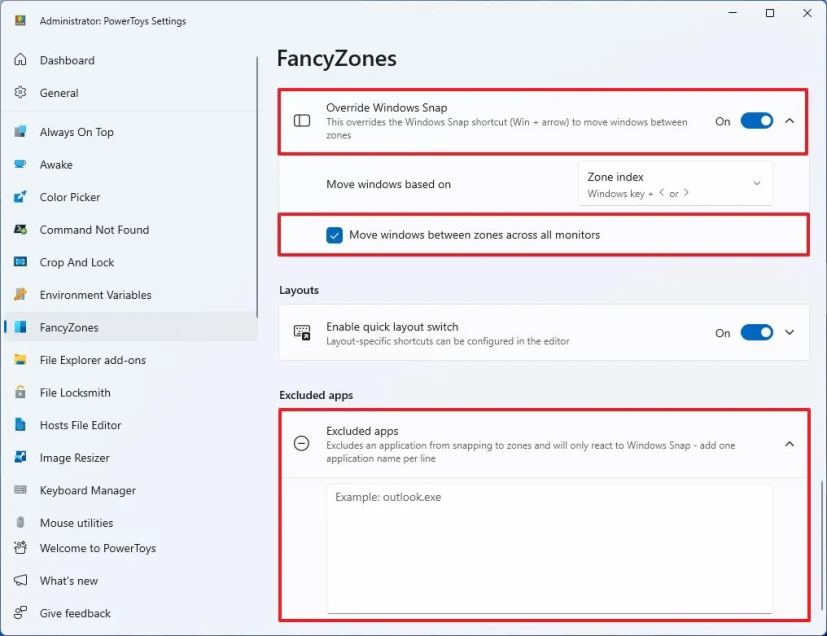
Turn on the “Override Windows Snap” toggle switch to use the “Windows key + arrow” shortcuts to snap windows overring the feature available on Windows 11.
-
Check the “Move windows between zones across all monitors” option.
-
Under the “Excluded apps” section, you can specify the name of the app you do not want to snap on zones when using the Snap Assist feature.
After you complete the steps, the settings will apply, and the feature will appear according to your settings selection.
Disable Snap on Windows 11
If you want to use FancyZones exclusively, it’s possible to disable the Snap feature available on Windows 11 using these steps:
-
Open Settings.
-
Click on System.
-
Click the Multitasking page.
-
Turn off the Snap windows toggle switch.
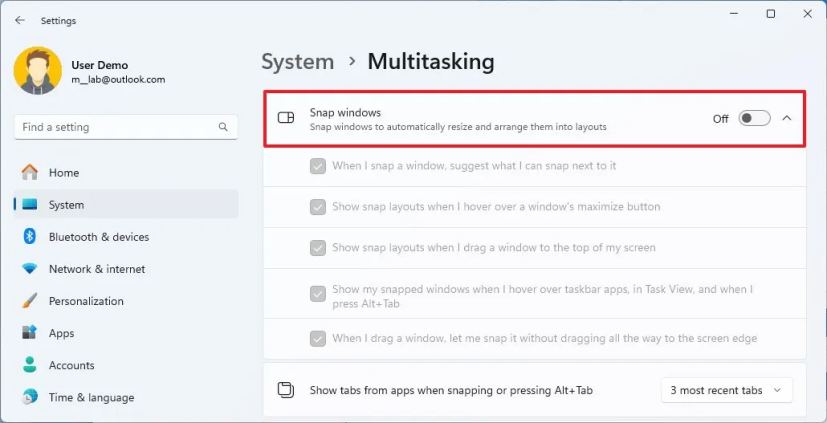
Once you complete the steps, FancyZones will be the only feature that snaps windows on the screen.
If you want to preserve the drag-to-snap or unsnap action when grabbing a window’s title bar, you can leave the “Snap windows” feature turned on but then clear the option for the feature you don’t want to use. For example, you can disable showing snap layouts when hovering over the maximize button or dragging a window to the top of the screen.
Update March 13, 2024: This guide has been updated to ensure accuracy and reflect changes to the process.
