Server safety is a prime precedence for any enterprise or group. Fail2Ban is likely one of the most essential instruments in a system administrator’s toolkit. This information explains what Fail2Ban is and how one can shield your server with Fail2Ban in your Linux from assaults.

What’s Fail2Ban?
Fail2Ban is an intrusion prevention software that screens log information and blocks IP addresses that present indicators of malicious exercise. It does this by creating “filters” that match sure patterns in log information and carry out actions, comparable to blocking the offending IP handle.
Why use Fail2Ban in Linux?
There are a number of causes to make use of Fail2Ban in Linux. possibly:
- It saves you time by mechanically blocking malicious IP addresses.
- Assist safe your server by decreasing the probabilities of an assault succeeding.
- It offers you peace of thoughts realizing your server is being monitored and guarded.
Set up Fail2Ban in Linux
By default, Fail2Ban is out there within the Ubuntu repositories. Set up it utilizing apt.
sudo add-apt-repository universe sudo apt replace && sudo apt set up fail2ban -y
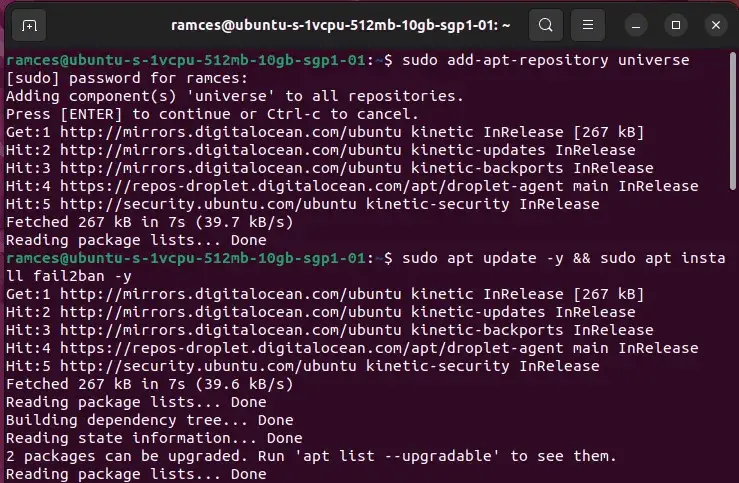
Fail2Ban will set its service within the background, however systemd will disable it by default. You can begin and allow it with the next instructions:
sudo systemctl begin fail2ban
sudo systemctl allow fail2ban
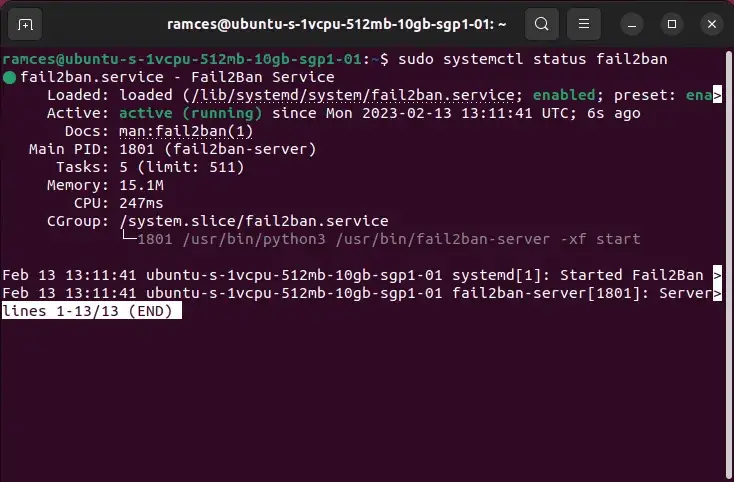
Confirm that Fail2Ban is operating with the next command:
sudo systemctl standing fail2ban
You will notice an output much like the picture beneath.
Configure Fail2Ban in Linux
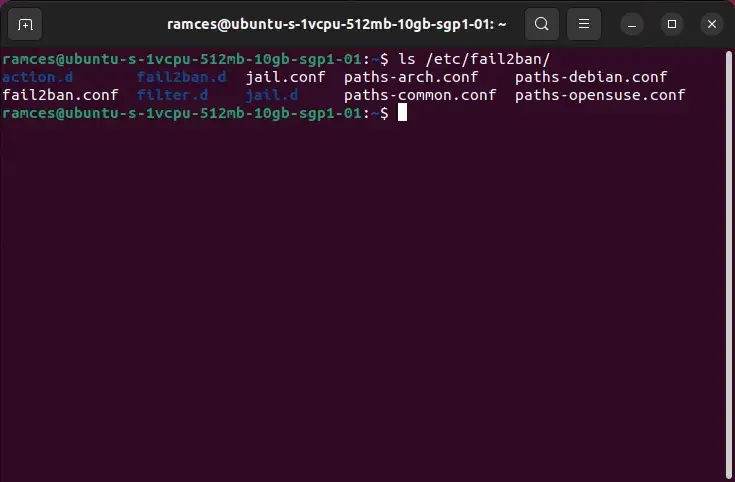
The listing “/and so on/fail2ban” incorporates the configuration information for Fail2Ban. By default, Fail2Ban comes with a “jail.conf” file that incorporates settings that might be utilized to all companies.
Nevertheless, it’s a good follow to create an area “jail.native” file and override the settings in “jail.conf,” as any adjustments you make to “jail.conf” might be misplaced each time the software program is up to date.
You possibly can create your “jail.native” file with the next instructions:
sudo cp /and so on/fail2ban/jail.conf /and so on/fail2ban/jail.native
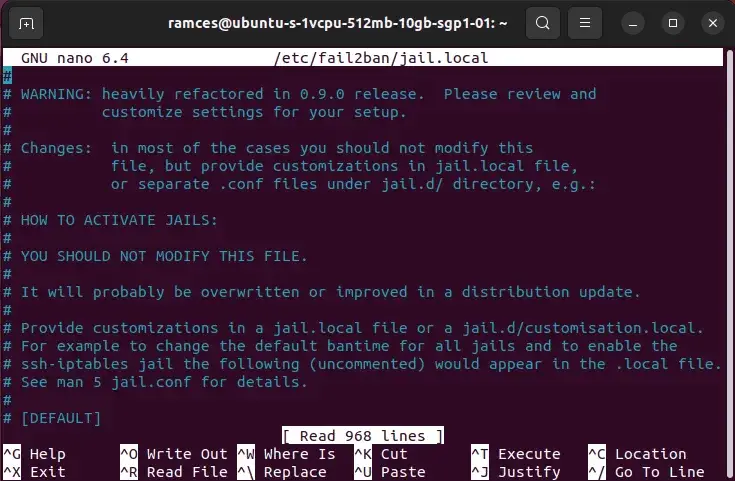
Open the jail.native file to edit it:
sudo nano /and so on/fail2ban/jail.native
Good to know: Learn to allow passwordless SSH logins on LINUX.
Discover the jail.native file
You will notice the same output as proven beneath and you might be overwhelmed by the variety of choices out there. However don’t fret, we stroll you thru crucial choices.
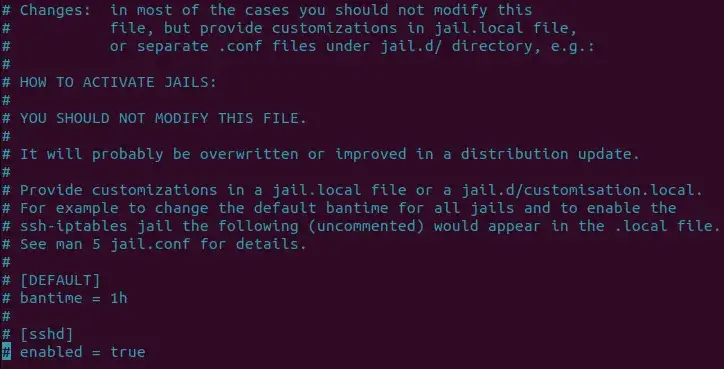
You will notice an icon “#” originally of the road, indicating that it’s a remark. Fail2Ban makes use of these to clarify what a selected setting does. You possibly can allow some settings right here by eradicating this icon.
Part incorporates “(DEFAULT)” on choices relevant to all prisons. That is the overall configuration of Fail2Ban. The next screenshot reveals an instance.
![]()
There are additionally different sections that begin with the service identify. This jail applies to a particular service on prime of the world’s prisons.
For instance, there’s a part for a jail “sshd”. This part incorporates the choices for the sshd service.
![]()
Tip: You may as well be taught extra about server hardening by securing your SSH server.
Allow the Autoban characteristic
Go to setting “bantime = 1hand take away the code “#” originally of the road to allow it. This line units how lengthy Fail2Ban will take to disable the IP handle. The default unit is 1 hour. You may as well use different models, comparable to minutes (m) or days (d) and even weeks (w).
![]()
You possibly can improve or lower this worth as you see match. For instance, you possibly can change this worth to 30 meters to scale back the block period to half-hour.
![]()
Change the default size of the login window
The following settings are “maxretry” and “findtime”. They restrict the variety of login makes an attempt an attacker could make earlier than Fail2Ban blocks his IP handle.
The default values for “maxretry” and “findtime” are 5 and 10 m. If an IP fails to authenticate 5 instances in ten minutes, Fail2Ban will block it for the period specified by the bantime setting.

You possibly can change these values to no matter you need. For instance, you possibly can set “maxretry” to three and “findtime” to 5m: Fail2Ban will disable an IP handle if it fails to authenticate thrice in 5 minutes.

Allow the Fail2Ban notification characteristic in Linux
The next settings are destemail, sendername, and mta. These settings are what Fail2Ban will use to configure e mail notifications.
- E-mail setting is the e-mail handle to which this system will ship its notifications.
- The sender’s identify is the identify that can seem within the From area of the notification e mail.
- mta is the mail switch agent that Fail2Ban will use to ship emails. mta default is sendmail , however you possibly can change it to one thing else like mail.
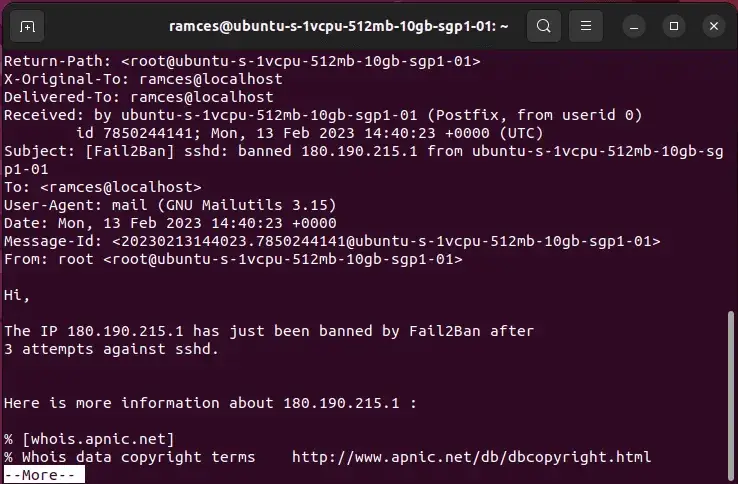
If you wish to obtain e mail notifications, it’s good to uncomment these strains and enter the suitable values as proven.

When a ban happens, you’ll obtain an e mail notification with particulars in regards to the ban as proven.
Create customized block orders
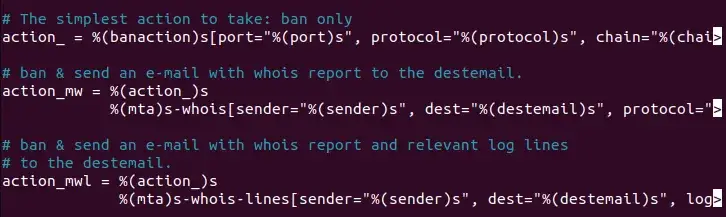
The following setting is “action_=.” This specifies the motion that Fail2ban takes when it blocks an IP handle. The default is to make use of iptables to dam the IP till the “bantime” expires.
You may as well use different procedures, as proven beneath. This tutorial sticks to the default setting for simplicity’s sake.
- action_mw: Sends an e mail notification when an IP handle is blocked, together with related WHOIS info.
- action_mwl: Sends an e mail notification when an IP handle is blocked, together with the related WHOIS info and log file entries that led to the blocking.
- action_xarf: Sends an X-ARF e-mail notification when an IP handle is blocked together with the log file entries that triggered the blocking.
Many different procedures can be found, but it surely’s not possible to cowl all of them on this tutorial. you might Read about all available procedures In Fail2ban documentation.
Allow configuration for the service
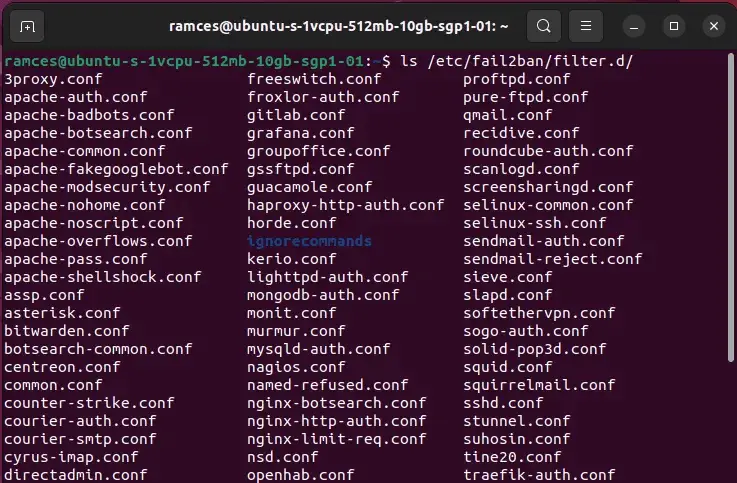
Other than configuring the default habits of Fail2ban, it’s also doable to make use of pre-made Filter Information for some in style Web companies. These are small information written by builders to seek for particular log outputs for a selected server.
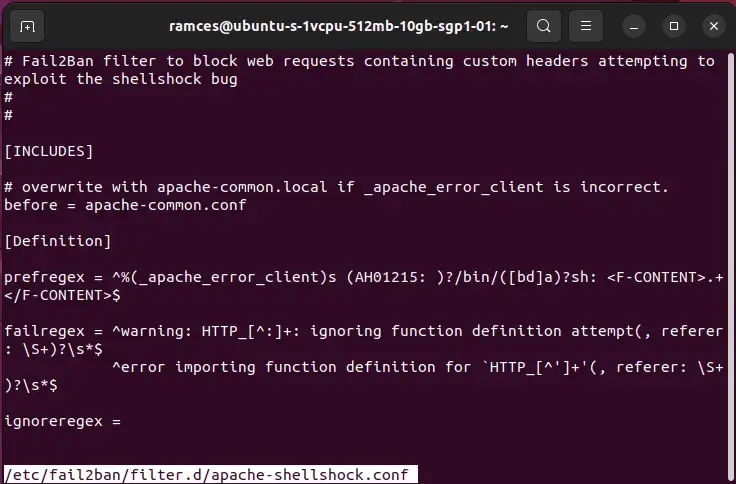
For instance, the “apache-shellshock.conf” file incorporates all the required settings to permit Fail2ban to examine for any malicious makes an attempt to generate a shellshock error.
You will discover all out there filter information to your system by itemizing the listing “/and so on/fail2ban/filter.d”:
ls /and so on/fail2ban/filter.d
As soon as you recognize the filters you wish to use, inform Fail2ban to load them throughout startup by opening your “jail.native” file:
sudo nano /and so on/fail2ban/jail.native
Create an area in “jail.native” the place you possibly can activate your new filters. I create my very own between the remark title and the block (INCLUDES).
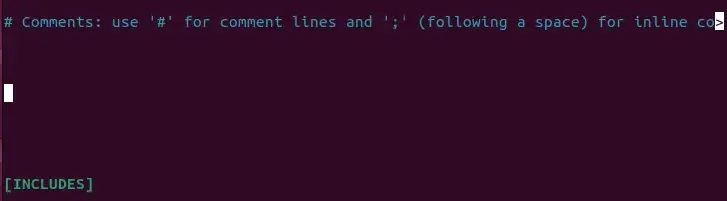
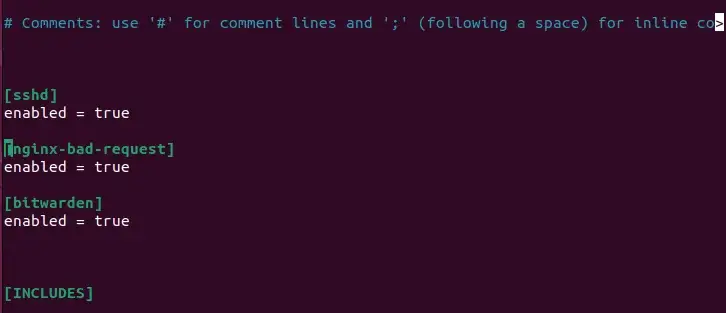
Add the filters you wish to activate. For instance, the next is a snippet I am utilizing in my configuration:
# Feedback: use '#' for remark strains and ';' (following an area) for inline feedback

(sshd)
enabled = true

(nginx-bad-request)
enabled = true

(bitwarden)
enabled = true

(INCLUDES)
As soon as performed, save and shut the file. Restart fail2ban to use the adjustments.
sudo systemctl restart fail2ban
Take a look at your configuration
Now that you have configured Fail2Ban in Linux, it is time to check it.
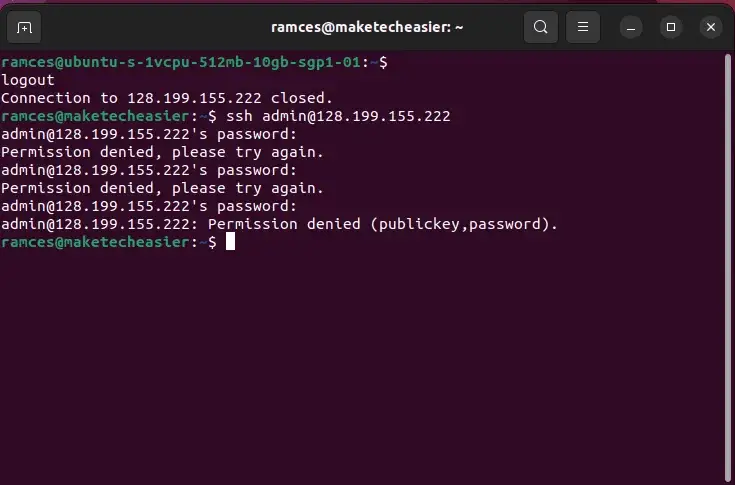
The best strategy to check your configuration is to strive logging in with the inaccurate password a number of instances in fast succession. You should utilize an SSH connection to do that.
On the disposal machine, attempt to SSH into your Fail2ban server utilizing the ‘admin’ username. Change “your_server_ip_address” with the precise IP handle of your Fail2ban server.
ssh (e mail protected)_server_ip_address
Enter a random password when prompted and repeat it a number of instances. After a number of makes an attempt, you will note a message that the server rejected your connection try.
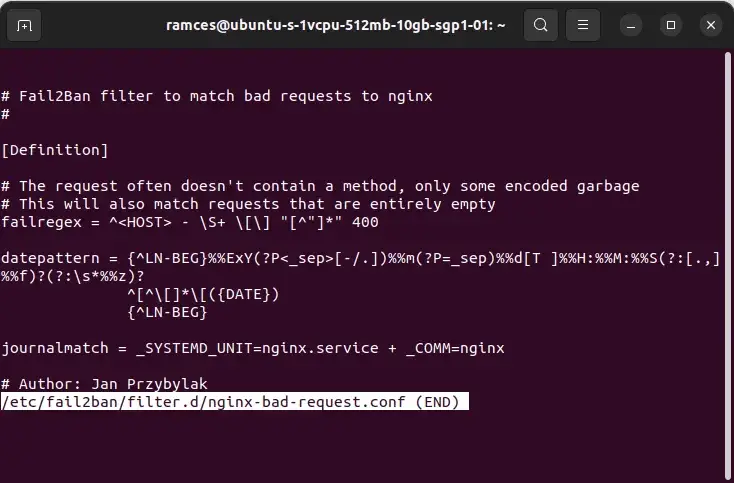
Other than utilizing ssh, you can even check different filter information in Fail2ban by operating Fail Standing. In my case, I am utilizing the “nginx-bad-request” filter which detects if a number is flooding the server with invalid requests.
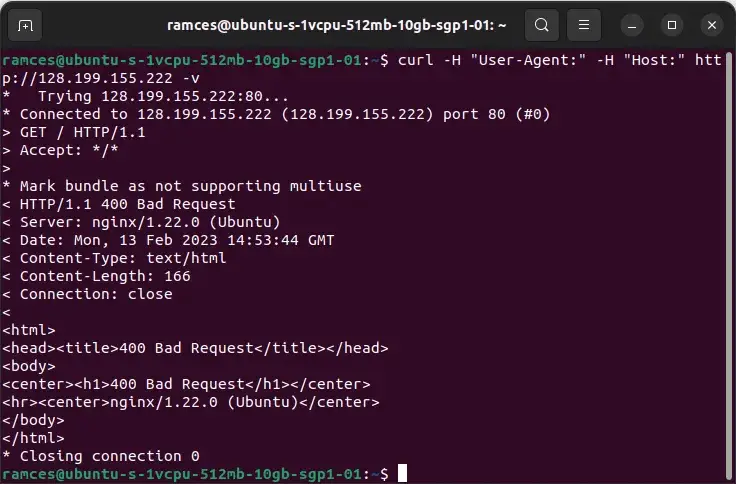
Realizing this, you possibly can check this characteristic by deliberately sending empty requests to your net server utilizing curl:
curl -H "Person-Agent:" -H "Host:" https://yourwebsite.com -v
Checking Fail2Ban routines in Linux
Lastly, run the next command on the Fail2ban server to confirm that fail2ban has added the required guidelines to iptables.
The grep command filters the output of the iptables command. The -S possibility tells iptables to print the principles in an simply parsable format.
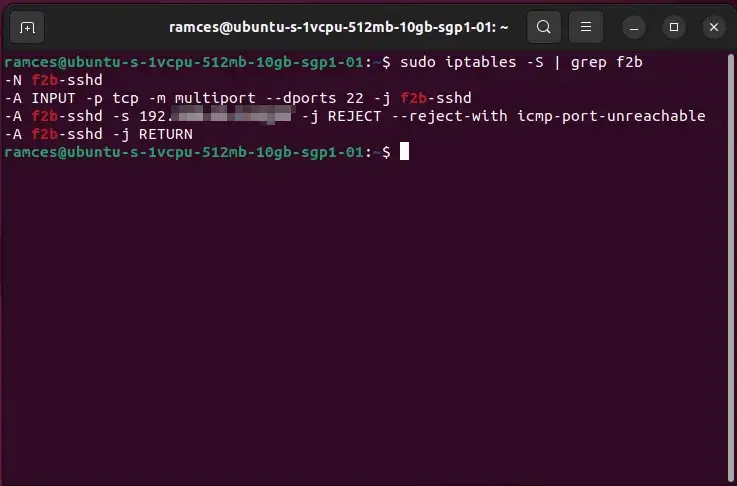
sudo iptables -S | grep f2b
You will notice an output much like the picture beneath. The “–reject-with icmp-port-unreachable” argument tells iptables to ship an ICMP port unreachable message to the consumer when it tries to attach. You may as well see the IP addresses of units that the server has blocked.
Tip: You must also use SELinux to safe your Linux server.
Regularly Requested Questions
Q1: Why do I get a clean e mail notification when Fail2ban blocks an IP handle?
Reply: In the event you obtain an empty e mail notification, it’s possible that you haven’t configured your mail server appropriately. Examine your mail server configuration and ensure it might probably ship e mail.
Q2: How can I unblock an IP handle?
Reply: First, discover the jail the place the IP handle is presently blocked: sudo fail2ban-client standing then unblock the IP handle by operating the next: sudo fail2ban-client set unsanip .
Q3: How do I view the fail2ban log file?
Reply: You might wish to view the fail2ban log file to troubleshoot issues or to seek out out why the IP handle was blocked. The file “/var/log/fail2ban.log” incorporates all logs generated by fail2ban. Use the cat command to view the fail2ban log file: cat /var/log/fail2ban.log.
This autumn: I’ve enabled a number of filter information. Why are all of them not working?
Reply: This drawback probably happens as a result of a filter overwrites a special file that preceded it. One strategy to repair that is to create your personal filter file by combining a number of filters collectively.
Q5: Will Fail2ban shield my server from a DoS assault?
Reply: Sure and no. For essentially the most half, Fail2ban will be capable of block any IP that sends invalid requests to your server. Nevertheless, one of many greatest limitations of this program is that it can not act on occasions that don’t produce a log entry. As such, it’s nonetheless essential to safe your Linux server utilizing different instruments for these types of assaults.