How to Snap apps on Windows 11
Windows 11 comes with Snap Assist, a feature that organizes windows on the screen to improve the multitasking experience when working with two or more applications.
The feature includes various functions to quickly and perfectly snap windows to the sides or corners of the screen using the mouse, keyboard, or touch. The idea is to use assistance so you don’t have to take extra steps to change the size or move the window manually on the screen.
Snap Assist isn’t new to Windows 11. It’s been available since Windows 7, but it’s been evolving. And now, you can access many more functions, such as Snap Layouts, Snap Groups, suggestions, more accessible shortcuts, and more.
In this guide, I will show you how to arrange windows on the screen using Windows 11’s Snapping feature. If you want to create custom snap layouts, you can FancyZones with PowerToys.
How to use Snap Assist on Windows 11
On Windows 11, you can snap windows in multiple ways using the mouse, keyboard, and touch. Here’s how.
Snap apps with mouse
You can snap windows on the screen in multiple ways using the mouse. If you have a touch-enabled device, you can use the mouse actions as gestures to snap.
To snap two windows side by side, drag a window to the left edge of the screen to snap it to the side. Continue with Snap Assist and select the other window you want to snap to the right.
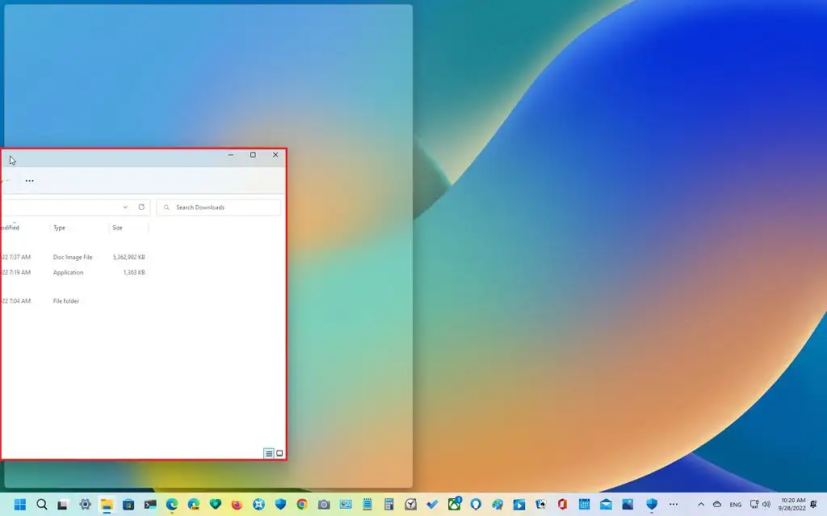
If you ignore Snap Assist, you can drag the other window to the right edge to snap it.
You can also drag the window to the corner edge to snap the window in one of the quadrants of the screen. Using the corners, you can snap three or four windows.
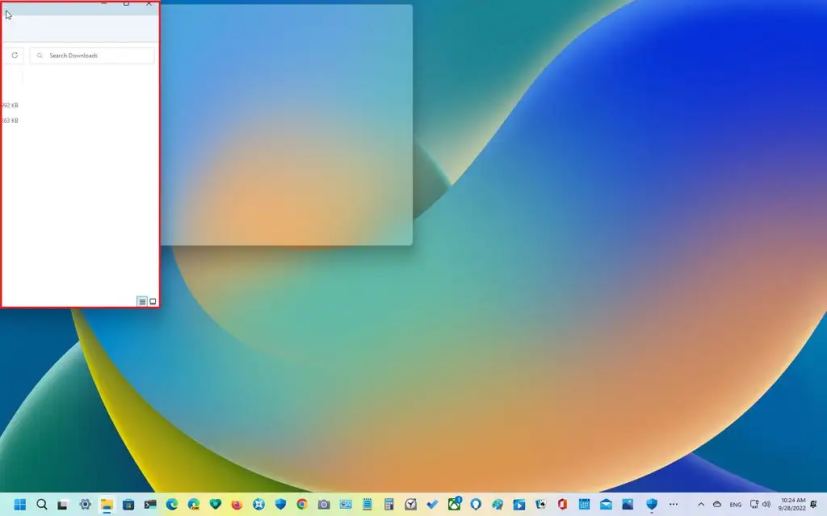
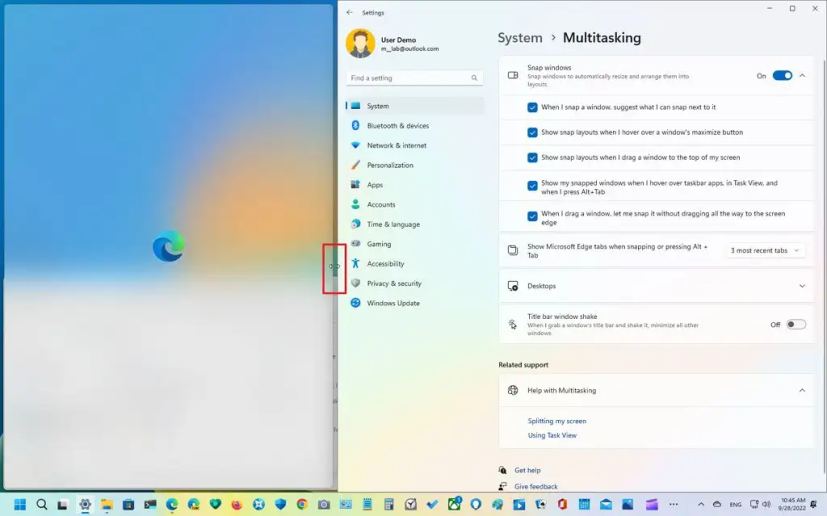
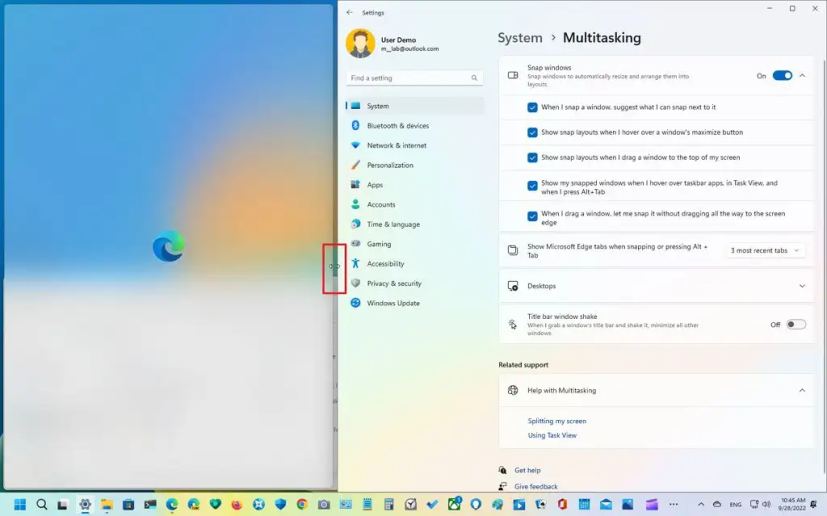
When you snap windows side by side, you can also resize the view by dragging the middle edge to the left or right.
Alternatively, you can hover over the maximize button with the mouse to open the Snap Layouts flyout and select where to snap the windows. Continue with Snap Assist and complete the snapping.
In addition, you can choose one of the suggested layouts, and the assistant will snap all the apps together.
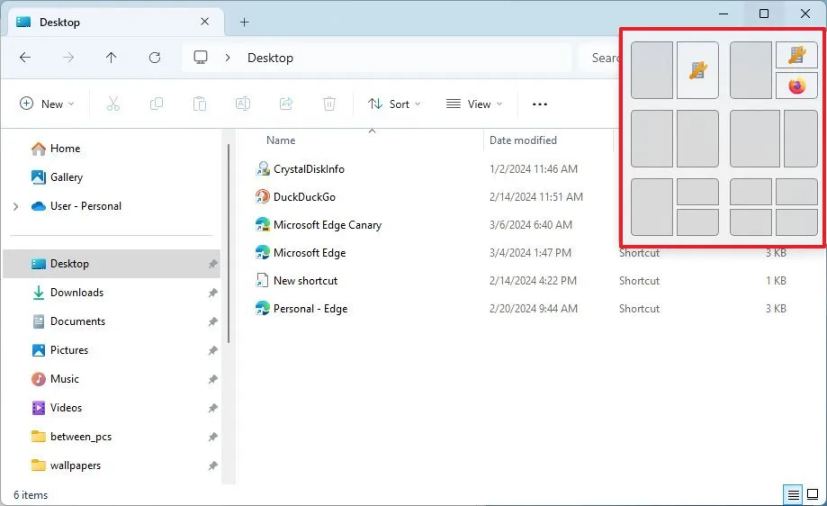
On Windows 11, starting with the Moment 5 update and higher releases, suggestions are an addition to Snap Layouts that uses AI to predict the apps you may want to snap next to your selected app.
You can also drag a window to the top edge of the screen to reveal the Snap Layouts drop-down. Drop the window in the zone you want, and then continue with Snap Assist and complete the snapping.
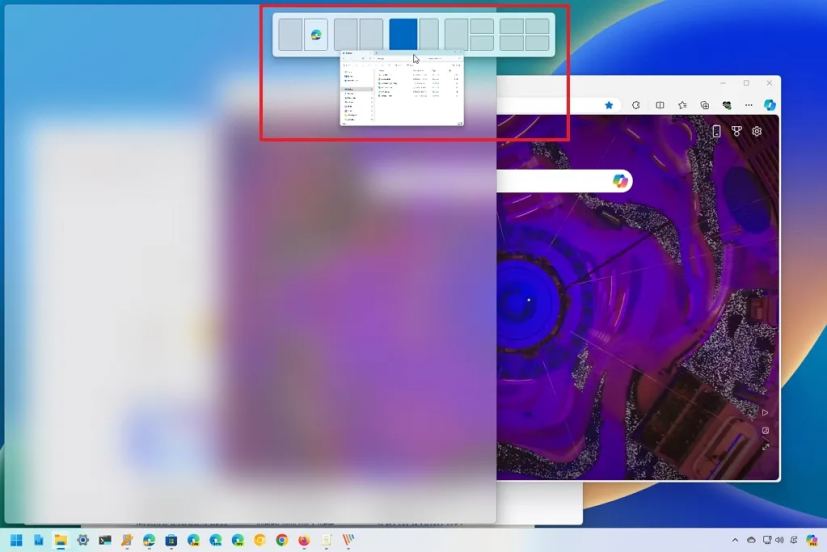
The available layouts will appear according to the screen size if you use Snap Layouts.
Snap apps with keyboard
You can also use the keyboard keys to snap apps on Windows 11.
To snap two windows with the keyboard, press the “Windows Key + Left arrow” shortcut to snap the window in focus to the left side. Continue with Snap Assist and select the other window you want to snap to the right.
If you ignore Snap Assist, use the “Windows Key + Right arrow” shortcut to snap the window in focus to the right side.
You can also use the “Windows Key + Left and Up arrows” keyboard shortcut to snap the window to the top-left side corner. The “Windows Key + Right and Up arrows” shortcut to snap the window to the top-right side corner. The “Windows Key + Left and Down arrows” shortcut to snap the window to the bottom-left side corner. And the “Windows Key + Right and Down arrows” shortcut to snap the window to the bottom-right side corner.
Windows snap layouts
Alternatively, you can use the “Windows Key + Z” shortcut to open the Snap Layouts flyout from the maximize button, press one of the numbers in the keyboard to select the layout, and then press the number to choose the snap location. Continue with Snap Assist and select the other window you want to snap to the right, or use the “Windows Key + Z” shortcut again to continue snapping windows.
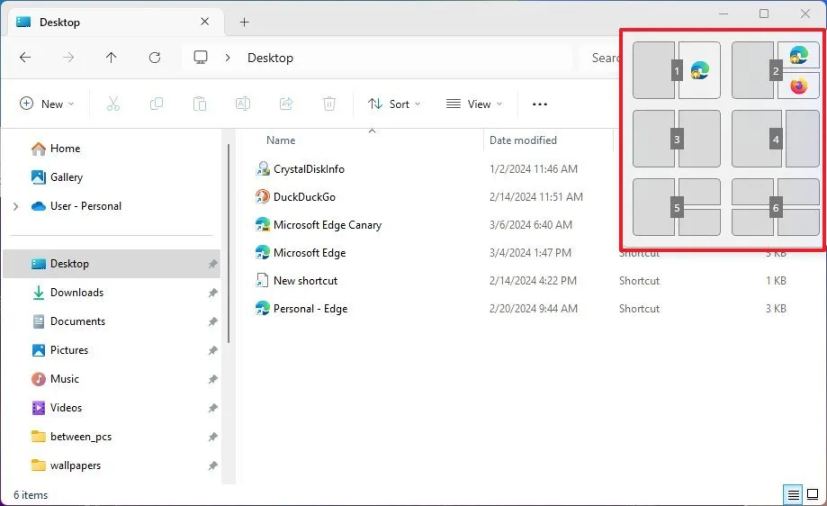
The display size determines the number of layouts, meaning you can’t get more snap layouts.
Windows snap groups
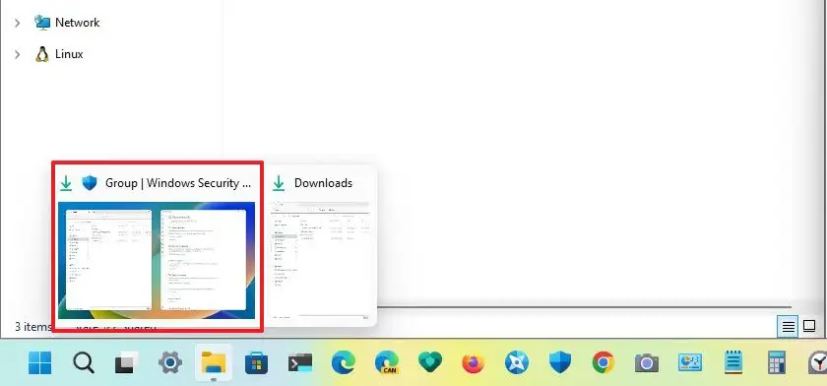
Whether you use the mouse or keyboard to snap windows, you can switch between groups of snapped windows or jump to another app and then come back to the group using “Snap groups” by hovering over an app in the Taskbar that belongs to a group and choose the group from the thumbnail previews.
Disable Snap feature on Windows 11
Windows 11 gives you granular control over features while snapping windows. You can disable Snap Assist altogether and control each option individually.
To disable the Snap feature on Windows 11, use these steps:
-
Open Settings.
-
Click on System.
-
Click the Multitasking tab.
-
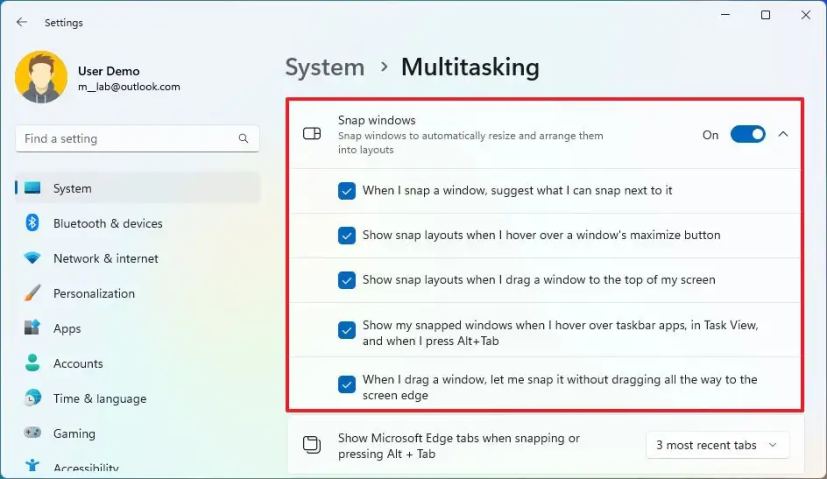
Turn off the “Snap windows” toggle switch to disable the feature.
-
(Optional) Turn on the “Snap windows” toggle switch to enable the feature.
-
Check the “When I snap a window, suggest what I can snap next to it” option to enable Snap Assist. If you turn off the option, you won’t see a list of suggestions on what to snap next when snapping a window.
-
Check the “Show snap layouts when I hover over a window’s maximize button” option to enable the flyout in the maximize button.
-
Check the “Show snap layouts when I drag a window to the top of my screen” option to enable the new layouts down-down from the edge of the screen. If you turn off the option, the layouts flyout at the top of the screen will no longer be available.
-
Check the “Show my snapped windows when I hover over taskbar apps, in Task View, and when I press Alt+Tab” option to show thumbnail previews of snap grouping. This feature is also known as Snap groups.
-
(Optional) Check the “When I drag a window, let me snap it without dragging all the way to the edge of the screen” option to bring up Snap Assist as drag a window closer to the edge of the screen.
-
(Optional) Use the “Show Microsoft Edge tabs when snapping or pressing Alt + Tab” setting to decide the number of tabs in Snap Assist. You can also choose not to show tabs.
Once you complete the steps, you can use the keyboard and mouse to organize your windows on the screen.
If some snapping features are not working, you may not be using the latest version of Windows 11. Some features, such as Snap groups, Snap Layouts from the top of the screen, and Snap Layouts with numbers when using the keyboard shortcut, are only available after upgrading to version 22H2 or higher releases, such as version 23H2, and layout suggestions are available with the Moment 5 update.
Update March 6, 2024: This guide has been updated to ensure accuracy and reflect changes to the process.
