Many a time, replace errors happen displaying lacking root certificates like error 0x800b010a. If in case you have additionally encountered such an error code, allow us to study what these trusted root certificates are and the best way to handle them on Home windows PCs.
When disabled, these certificates forestall different customers within the area from configuring their very own set. That is the place it turns into important so as to add or handle these certificates.
What are Trusted Root Certificates in Home windows?
Trusted Root Certificates are mainly some elementary element of the general public key infrastructure (PKI) in Home windows. It’s their duty to make sure the safety of digital communications together with internet shopping, e-mail, and some other on-line actions. They play a really essential function in establishing belief and safety within the digital world.
Downloading and Putting in a Trusted Root Certificates
Earlier than you add or handle such certificates, it’s important to first obtain and set up these certificates. To obtain Trusted Root Certificates, open your default internet browser and navigate to your native certification server. You could have a take a look at Microsoft’s web page to install these certificates via PowerShell.
Word: It is very important have the identical certificates of authority used for producing the server and, optionally, consumer certificates.
- When you go to the official website, select after which obtain a CA certificates, certificates chain, or CRL hyperlink, as wanted.
- Choose the suitable certificates of authority from the record and select the Base 64 Encoding technique.
- Shifting ahead, select the Obtain CA certificates hyperlink after which select the Open possibility when prompted to open or save the certificates.
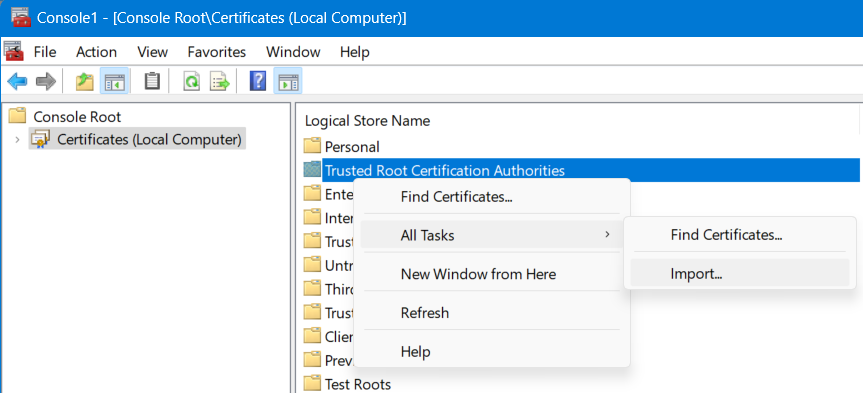
- When the certificates window opens, select Set up Certificates…. The Certificates Import wizard seems.
- Within the wizard, select Subsequent. Then, when you’re prompted for the Certificates Retailer, select Place all certificates within the following retailer. Choose the Trusted Root Certification Authorities retailer.
- You could now comply with the on-screen directions to finish the set up course of.
- After you’ve efficiently put in the certificates, hit End.
Now that you’ve put in certificates in your PC, comply with the under sections on the best way to both add or handle them whereas being contained in the Microsoft Administration Console.
Including Trusted Root Certificates in Home windows
Earlier than you handle any trusted root certificates, let’s first learn to add such certificates on Home windows. Right here’s how to do this –
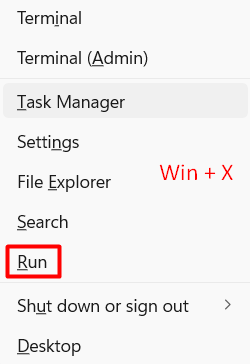
- To start with, press Home windows + X, and choose Run from the accessible choices.
- Kind
mmcwithin the textual content subject, and hit OK. When the UAC window prompts, hit Sure to authorize opening the Microsoft Administration Console. - Go to File, and hit Add/Take away Snap-in. Alternatively, you may additionally press Ctrl + M to launch the Add or Take away Snap-ins window.
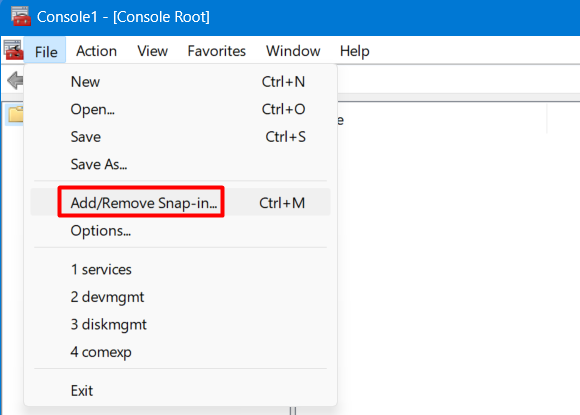
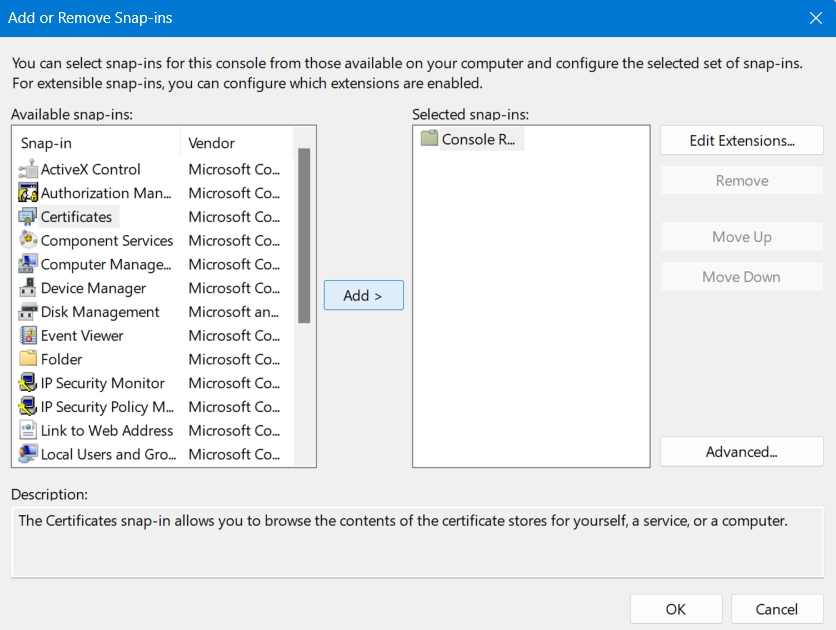
- Scroll right down to Certificates contained in the Out there Snap-ins, and click on as soon as on it. Go to the adjoining window, and hit Add.
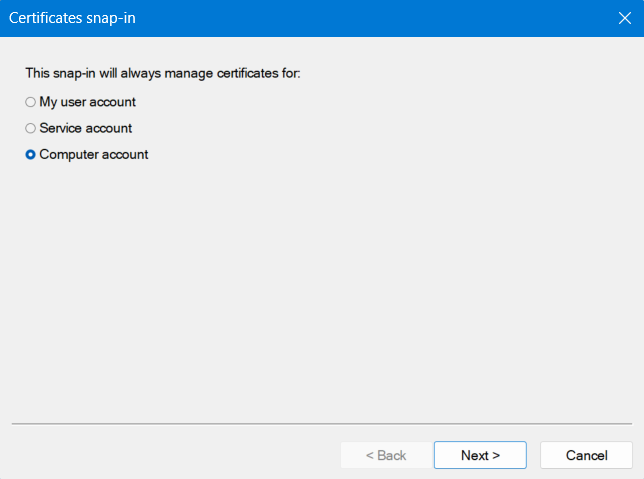
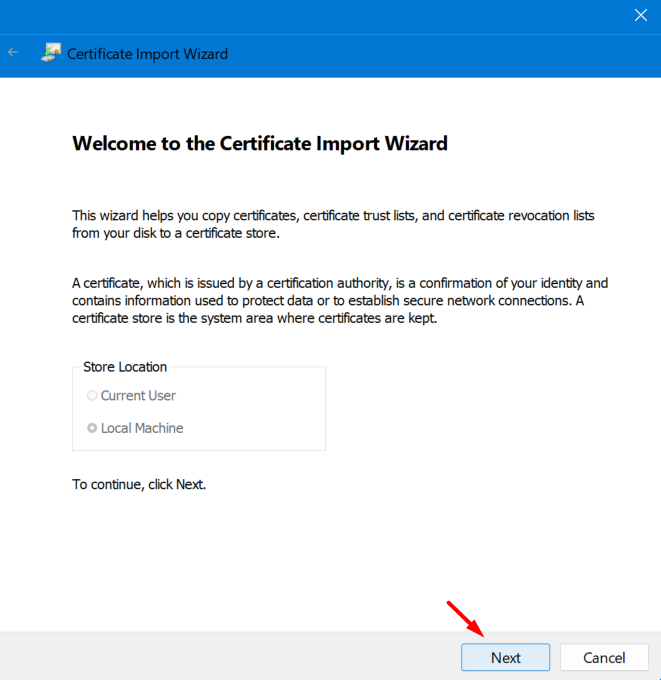
- The certificates snap-in window will seem subsequent. Tick the radio button left of the Pc account, and click on Subsequent.
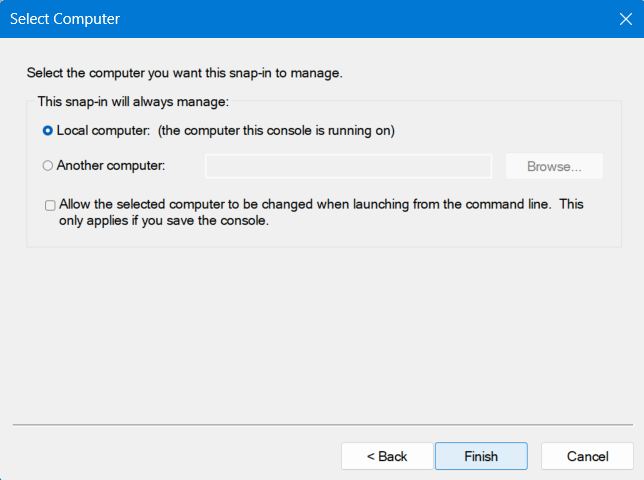
- Allow the Native Pc’s radio button, and hit End.
- “Certificates (Native Pc)” is now added underneath the Console Root contained in the Microsoft Administration Console.
Please allow JavaScript
- When the Welcome to the Certificates Import Wizard opens up, click on Subsequent once more.
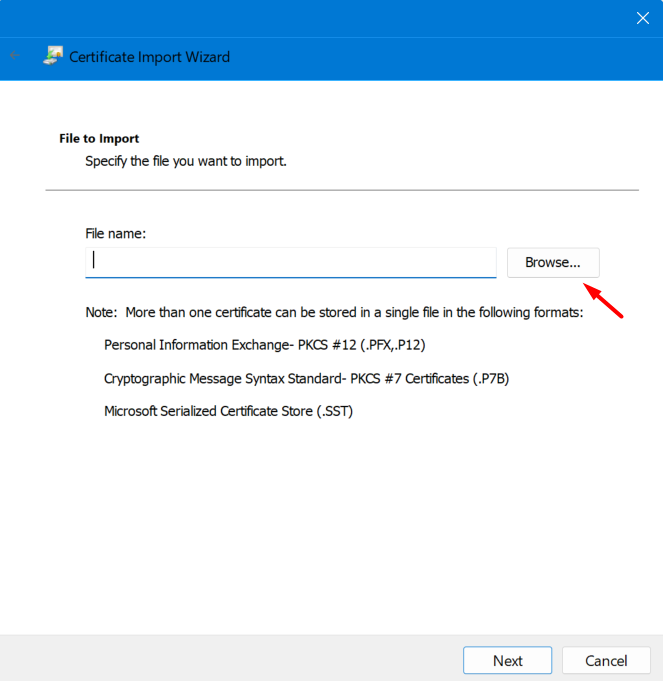
- Click on on Browse and navigate to the folder containing your trusted root certificates.
Observe the on-screen directions subsequent to finish this including Certificates to MMC.
Managing Trusted Root Certificates
Now that you know the way so as to add a trusted root certificates, let’s study the steps on the best way to handle such certificates contained in the Microsoft Administration Console.
- Go to the File menu once more, and choose Add/Take away Snap-in.
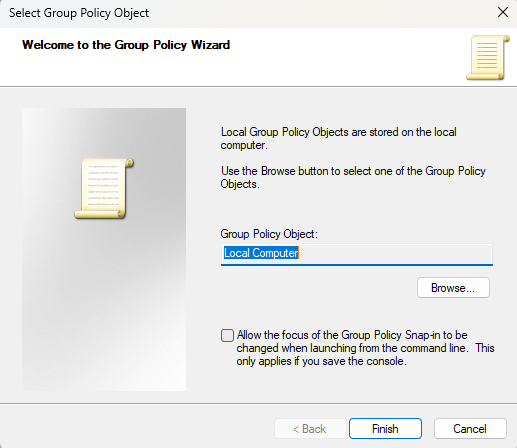
- This time, click on Group Coverage Object Editor underneath Out there Snap-in.
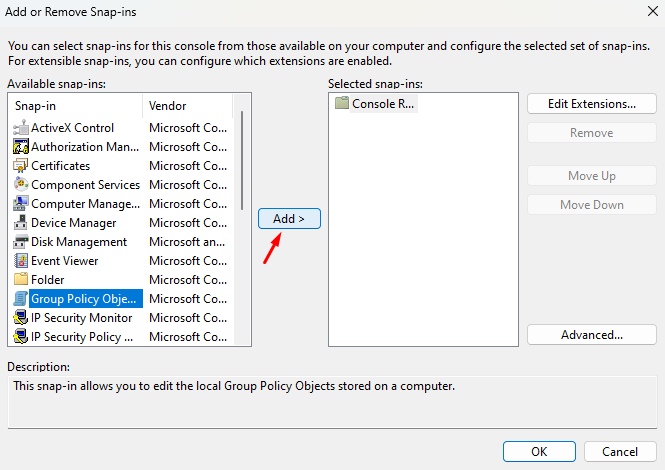
- Kind Native Pc underneath the Group Coverage Object, verify the tickbox, after which hit End.
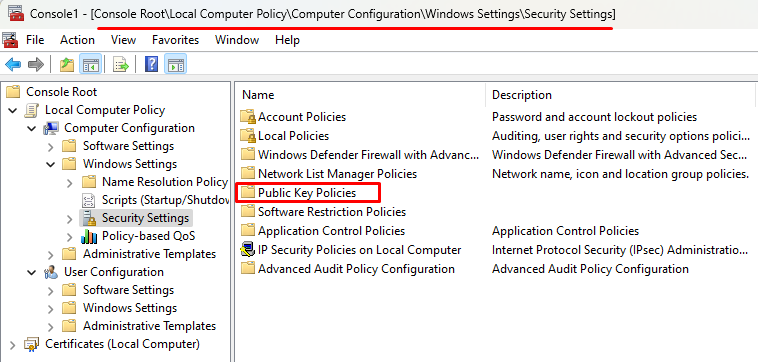
- Return to the MMC Console tree and navigate to the next path –
Native Pc Coverage > Pc Configuration > Home windows Settings > Safety Settings
- Find and double-click on Public Key Insurance policies subsequent.
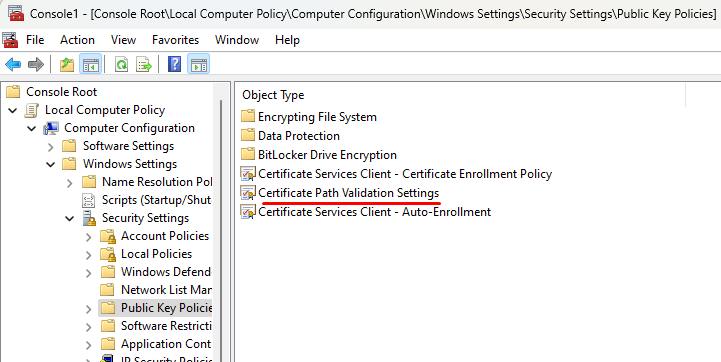
- When this expands, double-click on Certificates Path Validation Settings, and choose the Shops tab.
- Allow the tickbox subsequent to Outline these coverage settings after which allow each checkboxes underneath Per consumer certificates shops.
- Scroll right down to Root certificates shops, and verify the radio button left of “Third-Get together Root CAs and Enterprise Root CAs (really useful)”.
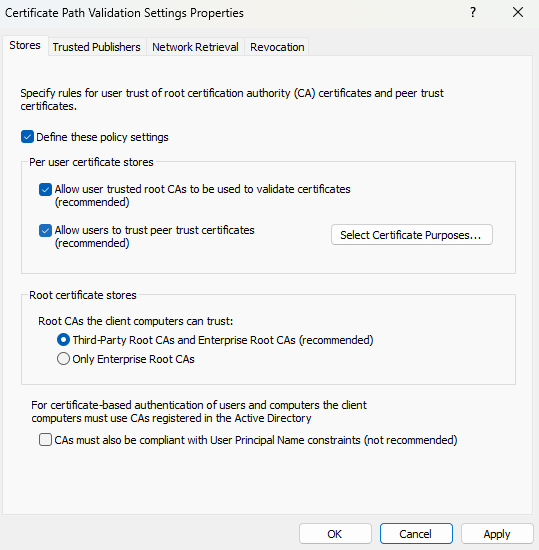
- Lastly, click on Apply after which OK to verify the current modifications.
That’s it, I hope you are actually in a position so as to add or handle Trusted Root Certificates in your Home windows PC.