On Home windows 11, you may take away a drive letter in at the least 4 methods, and on this information, you’ll find out how. The working system routinely assigns a drive letter to each machine storage linked to the pc, together with inner drives, USB drives, DVD or Blu-ray gadgets, and mapped community drives to register the logical quantity and current them to you on File Explorer or another app.
Nevertheless, typically, you could have to take away a drive letter for numerous causes. For instance, you could wish to preserve the drive hidden for safety causes, or the system mistakenly assigns letters to the hidden restoration or EFI partitions. You might also want to alter the drive letter to resolve conflicts or duplicates.
Regardless of the motive, on Home windows 11, you may take away a drive letter in at the least 4 methods utilizing the Settings app, Disk Administration, Command Immediate, and PowerShell.
On this information, I’ll train you the right way to take away a drive letter on Home windows 11.
- Remove drive letter from Settings app
- Remove drive letter from Disk Management
- Remove drive letter from Command Prompt
- Remove drive letter from PowerShell
Take away drive letter from Settings app
To take away the drive letter on Home windows 11, use these steps:
-
Open Settings on Home windows 11.
-
Click on on System.
-
Click on the Storage web page.
-
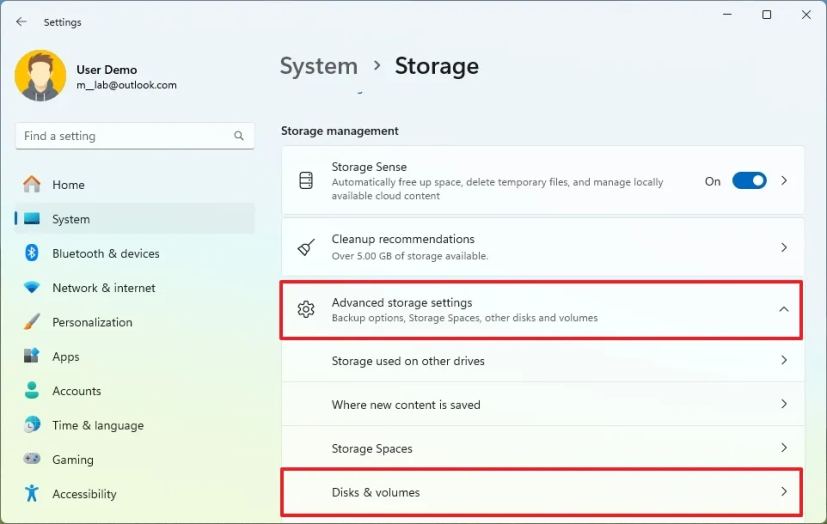
Click on the “Superior storage settings” choice below the “Storage administration” part.
-
Click on the Disks & volumes setting.
-
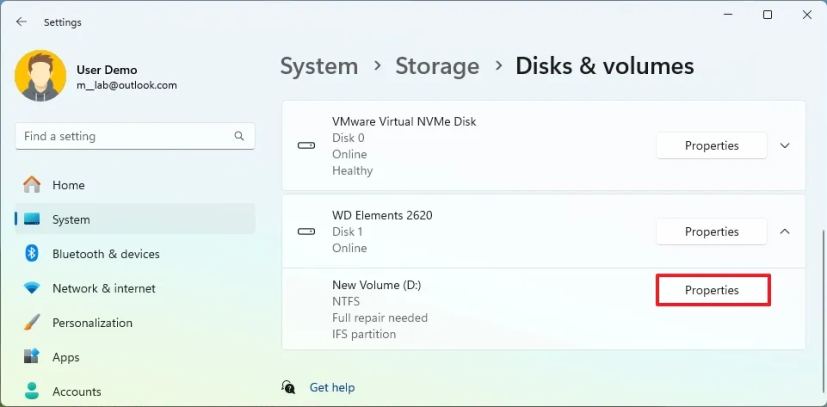
Choose the drive with the amount with the letter to take away.
-
Choose the amount and click on the Properties button.
-
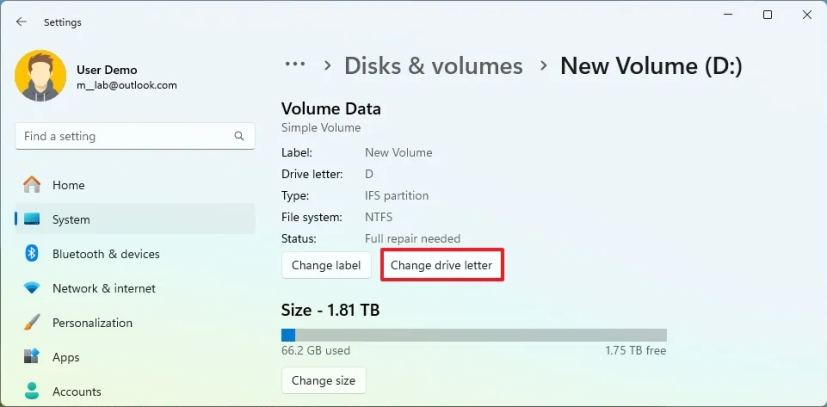
Click on the “Change drive letter” button.
-
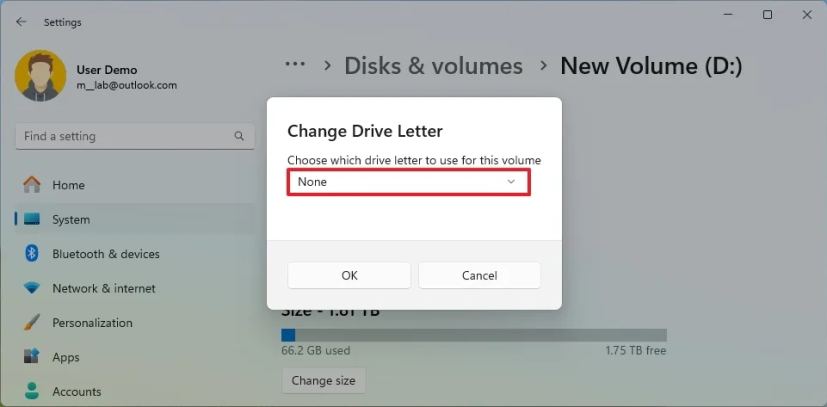
Choose the None choice to take away the drive letter on Home windows 11.
-
Click on the OK button.
When you full the steps, the system will take away the drive letter on Home windows 11.
Take away drive letter from Disk Administration
To take away the drive letter from Disk Administration, use these steps:
-
Open Begin.
-
Seek for Create and format disk partitions and click on the highest end result to open the Disk Administration device.
-
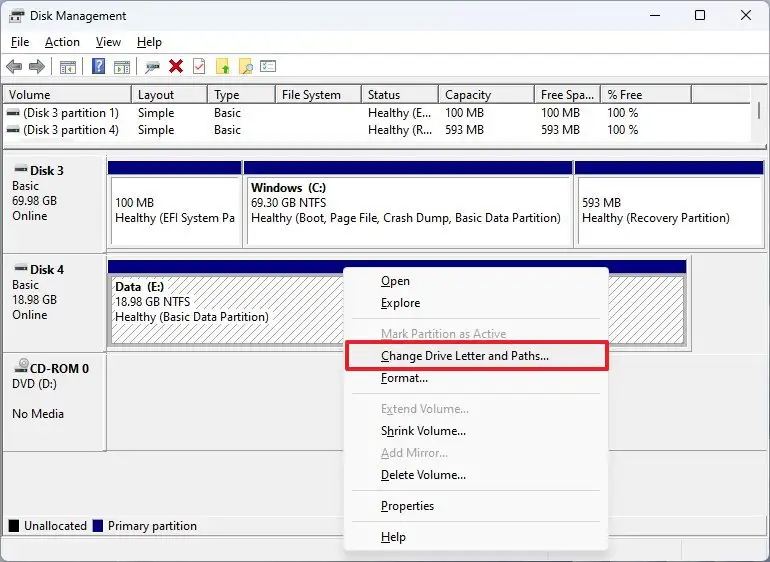
Proper-click the amount and choose the “Change Drive Letter and Paths” choice.
-
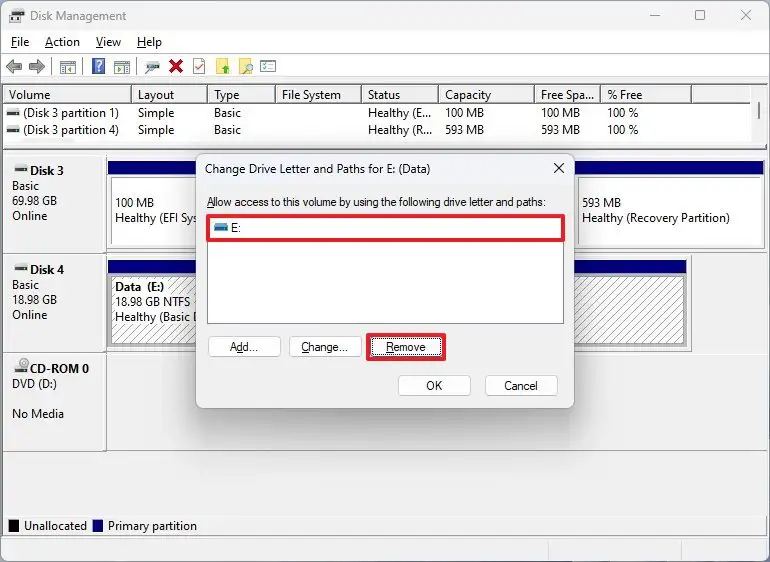
Choose the drive letter and click on the Take away button.
-
Click on the OK button.
After finishing the steps, the drive will not seem in File Explorer.
Take away drive letter from Command Immediate
So as to add a brand new drive letter from Command Immediate, use these steps:
-
Open Begin.
-
Seek for Command Immediate, right-click the end result, and choose the Run as administrator choice.
-
Sort the next command to launch diskpart and press Enter:
diskpart
-
Sort the next command to listing the volumes and press Enter:
listing quantity
-
Sort the next command to pick out the amount (drive) to take away the letter and press Enter:
choose quantity 4
Within the command, change “4” for the quantity akin to the storage to take away the letter.
-
Sort the next command to take away the drive letter on Home windows 11 and press Enter:
take away letter=E
Within the command, change “E” for the letter to take away.

When you full the steps, the diskpart device will letter for the amount.
Take away drive letter from PowerShell
To take away a drive letter from PowerShell, use these steps:
-
Open Begin.
-
Seek for PowerShell, right-click the end result, and choose the Run as administrator choice.
-
Sort the next command to determine the onerous drive and press Enter:
Get-Disk
-
Sort the next command to determine the partition to take away the drive letter and press Enter:
Get-Disk 4 | Get-Partition
Within the command, change “4” with the disk quantity to take away the letter.
-
Sort the next command to take away the drive letter and press Enter:
Take away-PartitionAccessPath -DiskNumber 4 -PartitionNumber 2 -Accesspath E:
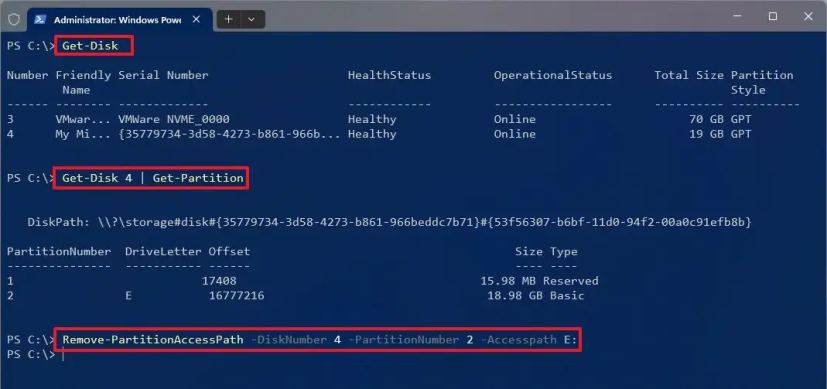
Within the command, change “4” with the disk quantity and “2” for the partition holding the drive letter. Additionally, change “E” for the drive letter to take away.
After finishing the steps, PowerShell will take away the letter for the drive, making it inaccessible.
Replace Could 15, 2024: This information has been up to date to make sure accuracy and mirror adjustments to the method.