Though now you can set up completely different Linux distros via WSL or digital machine on Home windows 11 (and 10), together with Ubuntu, Mint, Kali, and Fedora, typically you should still want to make use of the full-blown model of Linux to entry the total {hardware} capabilities for one of the best expertise and efficiency.
When you don’t have a spare laptop to put in a full model of Linux, you may modify your present set up to run a Linux distro alongside Home windows on a dual-boot setup. I’ll define the steps to dual-boot Home windows 11 and Linux utilizing Ubuntu as a result of it’s among the many hottest distros, however you may refer to those directions for nearly any distro you wish to use or for those who’re utilizing Home windows 10.
On this information, I’ll clarify the steps to create a dual-boot system with Home windows and Linux. You can too arrange a dual-boot system with two completely different variations of Home windows.
Arrange Home windows and Linux dual-boot system
Shrink Home windows partition
Though the Ubuntu setup contains an possibility to put in alongside Home windows 11 (or 10), typically it might not work as anticipated. As a substitute, it’s really helpful to shrink the Home windows partition to make room for the Ubuntu set up earlier than continuing and use the handbook setup throughout set up.
You can too use a secondary (inside) drive as a substitute of fixing the setup partition. This fashion, you may separate every working system on a unique bodily drive with out having to switch an present partition.
When you’ve got a tool with out an working system, use these directions to carry out a clear set up of Home windows 11 (or Home windows 10 with these steps), after which proceed with the directions under.
To shrink a partition on Home windows 11 with Disk Administration, use these steps:
-
Open Begin.
-
Seek for Create and format exhausting disk partitions and click on the highest consequence to open the Disk Administration console.
-
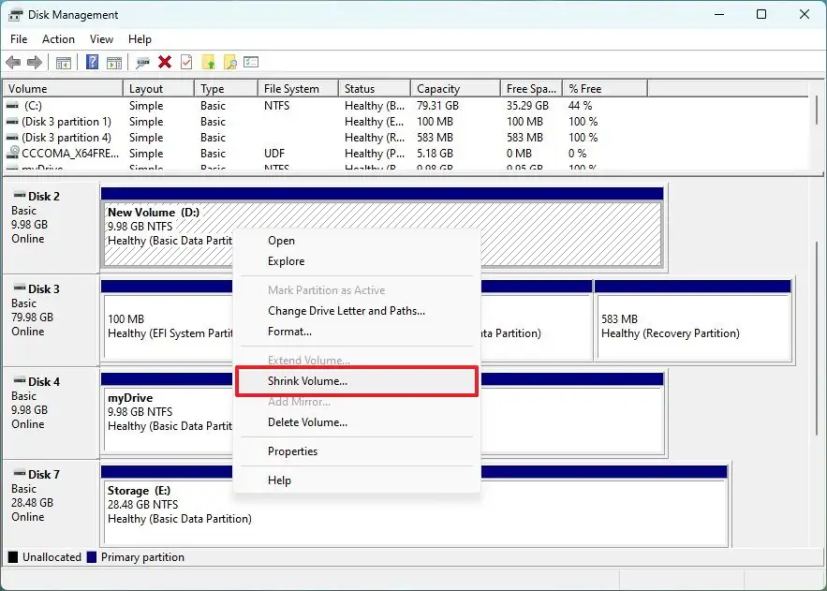
Proper-click the drive you wish to change its partition measurement and choose the Shrink Quantity possibility.
-
Affirm the quantity of area to shrink the partition (in megabytes).
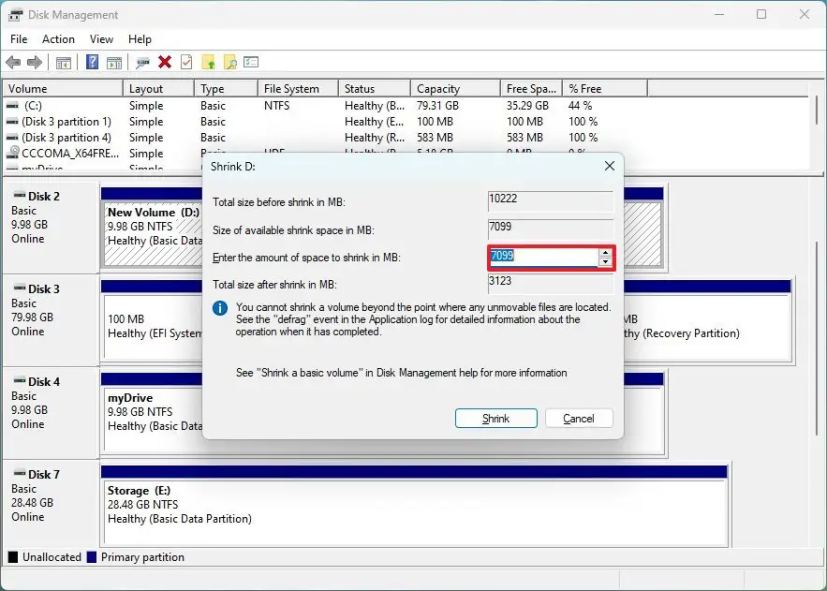 Fast notice: Ubuntu (and most distros) requires a minimum of 25GB of obtainable area.
 -
Click on the Shrink button.
When you full the steps, you’ll find yourself with a small partition and a few unallocated area to put in Ubuntu. You can too use different strategies to vary the dimensions of the partition on Home windows 11.
Create Ubuntu bootable media
You’ll additionally must download the Linux ISO file containing the most recent model of Ubuntu, which you should use to create a bootable media. You may download Linux Mint from the official web site, Fedora can be downloaded here, and Kail Linux from this site.
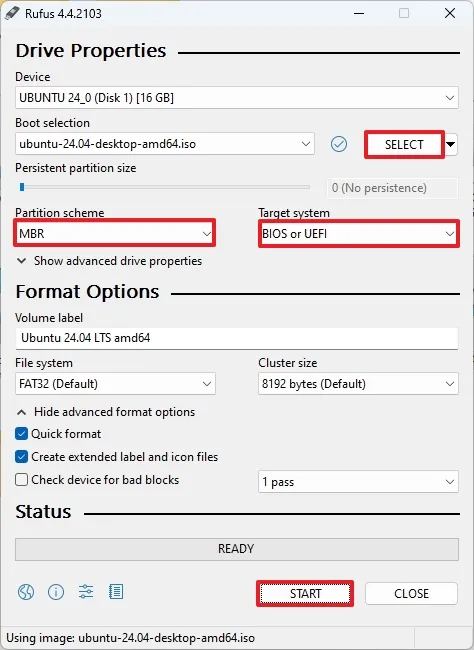
On Home windows, the best strategy to create a USB bootable drive with Linux recordsdata that may boot on BIOS or UEFI is by utilizing the Rufus instrument.
To create a bootable Linux USB media, use these steps:
-
Click on the Obtain possibility for the most recent model.
-
Save the file onto your laptop.
-
Double-click the .exe file to launch the instrument.
-
On “Gadget,” use the drop-down menu and choose the USB flash drive.
-
Click on the Choose button.
-
Select the Linux ISO file (on this case, Ubuntu).
-
Click on the Open button.
-
Select the MBR possibility within the “Partition scheme” setting.
-
Select the BIOS or UEFI possibility within the “Goal system” setting.
-
On “File System,” choose FAT32.
-
(Optionally available) Affirm a reputation for the drive within the “Quantity label” setting.
-
Select the FAT32 possibility within the “File system” setting.
-
Proceed with the default settings as they’re.
-
Click on the Begin button.
-
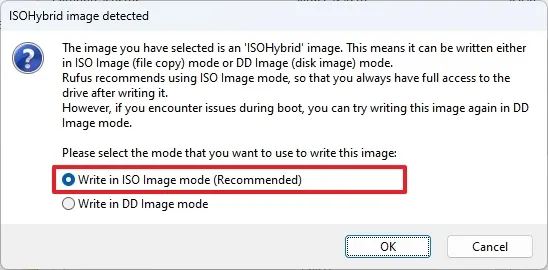
Select the “Write in ISO picture mode” possibility (if relevant).
-
Click on the OK button.
-
Click on the Sure button (if relevant).
-
Click on the OK button.
After finishing the steps, you may proceed with the steps under to create a dual-boot system with Ubuntu and Home windows 11.
Alternatively, you should use the Ventoy utility to make any set up media bootable by dragging and dropping the ISO file right into a USB drive.
Twin-boot Home windows and Ubuntu
After you have shrunk the Home windows setup partition and created the Linux bootable drive, you may proceed with the dual-boot setup.
To dual-boot Home windows and Linux, use these steps:
-
Restart your laptop with a Linux USB bootable media.
Fast Tip: In case your laptop just isn’t beginning into the Ubuntu (Fedora, Kali, or Mint) setup, chances are you’ll must entry the system BIOS to vary the boot settings to begin from USB. Sometimes, you may change these settings by urgent one of many capabilities (for instance, F2, F8, F12), Delete, or ESC key. Nevertheless, verify your laptop producer’s help web site for extra particulars. -
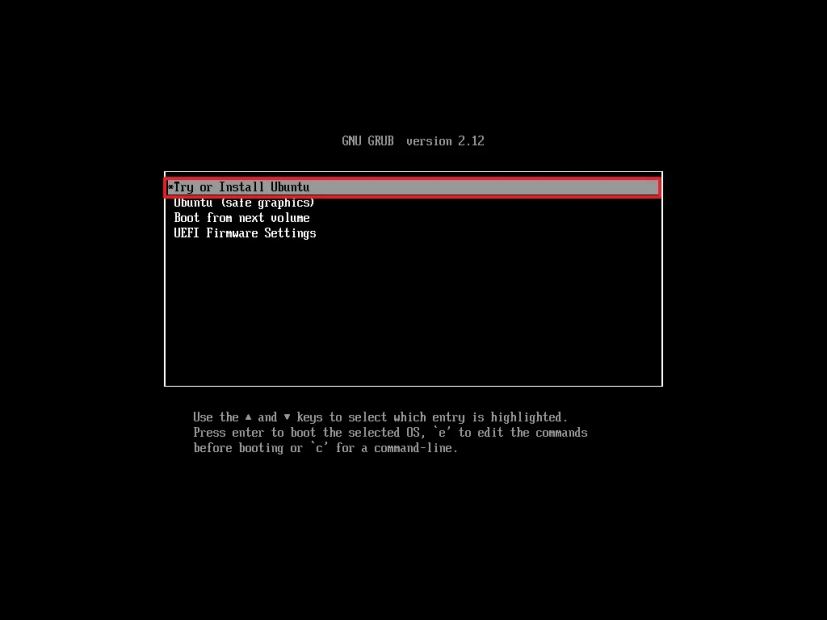
Choose the “Attempt or Set up Ubuntu” possibility and press Enter to proceed.
-
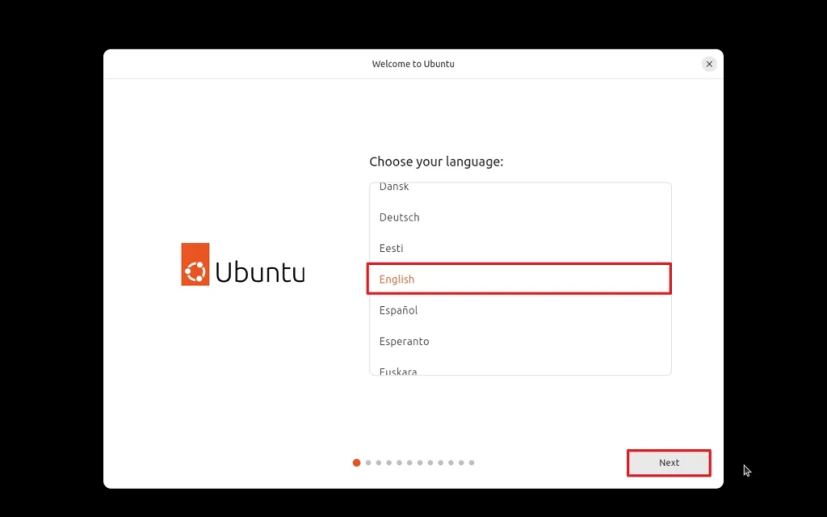
Select your language.
-
Click on the Proceed button.
-
Proceed choosing your accessibility preferences.
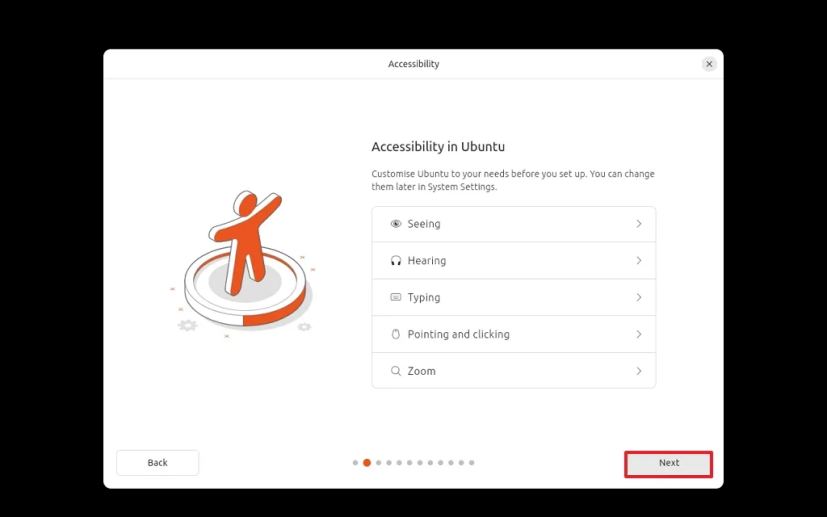 Fast notice: You may configure visible, listening to, typing, and enter settings.
 -
Click on the Subsequent button.
-
Select your keyboard structure.

-
Click on the Subsequent button.
-
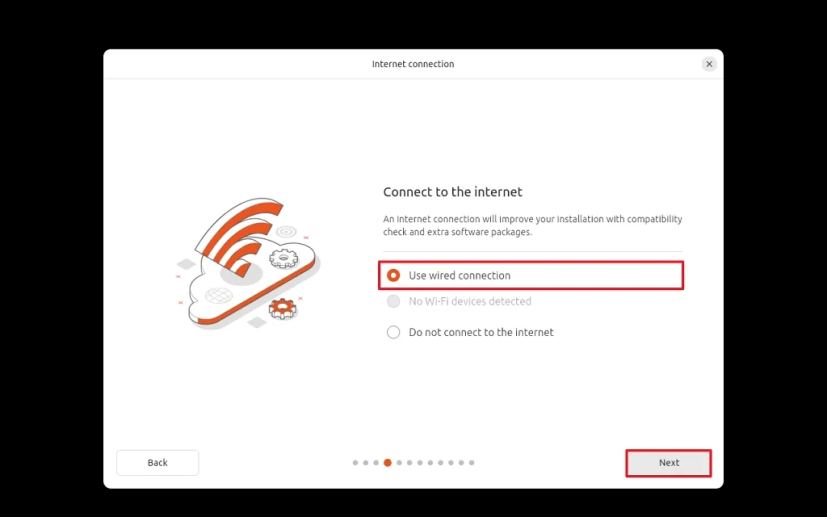
Choose your community connection.
-
Click on the Subsequent button.
-
Choose the Set up Ubuntu possibility.
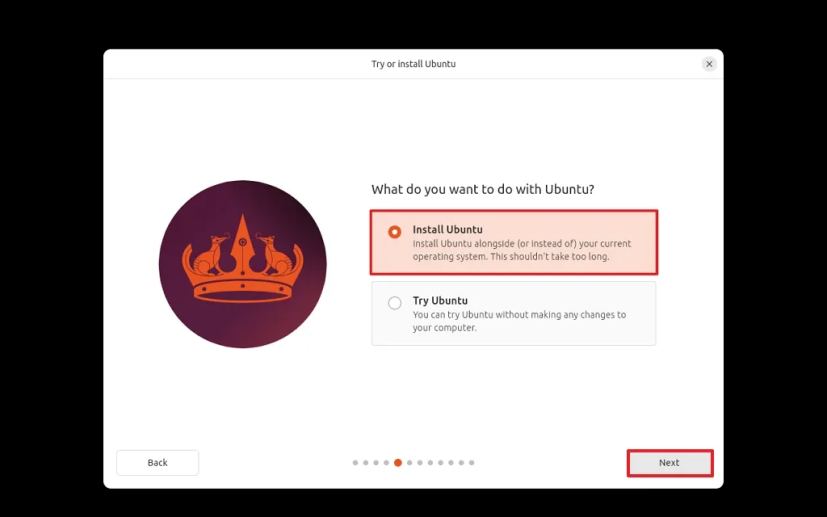
-
Click on the Subsequent button.
-
Select the Interactive set up.
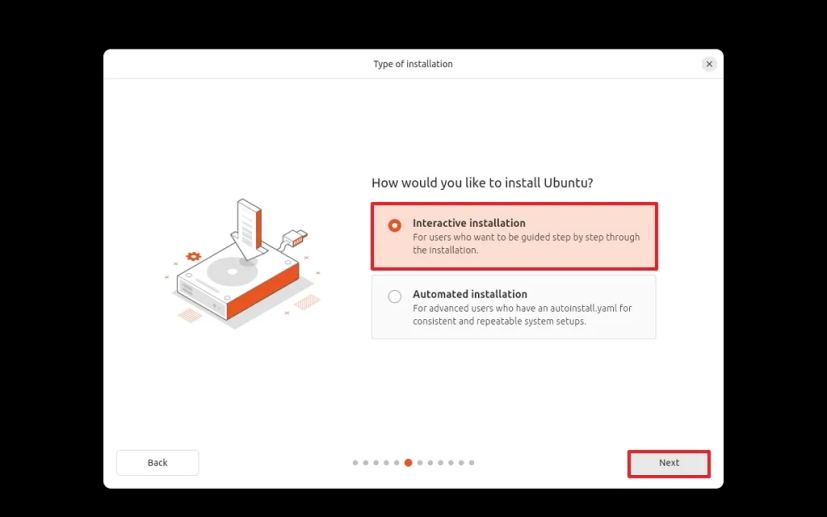
-
Click on the Subsequent button.
-
Select the Default choice possibility.
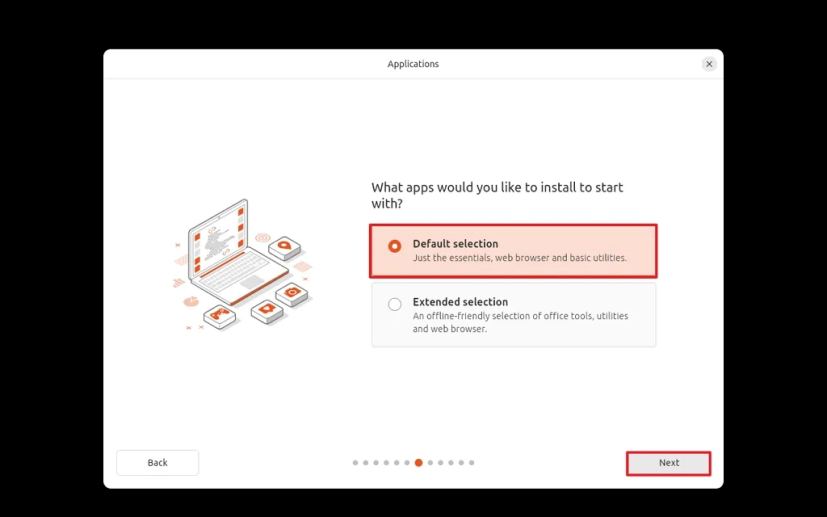 Fast tip: The “Default choice” possibility units up a leaner set up of the working system with solely the important utilities. You may then use the App Heart app so as to add extra apps. The “Prolonged choice” provides extra instruments which are sometimes helpful for offline conditions.
 -
Test the “Set up third-party software program for graphics and Wi-Fi {hardware}” possibility.
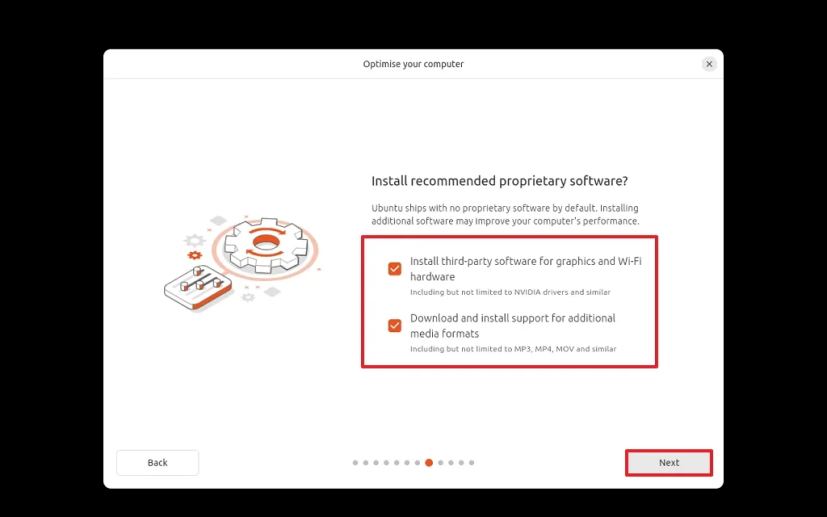
-
Test the “Obtain and set up help for added media codecs” possibility.
-
Click on the Subsequent button.
-
Select the “Set up Ubuntu alongside Home windows Boot Supervisor” possibility.
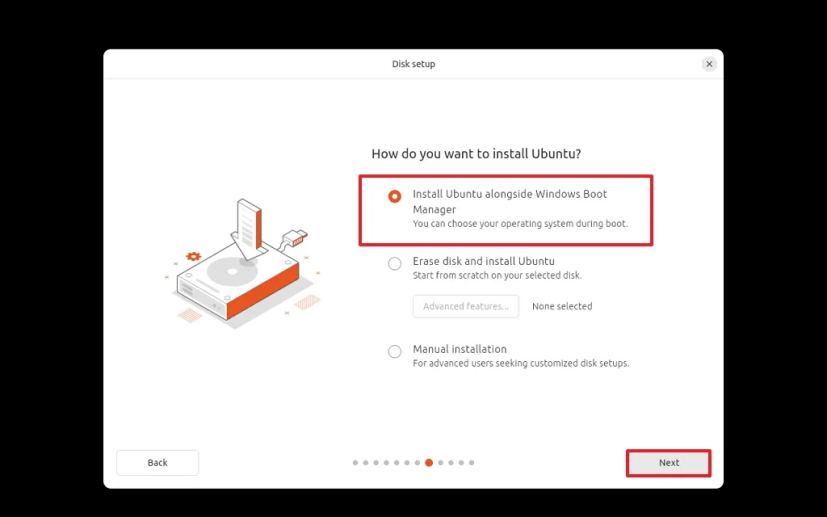
-
Click on the Subsequent button.
-
Create an area Linux account.
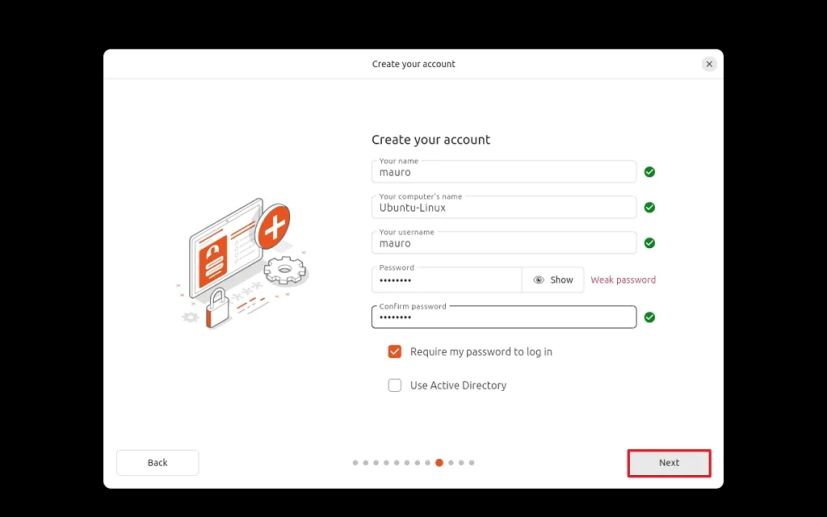 Fast notice: On this part, don’t attempt to use the “root” username and select the title on your laptop.
 -
Click on the Subsequent button.
-
Change your timezone (if relevant).
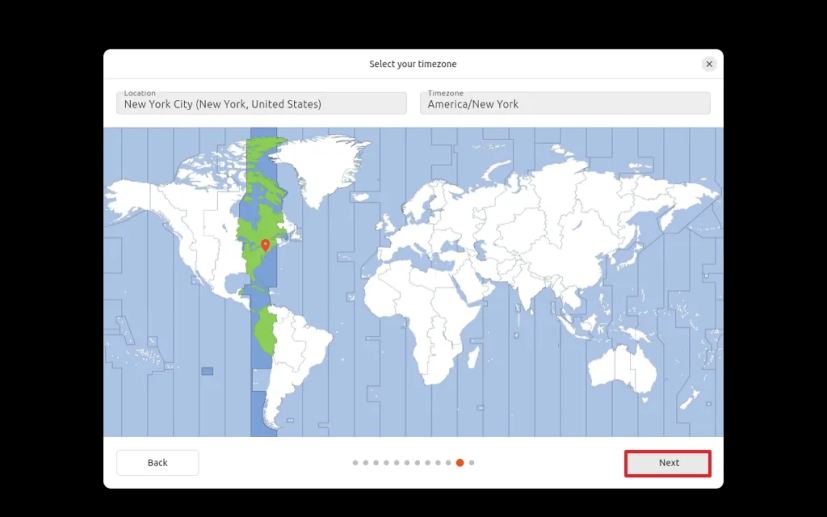
-
Click on the Subsequent button.
-
Click on the Set up button.
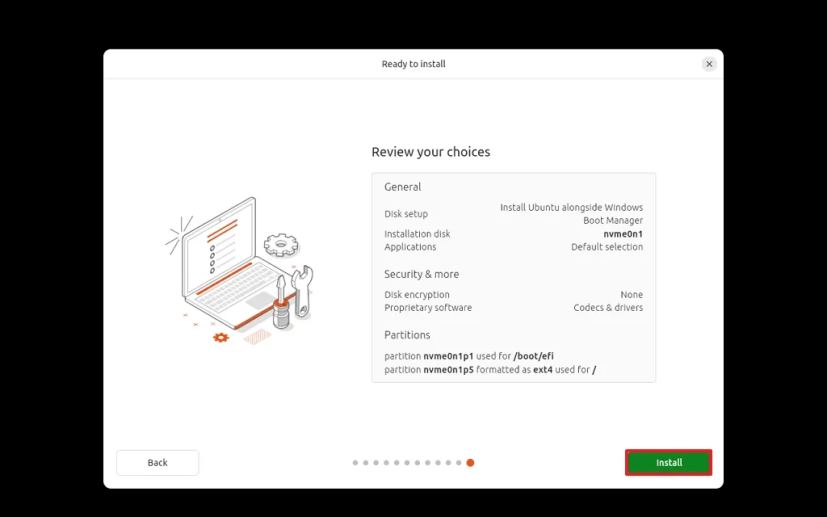
-
Click on the Restart now button.
When you full the steps, Linux will set up in your gadget alongside Home windows 11 (or 10).
When you plan to check this setup with VMware Workstation, take into account that Ubuntu 24.04 just isn’t formally supported, and chances are you’ll encounter points. As an illustration, I encountered graphics and networking issues whereas scripting this information. If that is your case, you might be able to mitigate the graphics points by disabling the 3D graphics and the auto-adjust interface options. If the issue is the community, you will need to set up the drivers manually.
Replace Might 6, 2024: This information has been up to date to make sure accuracy and mirror adjustments to the method.