You possibly can set up ChromeOS Flex on unsupported Home windows 11 {hardware}, and on this information, I’ll present you the right way to full this setup. ChromeOS Flex is a light-weight working system variant of the ChromeOS from Google. The most important distinction between the 2 variations is that ChromeOS is the system that comes preinstalled on Chromebooks, whereas ChromeOS Flex is similar working system, however it’s the model that anybody can obtain to put in on nearly any Home windows, Mac, or Linux laptop.
Though you may set up this working system on any machine, it primarily makes a nice various for unsupported Home windows 11 computer systems), so as a substitute of manufacturing e-waste, you can provide incompatible Home windows units a second life with a contemporary working system.
What’s ChromeOS Flex
Google’s ChromeOS Flex is predicated on Linux, which makes use of internet apps and the Chrome browser as the primary interface. The working system additionally provides you safety safety from threats corresponding to malware and ransomware, and also you get a quick and trendy work setting with background updates that scale back downtime whereas boosting productiveness.
ChromeOS Flex {hardware} necessities
Google solely helps particular units, however you may nonetheless set up the working system on nearly any {hardware} so long as it meets the minimal necessities:
- Processor: Intel or AMD x86-64-bit.
- Reminiscence: 4GB.
- Storage: 16GB.
The necessities to run ChromeOS Flex are minimal, however the firm notes that processors and graphics made earlier than 2010 might lead to a poor person expertise.
On this information, I’ll train you the steps to put in ChromeOS Flex on an outdated Home windows-based laptop.
Set up ChromeOS Flex on Home windows 11 unsupported {hardware}
The set up of ChromeOS Flex is a two-step course of. First, you need to create a USB bootable media after which undergo the setup expertise.
1. Create ChromeOS Flex USB flash media
To create a ChromeOS Flex set up media, join a USB flash drive of 8GB and use these steps:
-
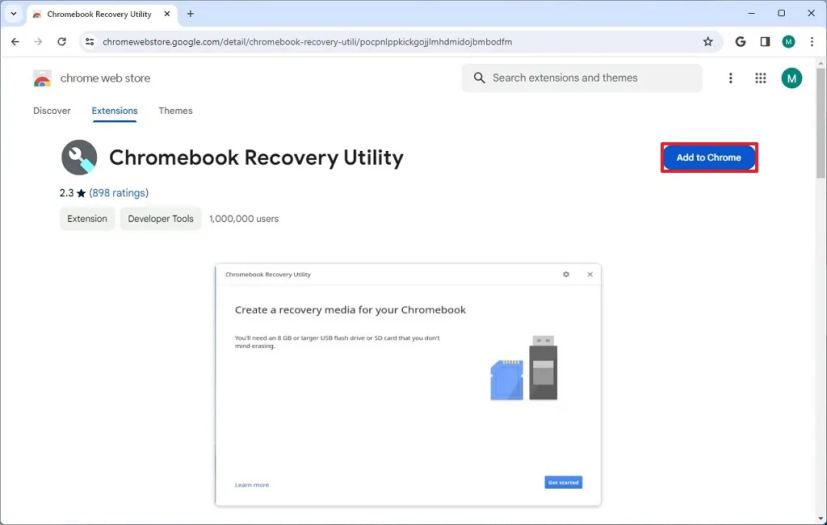
Open Chromebook Recovery Utility page on Chrome.
@media solely display and (min-width: 0px) and (min-height: 0px) {
div[id^=”bsa-zone_1659356505923-0_123456″] {
min-width: 336px;
min-height: 280px;
}
}
@media solely display and (min-width: 640px) and (min-height: 0px) {
div[id^=”bsa-zone_1659356505923-0_123456″] {
min-width: 728px;
min-height: 280px;
}
} -
Click on the Add to Chrome button.
-
Click on the Add extension button.
-
Click on the Extension button and choose the Chromebook Restoration Utility extension.
-
Click on the Get began button.
-
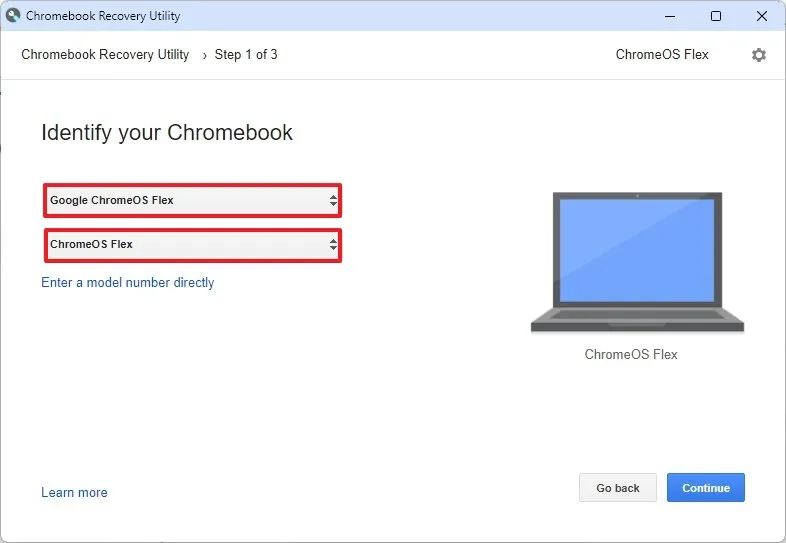
Choose the “Google ChromeOS Flex” choice from the “Establish your Chromebook” web page.
-
Choose the ChromeOS Flex choice.
-
Click on the Proceed button.
-
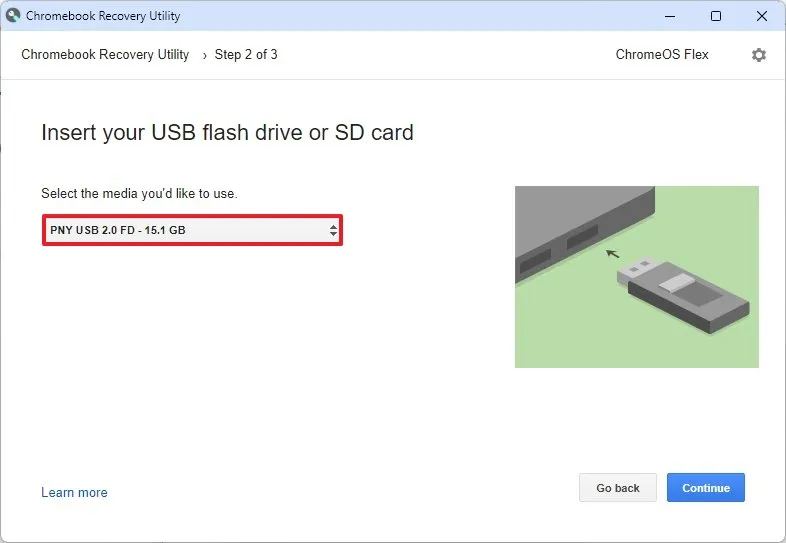
Choose the USB flash media from the record.
-
Click on the Proceed button.
-
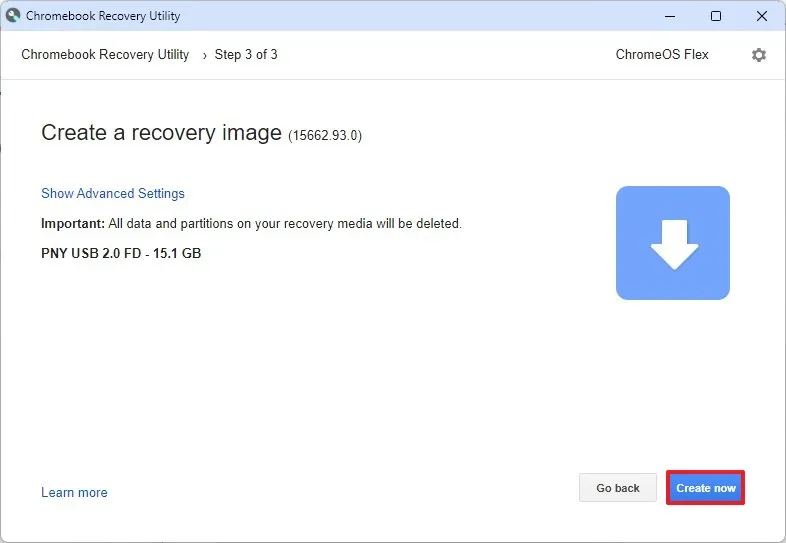
Click on the Create now button.
-
Click on the Achieved button.
When you full the steps, you may proceed with the clear set up of ChromeOS Flex.
2. Set up ChromeOS Flex
To put in ChromeOS Flex on an unsupported Home windows 11 {hardware}, use these steps:
-
Begin unsupported Home windows 11 PC with the ChromeOS Flex USB.
Fast observe: If the pc can’t boot from USB, you might must replace the BIOS/UEFI settings. This course of normally requires urgent one of many operate keys (F1, F2, F3, F10, or F12), the ESC, or the Delete key. For extra correct directions, go to your PC producer’s assist web site. -
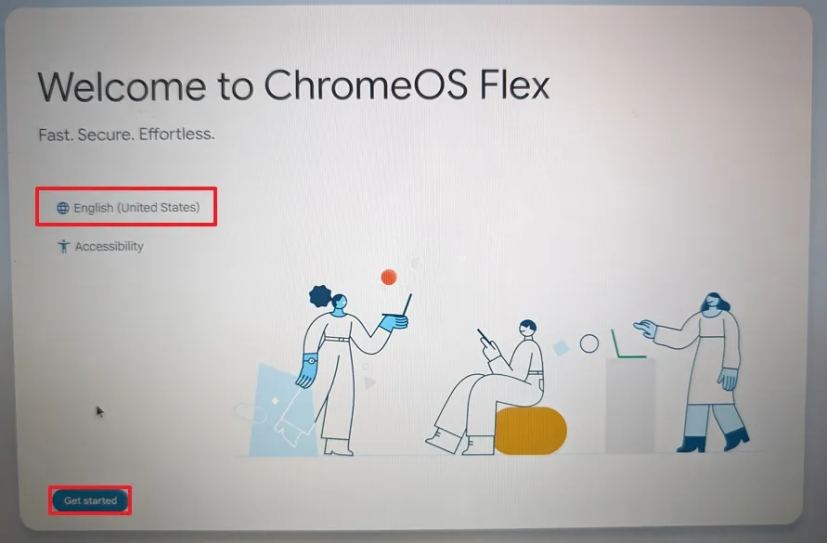
Change the set up language (if relevant).
-
Click on the Get Began button.
-
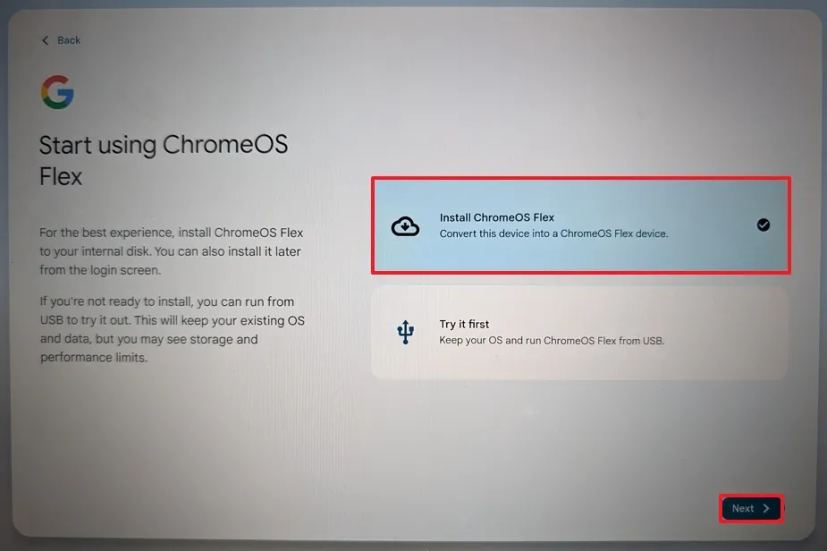
Choose the “Set up ChromeOS Flex” choice.
 Fast observe: The “Attempt it first” choice lets you run the working system from the USB flash drive. It even saves the setup and profile, so the following time you begin the pc from USB, you may proceed utilizing the working system. If afterward you wish to set up the working system, on the sign-in display, you can see the “Set up ChromeOS Flex” choice.
 -
Click on the Subsequent button.
-
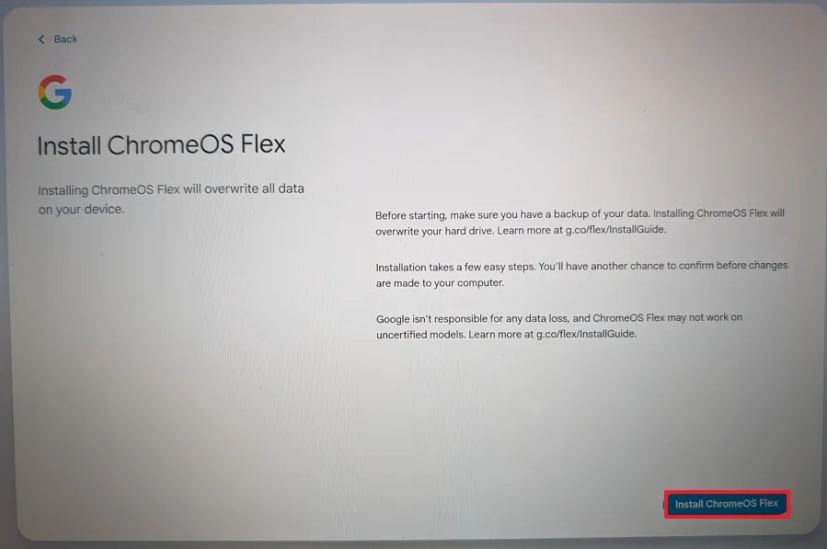
Click on the “Set up ChromeOS Flex” button. (This course of will delete every part on the pc.)
-
Click on the Set up button to proceed with the setup.
-
Click on the Get began button after the set up.
-
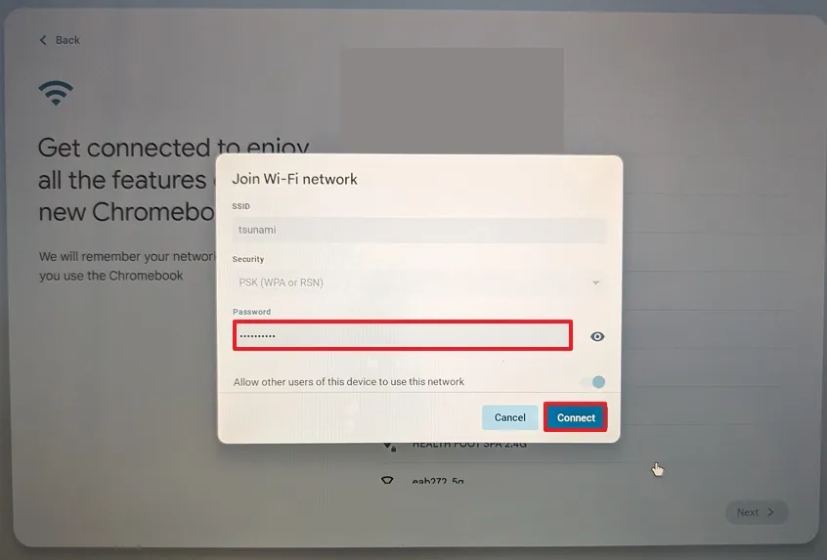
Select the wi-fi community.
-
Verify the Wi-Fi password.
-
Click on the Join button.
-
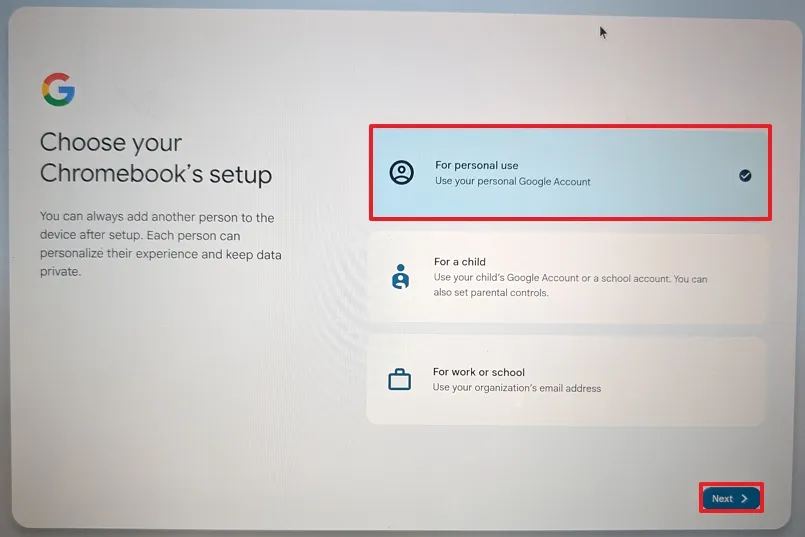
Click on the “For private use” choice.
 Fast observe: At this level, the system will obtain any accessible updates for the working system. The pc can even restart. You possibly can all the time click on the “Skip and remind me later” button.
 -
Click on the Subsequent button.
-
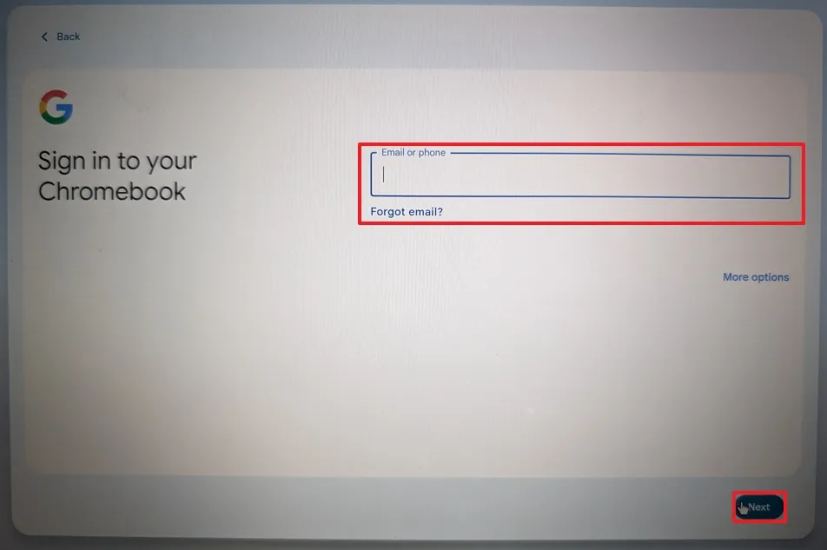
Verify your Gmail account.
-
Click on the Subsequent button.
-
Verify the account password.
-
Click on the Subsequent button.
-
Full the account verification.
-
Click on the Subsequent button.
-
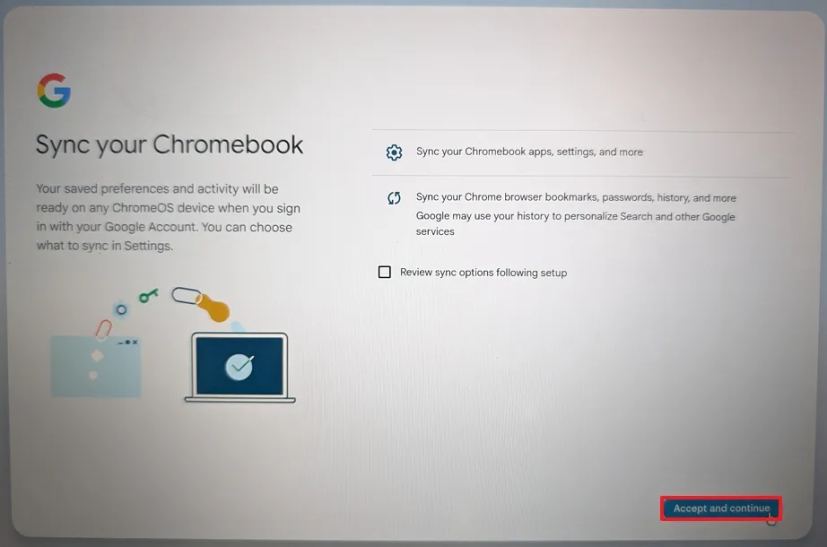
Click on the “Settle for and proceed” button.
-
Click on the “Settle for and proceed” button once more.
-
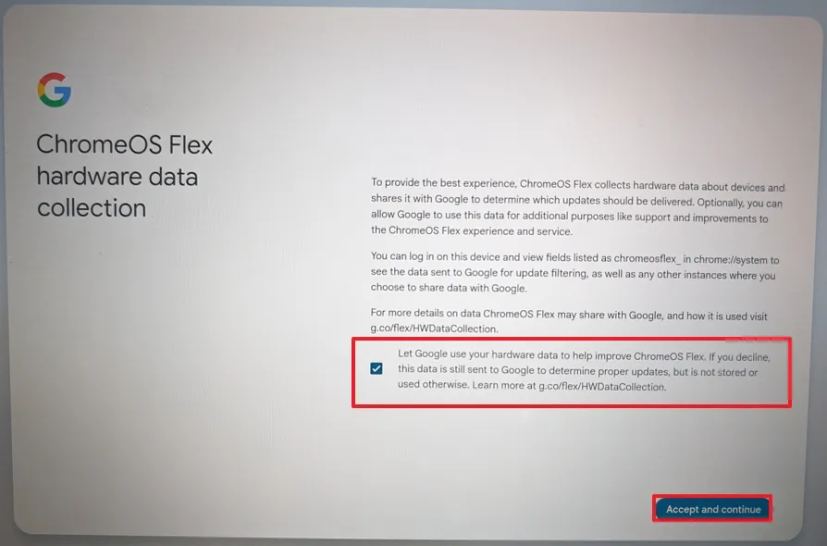
Clear the choice to permit Google to gather details about your machine.
-
Click on the “Settle for and proceed” button yet another time.
-
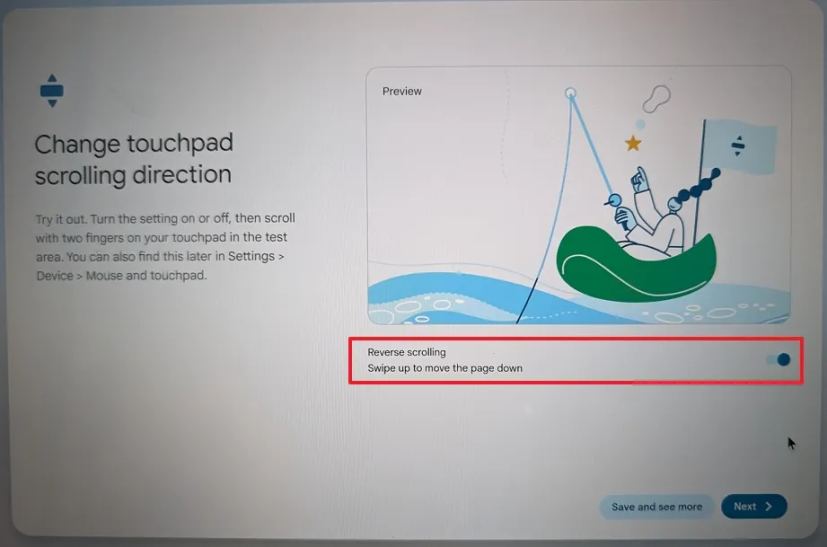
Click on the “Change touchpad scrolling route” choice.
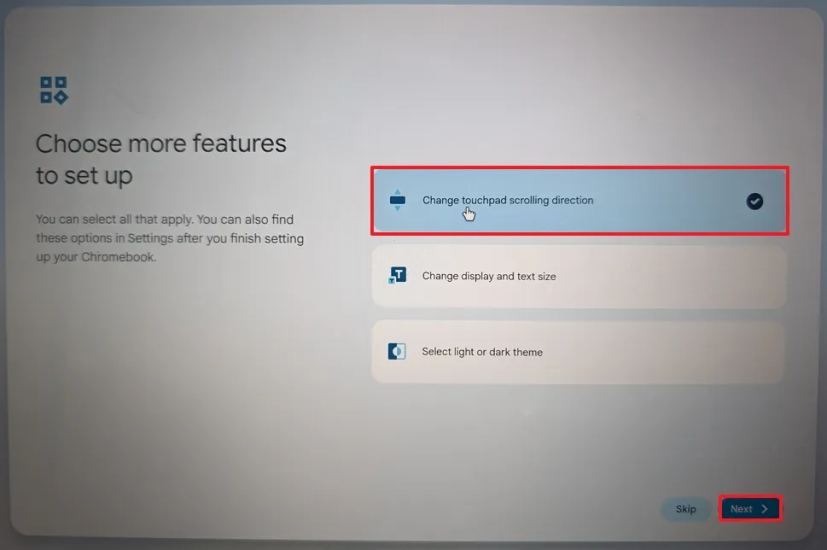 Fast observe: Should you’re coming from a Home windows setting, it’s really useful that you simply regulate the scrolling setting.
 -
Click on the Subsequent button.
-
Activate the Reverse scrolling toggle change.
-
Click on the Subsequent button.
-
Click on the Get began button.
After you full the steps, the working system might be put in on the pc.
In case you are prepared for Home windows once more, you should utilize these steps to reinstall Home windows 11 or Home windows 10.
Replace February 20, 2024: This information has been up to date to make sure accuracy and mirror the adjustments to course of.