4 other ways that can allow you to uninstall or take away the Printer driver on Home windows 11 – Settings, CMD, PowerShell, and Print Administration.
With the most recent developments in know-how, gadget capabilities, and the doorway of Cloud-based knowledge, now you can print paperwork with ease from anyplace. For instance – you could now even join your smartphone to any PC and get the printing job executed efficiently.
Many customers have a behavior of including new printers to their computer systems after which neglect about it. With an increasing number of printing units connected to your PC, you’ll discover a rise within the general system useful resource consumption.
Because of this, your laptop will begin operating slowly or performing very poorly. To keep away from your machine changing into inefficient then, you will need to take away the entire not too long ago added Printers on the pc.
Methods to Take away a Printer Driver on Home windows 11
To take away a printer and driver out of your laptop is a two-step course of.
1. By way of Settings
That is the simplest of all 4 strategies that I’m going to clarify beneath. Right here’s an entire guideline on the best way to take away a printer driver by way of Native Settings –
- Press WinKey + I to launch the Settings app.
- Choose Bluetooth & Units and soar to the suitable aspect.
- Find and click on upon the part – Printers & Scanners.
- A listing of added printers will seem on the next web page.
- Click on over the Printer that you just now not require on Home windows 11, and hit the Take away button.
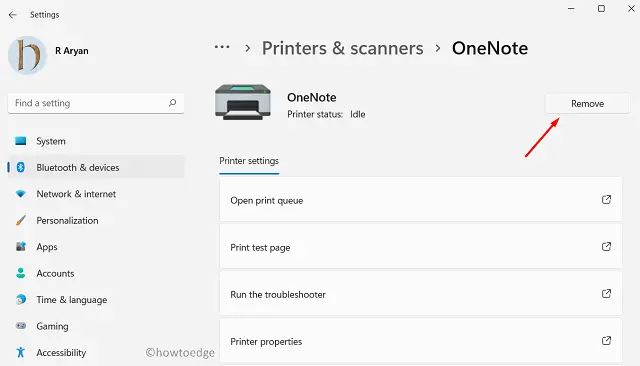
- In case any immediate seems asking if you wish to proceed with this setting, hit Sure.
- The printer driver will uninstall routinely.
Restart your PC subsequent to make the adjustments efficient from the subsequent login.
2. Take away the Printer Driver by way of Print Administration
Print Administration is one other useful gizmo that you should utilize to take away any printer driver in your laptop. Right here’s how this course of goes –
- Launch the Search window by urgent Win + S.
- Sort “Print Administration” on the search bar, and double-click on the highest end result.
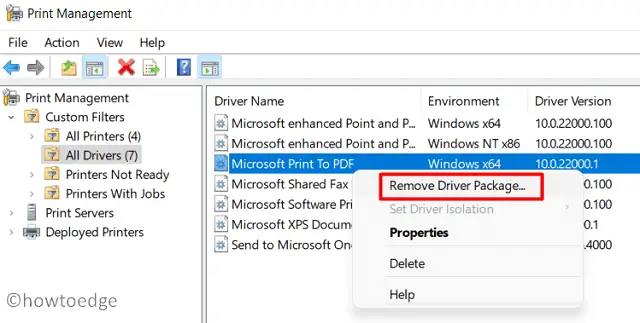
- Broaden the Customized Filters and hit All Drivers.
- A listing of printer drivers will seem on the middle web page.
- Proper-click on the driving force that you just wish to take away, and hit – Take away Driver Bundle.
- A immediate might seem if you wish to proceed with the driving force deletion, hit Sure.
The chosen driver will uninstall instantly afterward. In case you wish to take away any extra printer, re-follow the above steps, and delete that.
3. Uninstall a printer driver by means of Command Immediate
Chances are you’ll uninstall a printer driver by operating a number of codes on the Command Immediate as properly. To know the way it’s executed by way of CMD, use these steps –
- Launch Command Immediate as an administrator.
- When the person account management window seems, faucet Sure.
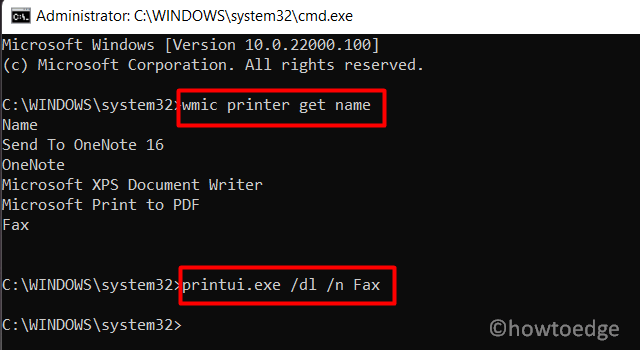
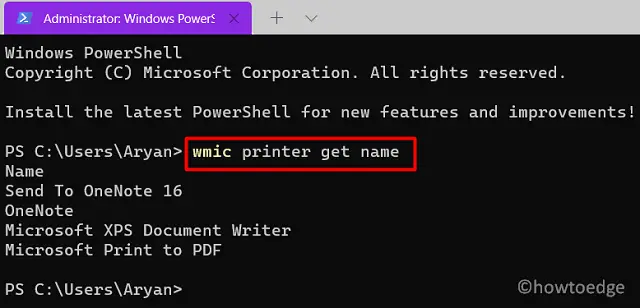
- On the elevated console, kind the next, and press Enter –
wmic printer get title- After that, kind the beneath command and hit the Enter key once more –
printui.exe /dl /n "YOUR-PRINTER-NAME"Notice: Within the above command line, guarantee changing YOUR-PRINTER-NAME with the precise title of your printer.
- The chosen printer shall be eliminated quickly afterward. Don’t neglect to restart your PC after this.
4. Utilizing PowerShell Instructions
In case you like PowerShell as a substitute of operating codes on Command Immediate, do the next –
- Press Win + X, and select – Home windows PowerShell (Admin).
- Click on on the Sure button if UAC prompts on the show display screen.
- When the blue console opens up, kind the beneath cmdlet adopted by the Enter key.
Get-Printer | Format-Checklist Title
- Now, that you just get to know all printing drivers in your machine, run this code subsequent –
Take away-Printer -Title "YOUR-PRINTER-NAME"
- Exchange “Your-Printer-Title” along with your precise print driver’s title, and hit Enter.
- Restart your machine to delete any residual or leftover information.
Learn Subsequent: Take away or uninstall a printer driver on Home windows 10
That will be all!