On this information, we are going to talk about what causes error code 0x80070659, when it happens, and what are the doable methods to repair it on Home windows 11/10.
That is mainly an update-related subject and comes into existence solely while you attempt to set up any pending updates in your pc. The replace might be of something like – Safety/Non-security patches, .NET frameworks, and even Optionally available updates.
What might trigger Error Code 0x80070659 in Home windows?
Error code 0x80070659 usually occurs when your system meets a number of of the next situations –
- Community glitches
- Corrupted replace parts
- Collected big cache or short-term information
- Buggy software program working in your system
Word: If this error had began after putting in a particular program in your pc, be certain that to uninstall that app, and see should you can replace your PC now.
The best way to Repair Replace Error Code 0x80070659
If you’re getting an error code 0x80070659 whereas updating your Home windows OS, comply with these options in the identical order as introduced beneath –
1] Run Home windows Replace once more
An replace error might happen from nowhere and doesn’t essentially imply it’s a must to discover and repair the explanations behind it. This may need occurred attributable to some community glitches or important companies not working at the moment. So, earlier than you go and apply the options, restart your PC for as soon as.
When your system reloads, verify should you can obtain/set up updates now –
- Home windows 10: Settings (Win+I) > Replace & Safety > Home windows Replace
- Home windows 11: Settings (Win+I) > Home windows Replace
After reaching the above path in your respective model of Home windows, hit Verify for updates.
Repair: Verify For Updates doesn’t work in Home windows 10
2] Troubleshoot Home windows Replace
Home windows Replace troubleshooter is the best instrument while you come throughout any error whereas updating your system. This instrument was all the time there, nevertheless, its capabilities have vastly elevated with the onset of Home windows 10. You will see this very helpful on Home windows 11 as effectively. Right here’s how you can carry out this job –
Word: This part elaborates on how you can troubleshoot Home windows Replace on Home windows 11. Learn to get it executed on Home windows 10 PC.
- To begin with, press Home windows + I.
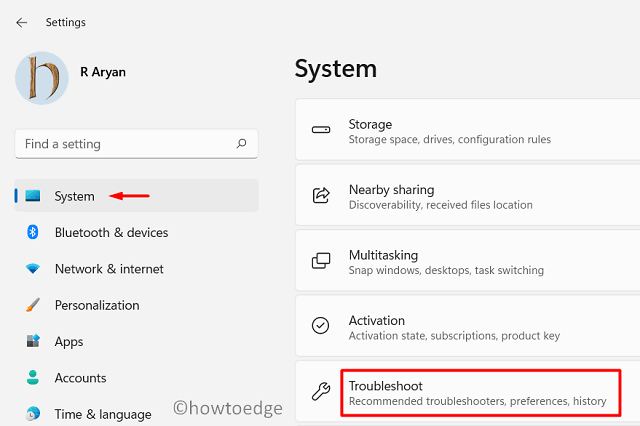
- Choose System on the left pane.
- Transfer to the adjoining proper, scroll down, and hit Troubleshoot.
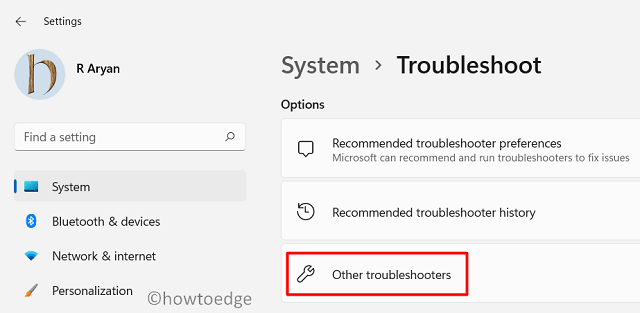
- Three choices will seem subsequent; select Different troubleshooters.
- You might now see a Run button beside Home windows Replace. That is accessible underneath the “Most frequent” part.
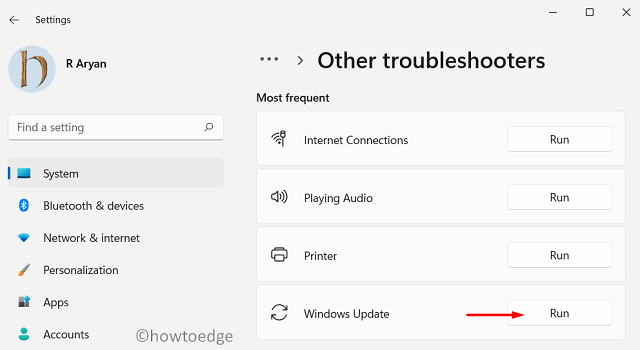
- Properly, click on over it as soon as and comply with the directions that seem subsequent to this.
Restart the PC when the troubleshooting completes and verify if this solves the problem that you just have been coping with.
3] Delete Momentary Information
System-generated information or app cache carry on rising with every passing day on Home windows 11/10. Over a time period, these information begin attracting undesirable bugs or points in your system.
As these information are short-term in nature and don’t have an effect on the core functioning of Home windows or its apps, you need to delete them manually. Disk Cleanup is an in-built instrument that you should utilize to eliminate unnecessarily saved cache, improve information, earlier set up(s), and many others.
These days, you may as well allow Storage Sense in your working system. Turning this setting ON will robotically search for information that it will possibly delete when the disk house is low.
How do I clear Home windows 11 Cache – Delete Momentary Information
4] Reset Replace Parts
The prime supply of any update-related errors on a tool is none apart from the corrupted replace parts. So, if the above options don’t work in your case, reset the replace parts and verify if this helps.
The resetting course of consists of primarily three issues and they’re –
- Stopping update-related companies
- Clearing replace cache folders – Catroot2, SoftwareDistribution
- Restarting all of the companies that you’ve got stopped earlier
Let’s see how you can reset replace parts by way of Command Immediate –
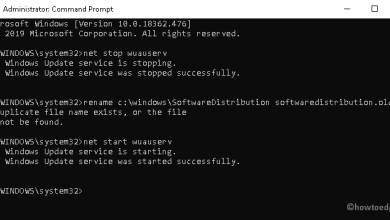
- To begin with, open CMD as an administrator.
- On the elevated console, run this code a number of occasions –
taskkill /f /fi "SERVICES eq wuauserv"
- Now that you’ve got ended all of the duties or processes in your PC, run these instructions one after one other.
web cease cryptSvc
web cease bits
web cease msiserver
- After stopping the important companies, rename the Home windows Cache folder. To take action, run this code –
ren C:WindowsSoftwareDistribution SoftwareDistribution.outdated
ren C:Windowssystem32catroot2 catroot2.outdated
- Restart your PC subsequent and restart the companies that you just stopped earlier.
web begin cryptSvc
web begin bits
web begin msiserver
Verify if now you can replace your system with out entering into error code 0x80070659.
5] Use System Restore Factors
If you’re nonetheless getting the error code 0x80070659 whereas updating Home windows and have entry to a restore level, you need to revert again your working system to that time. Performing this job is tremendous straightforward; right here’s how to do that on Home windows 11 or 10 PC –
- Use System Restore Level on Home windows 11
- Use System Restore Level on Home windows 10
In case you don’t have any restore level saved in your PC, or the restoring isn’t occurring, it’s possible you’ll take into account clear putting in Home windows 11.