Video Screen Capture is an easy-to-use tool for recording videos of your screen, whether you’re creating tutorials, sharing game content, or capturing important moments. In Windows 11, you can use an app called Microsoft Clipchamp to easily capture video screens. Here’s how:
This guide will teach you the steps to start recording your computer screen in Windows 11.
How to take a video snapshot with Clipchamp
Take a video screenshot of your computer in Windows 11
To record your desktop or app screen on Windows 11, follow these steps:
- Opens to start On Windows 11.
- seek clipchamp And click on the first result to open the app.
- Sign in with your Microsoft account (if applicable).
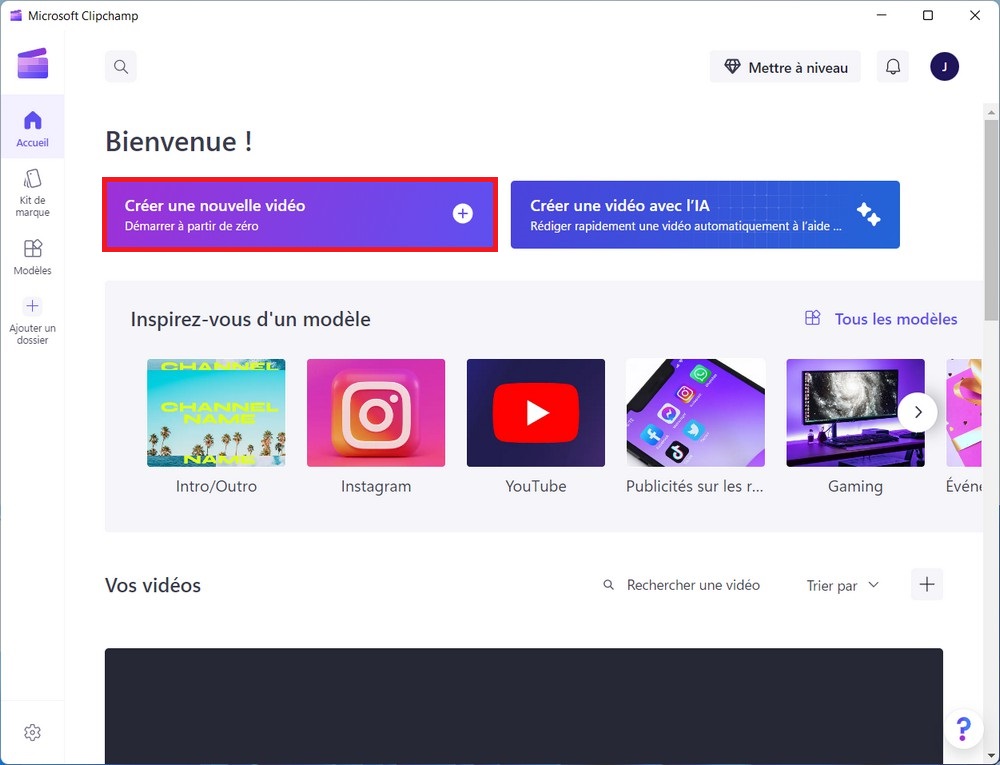
- Click the button Create a new video.
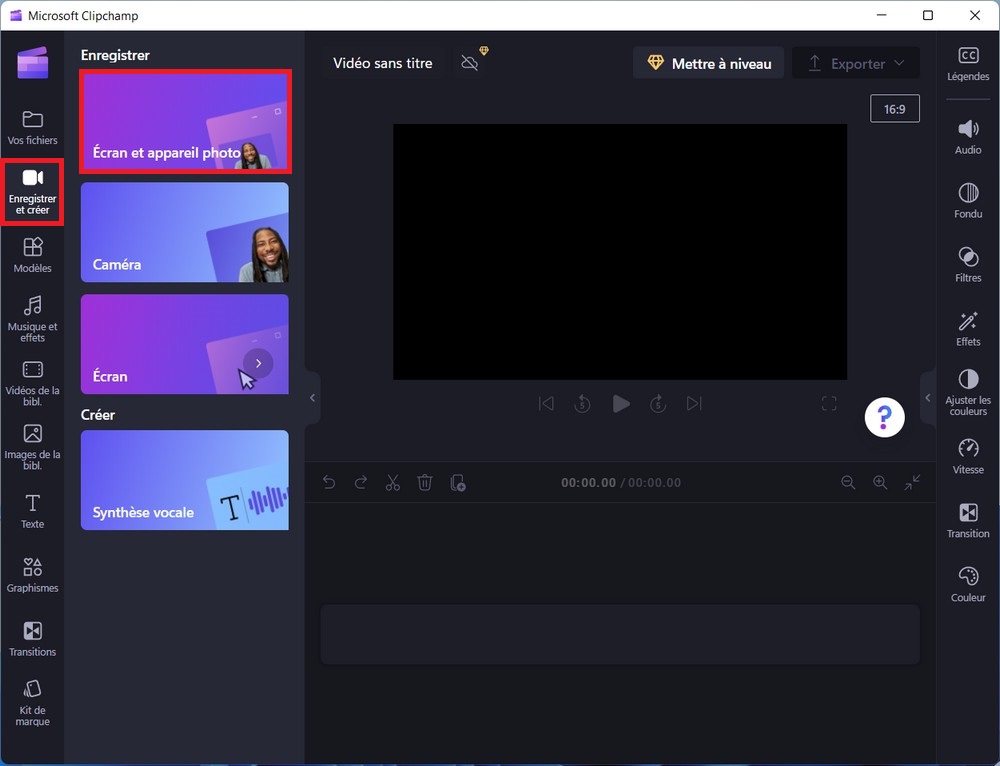
- Click on ” Save and create » in the right pane.
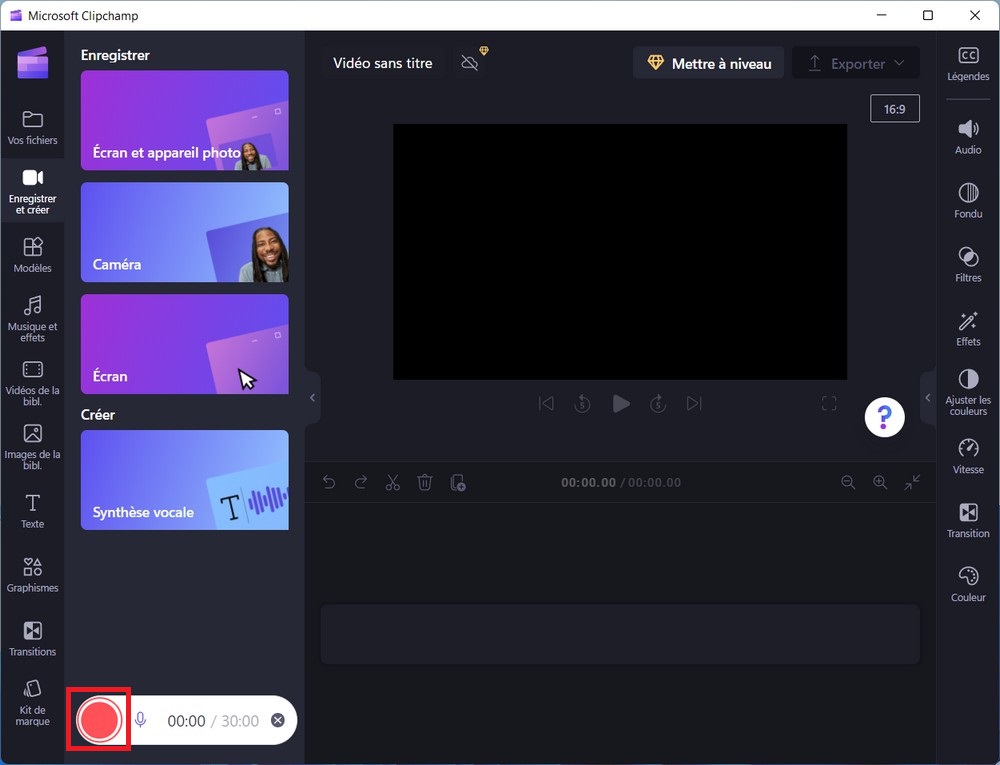
- Click on the option a screen.
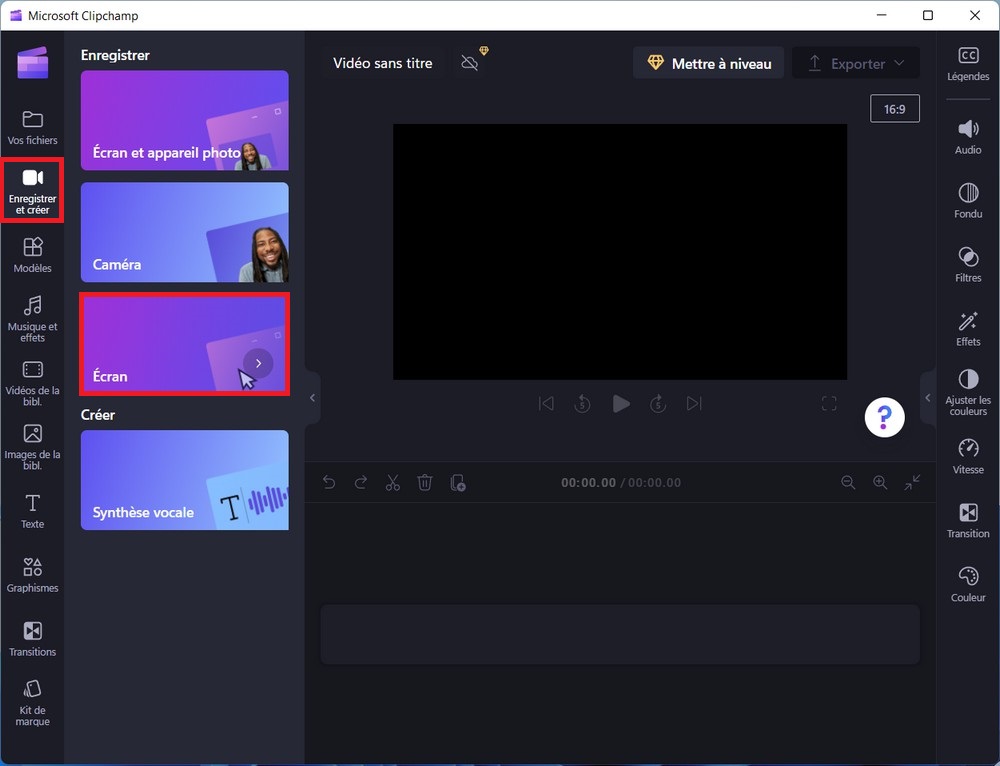
- Click the button Register.
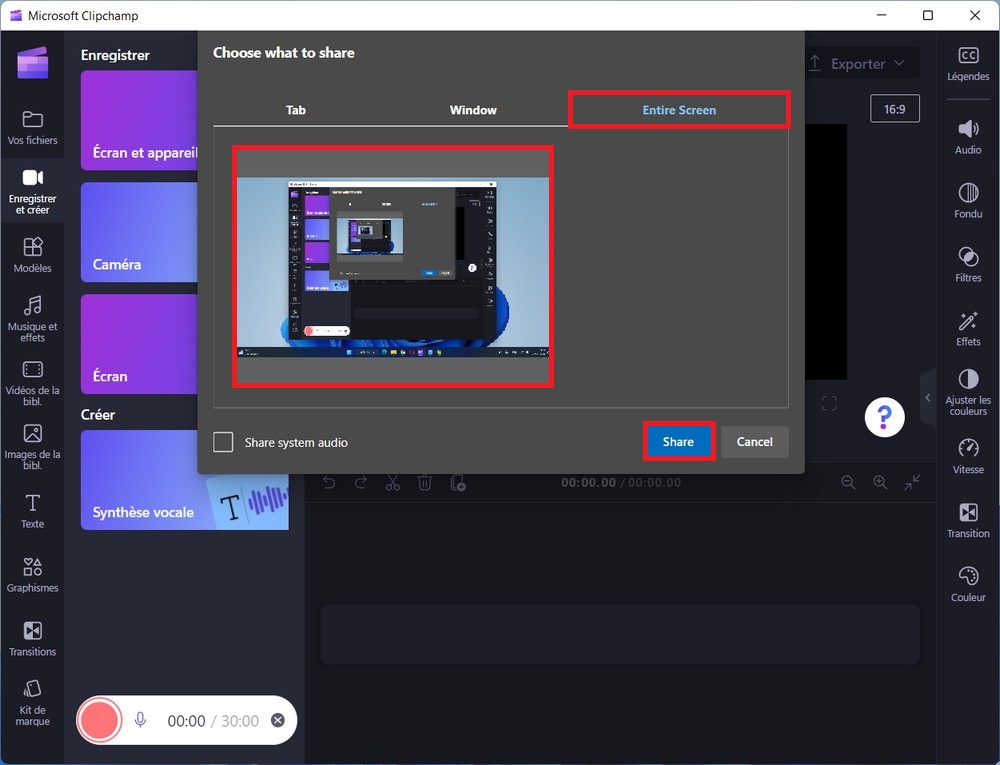
- Click on the tab “unpaid bill”And “windows” or “zoom in screen”depending on the region you want to register.
- Select the area on the screen to be recorded. For example, if you are in tab “zoom in screen”click the preview screen.
- Click the button Involved to start recording.
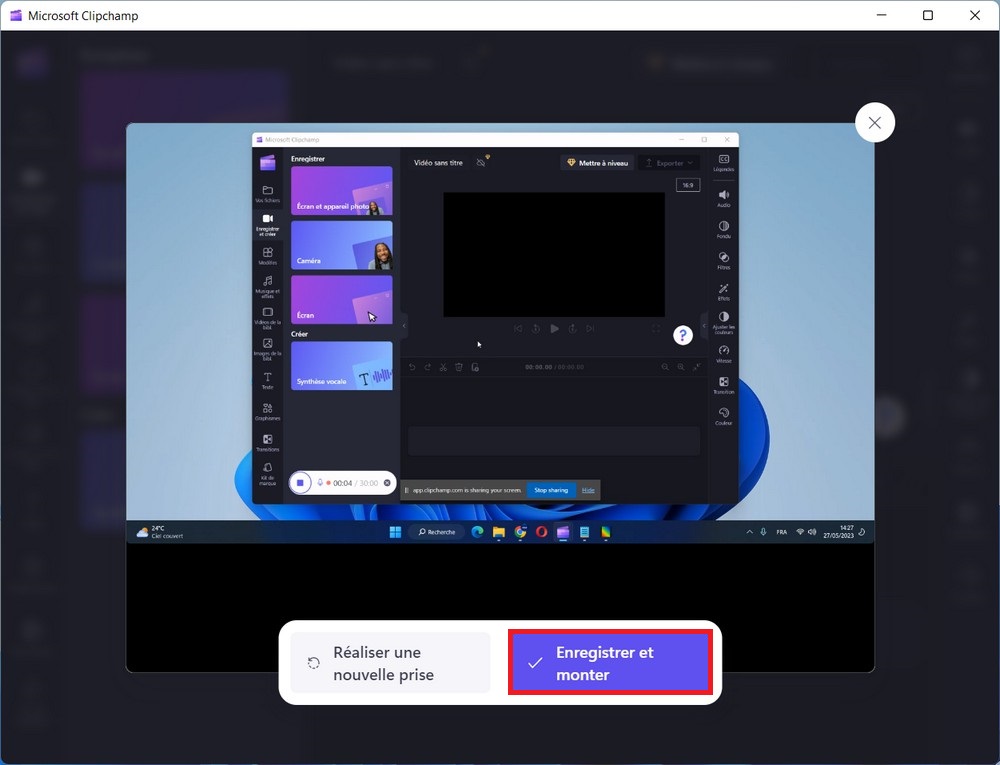
- Click the button stop sharing When you are done recording the screen.
- Click the button “record and edit”. Or click on the option Create a new snapshot to delete the recording and play it back.
- (Optional) Use the tools provided to review and edit the video.
Quick note: Clipchamp offers some basic editing features, such as the ability to clean, cut, duplicate, and split your video, and you can also add other media elements. For example, in the left navigation pane, you will find the tools to create video intros from templates. You also have stored music and videos, stored photos, transitions, and more.
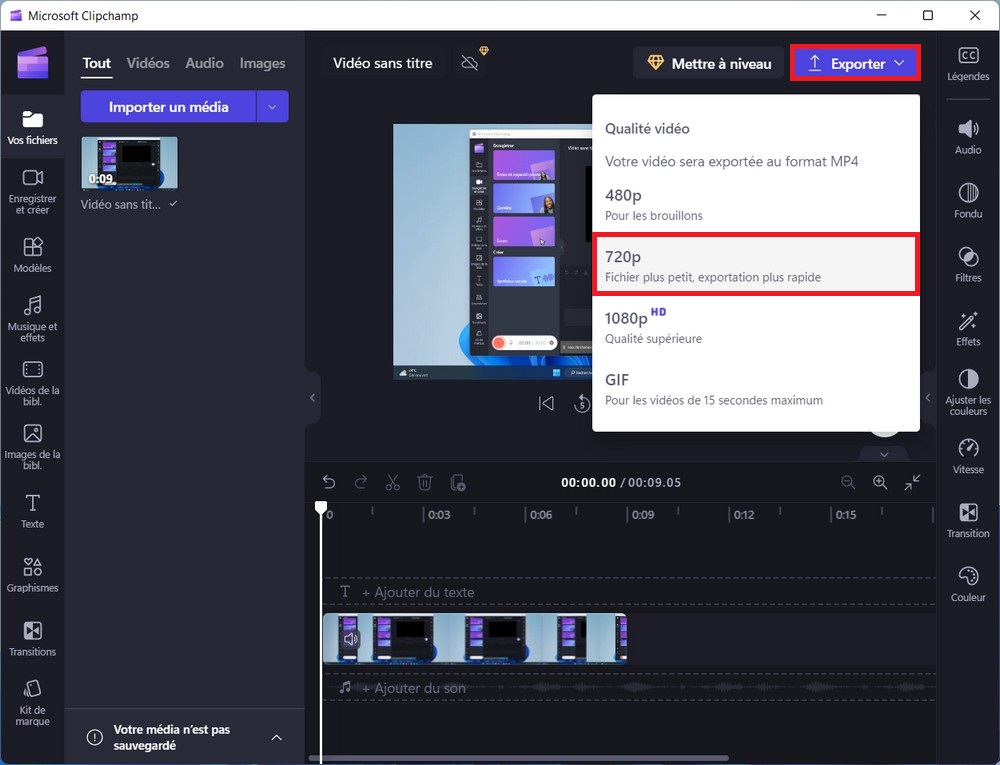
- Click the button export.
- Choose the option 720 p. If you have a Microsoft 365 subscription, you can choose the 1080p option.
After completing the steps, the screen recording will be saved on your Windows 11 PC, specifically in the Downloads folder.
Camera screen recording on Windows 11
To record your screen, including the camera, with Clipchamp, follow these steps:
- Opens to start On Windows 11.
- seek clipchamp And click on the first result to open the app.
- Sign in with your Microsoft account (if applicable).
- Click the button Create a new video.
- Click on “save and create” in the right pane.
- Click on the option Screen and camera.
- Click the button to be allowed for Clipchamp to access the camera.
- Click the button Register.
- Click on the tab “unpaid bill”And “windows” or “zoom in screen”depending on the region you want to register.
- Select the area on the screen to be recorded. For example, if you are in tab “zoom in screen”click the preview screen.
- Click the button Involved to start recording.
- Click the button stop sharing to stop recording.
- Click the button “record and edit”.
- (Optional) Use the tools provided to review and edit the video.
- Click the button export.
- Choose the option 720 p. If you have a Microsoft 365 subscription, you can choose the 1080p option.
After completing the steps, the screen recording next to the camera will be exported to the Downloads folder as a file. “.mp4”.
Clipchamp allows you to directly upload your video to popular platforms like YouTube, Vimeo, Google Drive, and Dropbox. You can also copy the share link and send it to your contacts.
Also Read: How to Record Screen on Windows 11 Using Xbox Game Bar
Video screen capture is now a snap on Windows 11 with the Clipchamp app. Just follow the above steps and you can quickly and easily create high quality video screenshots for all your needs.