When using Windows 11, there may be times when you want to change the default location where your files are saved. By default, Windows 11 saves files to specific folders such as Documents, Pictures, Music, and Videos. However, you have the option to customize this website to suit your needs. Here’s how to change the default save location on Windows 11.
Change the default save location on Windows 11
To change the default save location on Windows 11, you can follow these steps:
1. Open Settings on Windows 11.
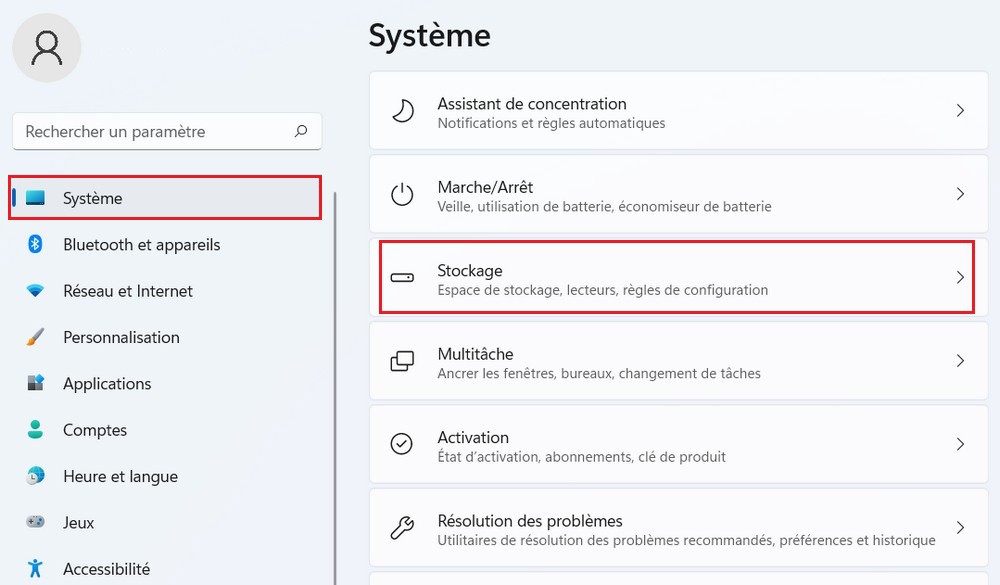
2. In the Settings window, click System.
3. Click on the tab storage.
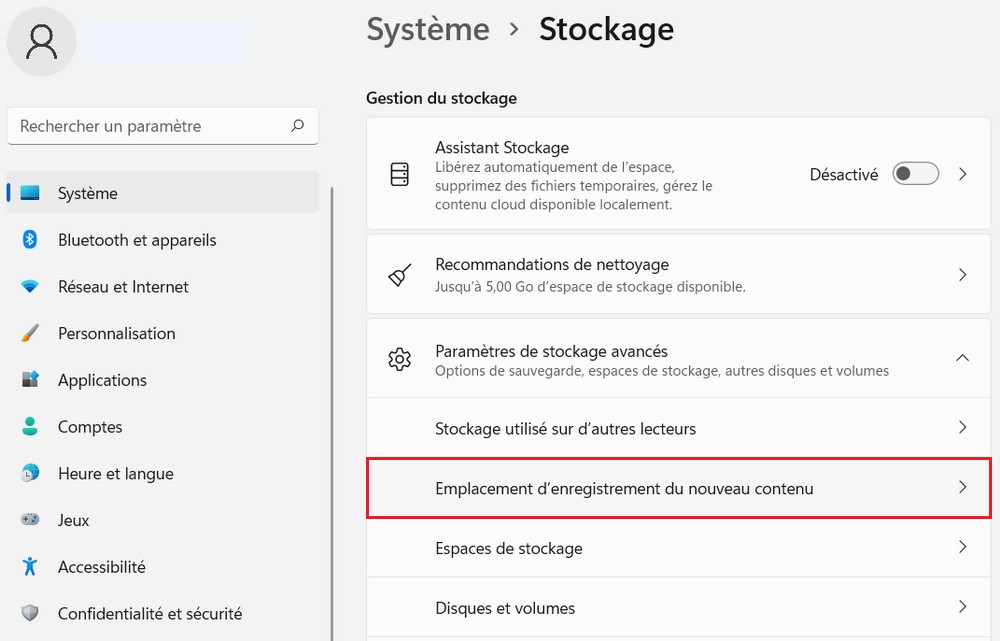
4. Select a file Advanced storage settings.
5. Click Where to save the new content.
6. Select the new location where you want to save your default files.
7. Click the button Progressing.
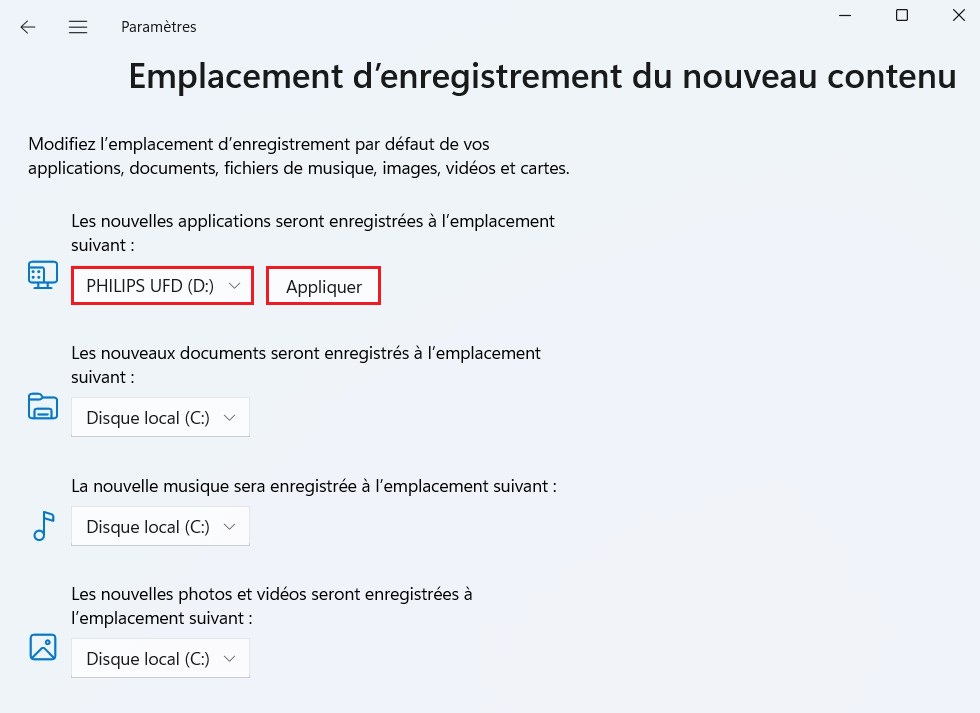
8. Repeat Steps 6 For each category whose default save location you want to change.
Once you follow these steps, all files in the selected category will be automatically saved to the new location you selected.
Also read: How to move installed programs in Windows 11
By customizing the default save location on Windows 11, you can organize your files more efficiently and avoid mixing them with other data.