A number of customers reported encountering an error 0x80070091 once they tried to create a system restore level or use an already created one to revert again their programs. Since you’re right here, it’s essential to even be going through the identical error code. Nicely, study what could set off this situation together with 3 ways repair to this drawback.
When this error code happens, you may even see an error message saying the next –
Particulars:
System Restore failed whereas restoring the listing from the restore level.
Supply: AppxStaging
Vacation spot: %ProgramFilespercentWindowsApps
An unspecified error occurred throughout System Restore. (0x80070091)

3 Methods Repair System Restore Error 0x80070091
In case you are getting an error 0x80070091 when creating or utilizing System Restore Level, try the under fixes one after one other.
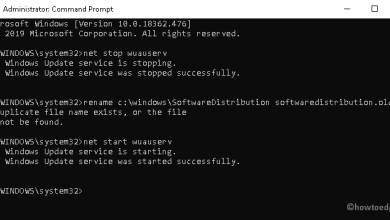
1. Rename the WindowsApps folder in Protected Mode
The error code 0x80070091 principally seems as a consequence of some points throughout the WindowsApps folder. Renaming this folder is a straightforward repair to revive utilizing System backup in your pc.
Nevertheless, since renaming the Home windows Apps folder shouldn’t be potential usually, boot into Protected Mode first and carry out this activity. Right here’s how –
- Boot your Home windows 10 PC into Protected Mode.
- Once you’re in Protected Mode, press Home windows + X and choose Terminal (Admin).
- Press Ctrl + Shift + 2 to invoke the Command immediate as administrator contained in the terminal.
- Execute these codes one after one other on the elevated console. Make certain to press the Enter key after every command.
cd C:Program Information
takeown /f WindowsApps /r /d Y
icacls WindowsApps /grant “%USERDOMAIN%%USERNAME%”:(F) /t
attrib WindowsApps -h
rename WindowsApps WindowsApps.outdated
After you run these codes efficiently, restart your pc. Signal again into your system once more and verify if you should use System Restore Level in your Home windows PC.
2. Rename the WindowsApps folder from WinRE
In case you are unable to rename the WindowsApps folder whereas inside Protected Mode, you might carry out this activity by getting into the Home windows Restoration Setting. The required steps are as follows –
- Proper-click on the Home windows icon and choose Settings.
- Within the Settings window, go to Replace & Safety > Restoration.
- Below the “Superior startup” part, click on on the Restart button.
- After your pc restarts, go to Troubleshoot > Superior choices > Command Immediate.
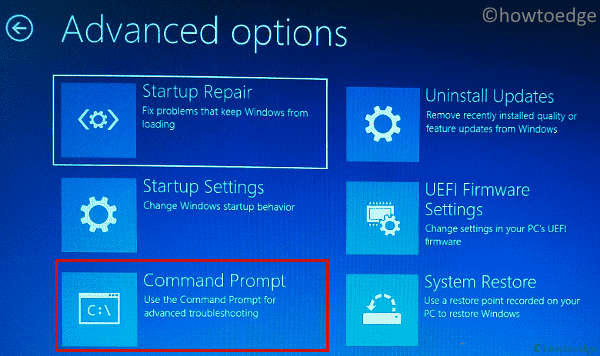
- Subsequent, sort in your administrator password to proceed.
- Sort the next instructions and hit Enter to run these codes one after the other.
cd C:Program Information
attrib WindowsApps -h
rename WindowsApps WindowsAppsOld
- Restart your pc if you’re achieved executing these codes.
Signal again into your system once more and verify if you should use System Restore Factors efficiently now.
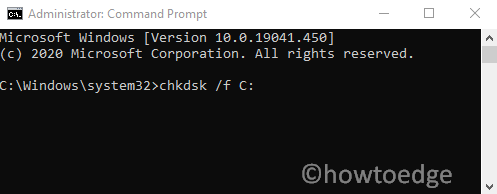
3. Carry out a CHKDSK scan
The presence of unhealthy sectors contained in the onerous disk may contribute to error code 0x80070091 when creating or utilizing a System Restore level in Home windows. To unravel this situation, it’s essential to provoke the Disk checking device and repair this situation. Comply with the under steps on easy methods to perform this activity –
- Click on on Begin (Home windows icon) and kind “Command Immediate”.
- Proper-click on Command Immediate and choose Run as administrator.
- When the UAC window prompts, hit Sure to allow entry.
- On the elevated console, sort the next adopted by the Enter key.
chkdsk /f C:
Be aware: Make certain to interchange the C: together with your applicable disk letter if the foundation drive differs on
- Within the above command, be certain that to interchange C together with your System drive. Now press the Enter key to run this command.
- In the event you’re requested to schedule a disk scan on the subsequent reboot, sort Y and hit Enter to verify the identical. This may take round quarter-hour to finish the scanning course of.
If this scan does reveal any unhealthy sectors in your onerous disk, you might provoke the disk restore activity by copying/pasting this command – chkdsk c: /x /r.
Do notice that this course of will take a very long time to restore your onerous drive. In case the ETA shows greater than 3 hours, the onerous disk is past restore and it’s essential to meet a technician to restore the identical.