This submit will talk about the doable culprits inflicting the replace error 0x80070490 together with seven correct methods to deal with them. This bug usually happens if you find yourself signed in utilizing a corrupted person profile. To repair this, create a brand new person account and delete the prevailing ones by way of the registry.
Notice: Earlier than continuing to the options listed under, disable third-party antivirus software program, and verify whether or not this solves the error 0x80070490. If the problem will get resolved, take away this program in your laptop and as an alternative begin utilizing the default safety utility i.e. Microsoft Defender. If not, attempt the next solutions sequentially –
1] Create a New Consumer Account
The replace error 0x80070490 usually happens when corruption is related to the signed-in person profile. To repair this, you need to create a brand new person account utilizing the next steps –
- To begin with, navigate to the under path –
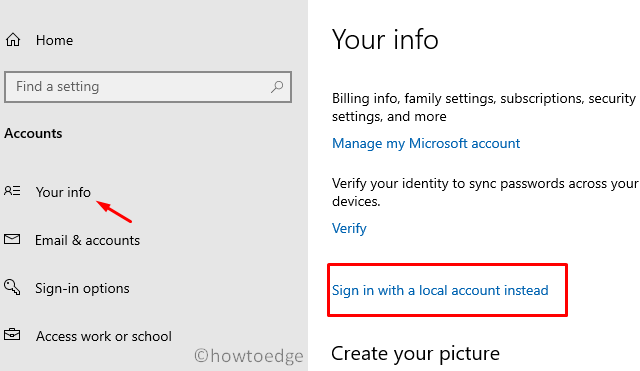
Settings (Win + I) > Accounts > Your Data
- Swap to the correct facet and click on “Check in with a neighborhood account as an alternative“.
- Observe the on-screen directions and register utilizing the newly created person ID and password.
Now that you’ve logged in utilizing a brand new person account, there mustn’t seem any error whereas updating Home windows.
2] Delete Consumer Profiles by way of Registry
If the error prevails even after logging in with a brand new person account, delete the outdated person profiles by way of the registry. Right here’s find out how to carry out this job –
- Press Win + R to open the Run dialog.
- Kind “
regedit” and click on OK. - On the registry, navigate to the under path –
HKEY_LOCAL_MACHINESOFTWAREMicrosoftWindowsCurrentVersionAppxAppxAllUserStore
- Search for the folder that resembles “S-1-5-21” like –
S-1-5-21-3105168380-3071851799-381973337-1001.
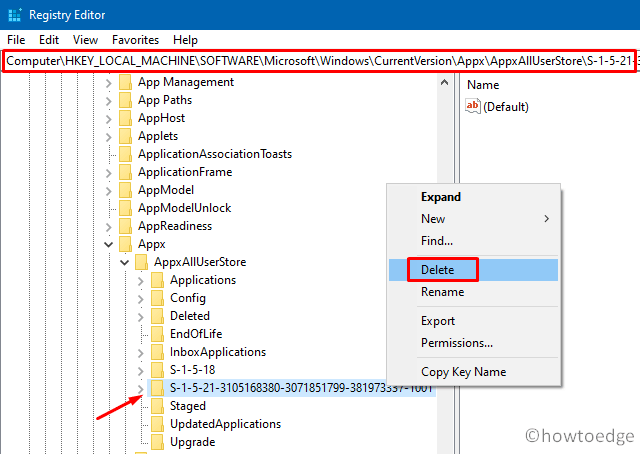
- Proper-click on this folder and select Delete. If there are multiple key equivalent to the above format, delete all of them.
- As soon as over, shut the registry and restart Home windows.
From the following logon, attempt updating your working system once more.
3] Run the Replace Troubleshooter
If creating a brand new person profile and deleting the prevailing ones don’t clear up the 0x80070490 challenge, replace the troubleshooter. This software will sort out the explanations resulting in update-related bugs and errors. Right here’s find out how to troubleshoot Home windows replace –
- Press Win + I to open the Settings menu.
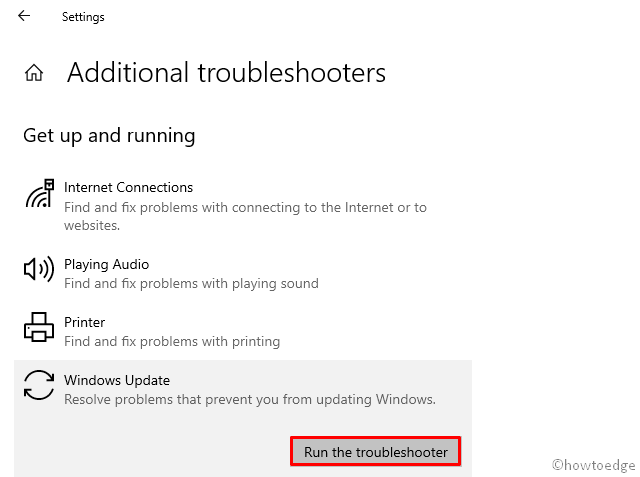
- Navigate Replace & Safety > Troubleshoot > Extra troubleshooters.
- Click on Home windows Replace, then Run the troubleshooter.
- Observe the on-screen directions to finish the remaining course of.
- When the troubleshooting finishes, Restart your laptop.
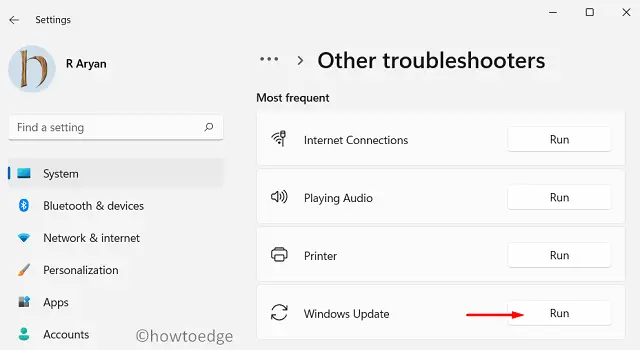
Whereas on Home windows 11 PC, you’ll not get the troubleshooter setting by following the above steps. You have to observe an alternate path which is as follows –
Settings (Win + I) > System > Troubleshooter > Different Troubleshooters
After reaching the trail above, you could discover Home windows updates below the part – Most frequent. Click on the Run button out there beside Home windows replace.
4] Carry out SFC/DISM scans
The presence of corrupted system recordsdata may additionally trigger the 0x80070490 error in the course of the Home windows replace. To repair this, you need to totally scan your PC utilizing the System File Checker utility program. Listed below are the important steps to work on –
- Launch Command Immediate having administrative privileges.
- Kind “
sfc/scannow” close to the blinking cursor and press Enter.
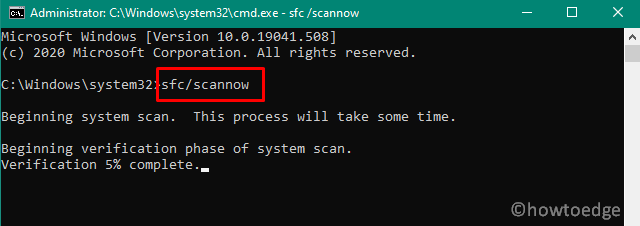
- Often, this takes 15-20 minutes to complete the scanning/repairing course of.
Notice: In sure circumstances, this will take much more time relying upon the extent of corruption.
- As soon as over, restart your laptop in order that the modifications made come into impact.
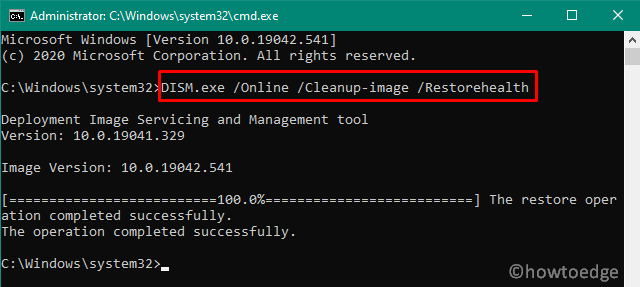
Now that you’ve efficiently repaired the broken core recordsdata, use the DISM software to seek out any corruption contained in the Home windows 10 picture. All you require is to execute the under code on an elevated console with Admin rights –
DISM.exe /On-line /Cleanup-image /Restorehealth
5] Reset Home windows Replace Companies
Many a time, you could tackle this challenge just by resetting the Home windows Replace Companies. To take action, use these steps –
- Press WinKey + S to launch the Search window.
- Kind companies within the textual content bar and hit Enter. Doing so will invoke the Companies window.
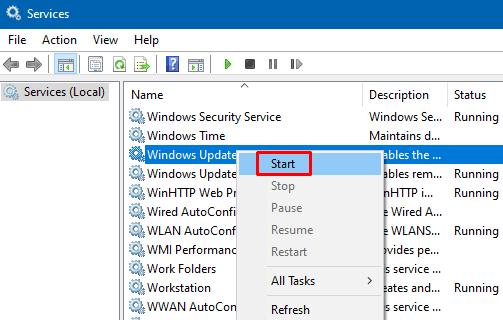
- Right here, scroll down and verify if the next companies are operating or not.
- Background Clever Switch Service
- Cryptographic Companies
- MSI Installer
- Home windows Replace
- The above companies needs to be operating for an error-free replace course of. Nevertheless, for those who discover any of those companies not operating, make a right-click, and hit Begin utilizing the context menu.
- Reboot your PC to include the current modifications.
When Home windows reloads, verify if the error 0x80070490 nonetheless happens or has been resolved.
6] Rename the SoftwareDistribution Folder
The replace course of may additionally fail when the SoftwareDistribution folder will get corrupted in some way. So, in case you are nonetheless combating the 0x80070490 error, attempt renaming this folder to one thing SD.outdated.
Nevertheless, as this folder incorporates all the knowledge {that a} Home windows replace requires, be certain to disable the replace companies first. To take action, use these steps –
- Use Win + R shortcut to open Run.
- Kind
companies.mscwithin the textual content subject and hit OK. - On the Companies window, find and right-click on Home windows Replace and click on “Cease“.
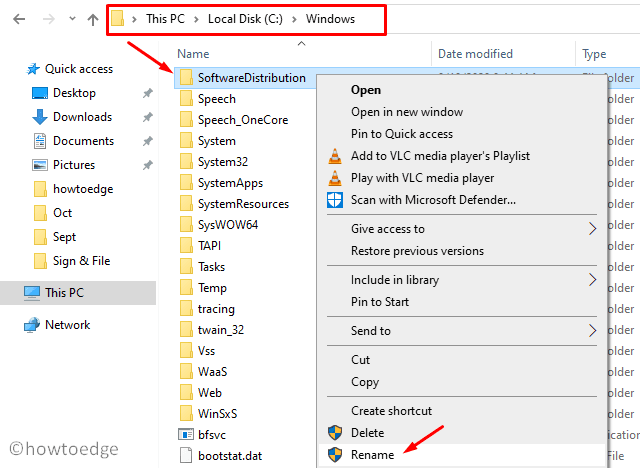
- Now, go to the under location and rename the folder –
SoftwareDistribution.
C:Home windows
- Subsequent, go to the situation
C:WindowsSystem32and search for the catroot2 folder. As soon as discovered, right-click on the identical and rename this to catroot2.outdated. - After renaming folders, return to the Companies window and restart the companies you stopped earlier.
- Restart your laptop after finishing the above steps.
7] Manually Set up the Newest Cumulative Replace
If you’re nonetheless getting the 0x80070490 error whereas updating Home windows 10 OS, higher try this manually. Right here’s find out how to manually obtain and set up the Standalone bundle in your laptop –
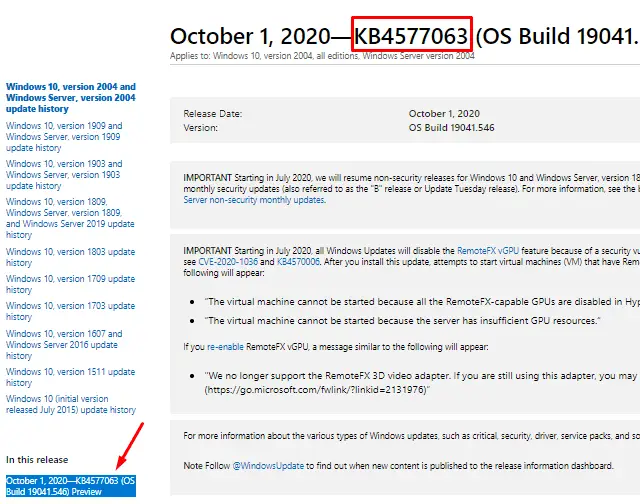
- Go to the Windows 10 Update History web site and click on the particular Construct model that you simply at present have in your PC. If you’re getting this error code on Home windows 11, navigate to the Windows 11 Update history web page as an alternative.
- Scroll all the way down to “On this launch” and choose the highest hyperlink. Head over to the correct pane and replica the quantity that begins with “KB” like – KB4577063.
- Now that you’ve copied the cumulative replace quantity, go to the Update Catalog page, and sort this quantity precisely. Press Enter to view an inventory of well-matching outcomes.
- In case you do know your system structure, click on the Obtain button subsequent to it. Chances are you’ll get this data by reaching out to the trail –
Settings > Replace & Safety > Home windows Replace > OS Construct Data. - After the obtain completes, click on twice on the setup file to start out the set up. Home windows might reboot a number of instances throughout this course of, so wait patiently.
- As soon as over, you gained’t get this 0x80070490 error anymore in the course of the Home windows Replace course of.
I hope this text resolves the problem that you simply have been in search of. Please tell us within the feedback part what was your challenge and which resolution labored for you in order that it might be helpful for different customers as effectively.