Have you ever not too long ago encountered the replace Error Code 0x80240020 whereas upgrading the Home windows 11/10 OS? Properly, if sure, then comply with this troubleshooting information to know the possible causes together with a number of working methods to resolve the identical. If the sign-in data part inside Home windows Replace stays disabled, this will result in this error code.
This error code comes with an error message that claims – The operation didn’t full as a result of there is no such thing as a logged-on interactive consumer. Listed here are some doable methods to resolve the issue on Home windows 10/11.
What causes Replace Error Code 0x80240020
This drawback typically happens when your Automated Updates request fails to get processed and sure updates can’t be downloaded. There are a number of workarounds accessible to assist resolve this situation. Take a look at the options intimately.
Methods to Repair Replace Error Code 0x80240020 in Home windows 10
To unravel the Replace error 0x80240020 on a Home windows 10 PC, use the next strategies –
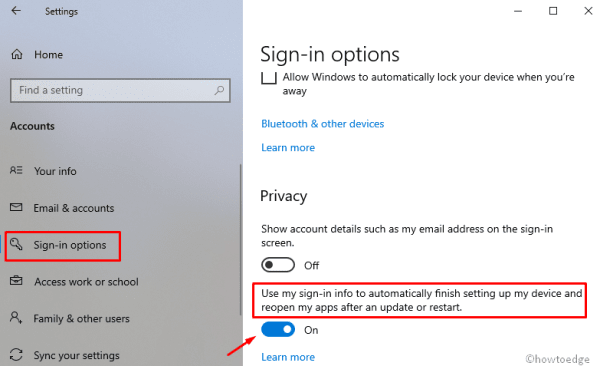
1. Allow “Use my sign-in data” contained in the Home windows Replace
Earlier than continuing to the precise options, one ought to configure the “Signal-in data” settings contained in the replace part. To take action, comply with these simple steps –
- Press the Win+I hotkey collectively to open the Settings window.
- On the subsequent web page, choose Accounts > Signal-in choices.
For Home windows 11
- Go to the Extra Settings choice.
- Activate the toggle change for Use my sign-in data to robotically end organising after an replace.
For Home windows 10
- Scroll all the way down to the Privateness part.
- Activate the function that reads Use my sign-in data to robotically end organising my system and reopen my apps after an replace or restart.
- Reboot your PC and from the subsequent login, the next error message might now not exist.
2. Run Home windows Replace Troubleshooter
Since this replace situation is because of corrupt system drivers, following the above fixes ought to resolve the underlying trigger. Nonetheless, should you nonetheless encounter the error 0x80240020 whereas upgrading the present Construct OS, run the Home windows troubleshooter. This device can simply detect defective information and restore them if doable. Right here is the whole process –
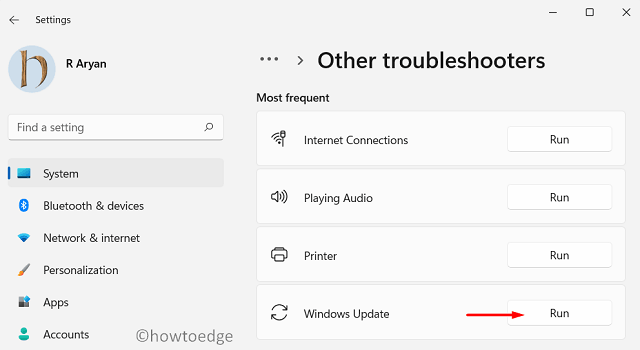
For Home windows 11
- Open the Settings menu utilizing the Home windows+I keys.
- Go to System > Troubleshoot > Different troubleshooters.
- Subsequent to Home windows Replace, click on on the Run button.
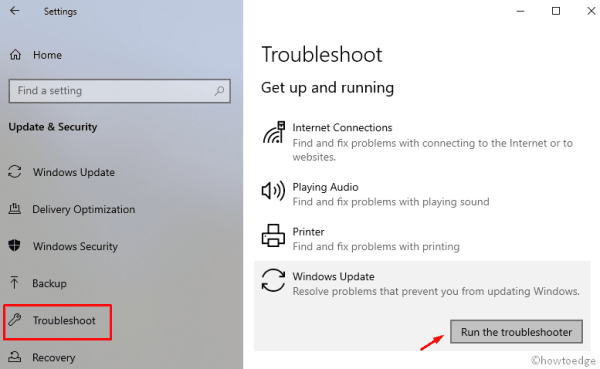
For Home windows 10
- Open the Run dialog utilizing Win and R shortcuts.
- Within the textual content field sort, ms-settings: and hit the OK button.
- Navigate to Replace & Safety > Troubleshoot > Home windows Replace.
- Now, click on the Run the troubleshooter button to start the looking/repairing job.
- As soon as over, Restart the PC and set up any pending updates on the pc.
3. Allow the BITS service
Background Clever Switch Service (BITS) acts because the communicator between Microsoft’s servers and your PC. This is the reason if something goes flawed or this service is stopped, you received’t be capable of obtain new patch updates from the corporate servers. Since you’re already getting an update-related situation, you must test whether or not BITS is working correctly in your pc or not. Listed here are the steps to work on –
- Click on on Begin, sort Providers, and press Enter.
- Find and double-click on the Background Clever Switch Service.
- On the subsequent display, go to the Normal tab and test if the Service standing is Working.
- Nonetheless, if it’s Stopped, click on on the Begin button to make it run.
- Click on on the OK button to save lots of the adjustments.
4. Delete/Recreate the SoftwareDistribution folder
Many a time, the system doesn’t carry out an improve owing to some lacking or corrupt information. In such instances, one ought to positively attempt to delete and recreate the SoftwareDistribution folder. Performing so doesn’t solely clear up the error 0x80240020 however fixes a number of different update-related points. Right here’s the way to proceed –
- Press the Win and R shortcuts to invoke the Run dialog.
- Right here within the textual content bar, sort the providers.msc and hit the OK button.
- When the Providers web page comes up, scroll down and find the under providers –
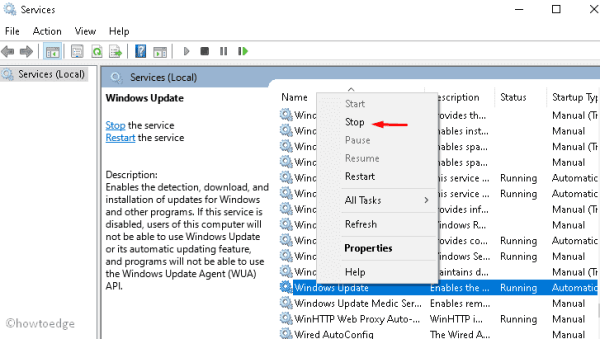
Home windows Replace service
Background Clever Switch service
Cryptographic providers
- Double-click on every considered one of these providers and hit the Cease button.
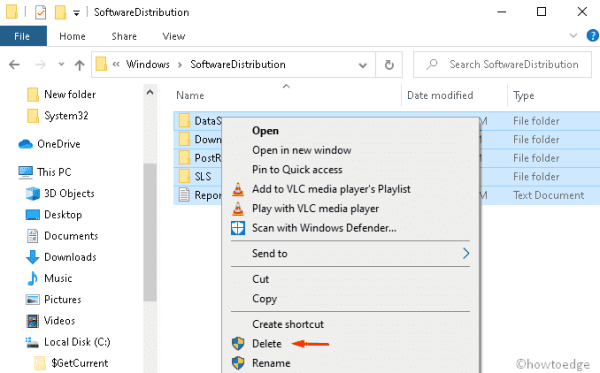
- Press the Win and E shortcuts to open File Explorer.
- Navigate to C:Home windowsSoftwareDistribution and delete all of the contents inside this listing or rename this folder to “softwaredistribution.previous“.
- Now, launch the Command Immediate as an Admin and execute the under code –
wuauclt.exe /updatenow
- Look ahead to some time as this takes a while to complete. As soon as over, shut the Home windows console and return to the Providers window to restart the providers that you simply stopped earlier.
Home windows Replace service, Background Clever Switch service, and Cryptographic providers.
- Lastly, reboot the pc in order that the adjustments come into impact instantly.
From the subsequent login, you might replace Home windows 10 OS with out receiving any error messages.
5. Carry out a number of adjustments contained in the Registry
If not one of the fixes above resolve the error 0x80240020, tweaking key values of sure entries contained in the registry might clear up this situation. Nonetheless, watch out as any incorrect adjustments might corrupt your complete working system. We additionally counsel making a system backup earlier than processing the under steps –
- Proper-click on the Home windows icon and choose Run.
- Sort regedit within the textual content field and press Enter to open the Registry Editor.
- When the UAC window seems, faucet Sure to authorize the entry.
- Now, increase the folders current on the left column to achieve out to the next deal with –
HKEY_LOCAL_MACHINESOFTWAREMicrosoftWindowsCurrentVersionWindowsUpdateOSUpgrade
- In case, you don’t discover any such file contained in the WindowsUpdate folder, create a brand new Key and identify this OSUpgrade utilizing the under sequence –
Proper click on on WindowsUpdate > Choose New > Key
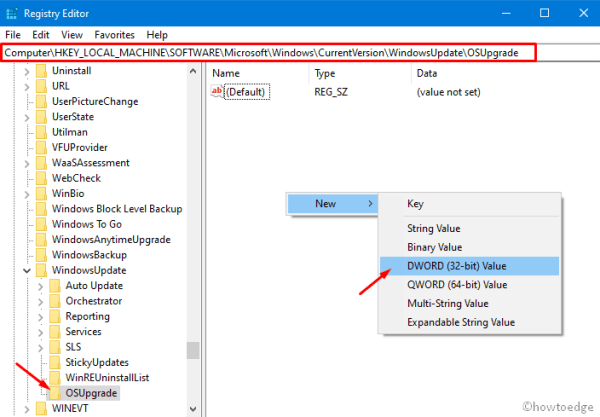
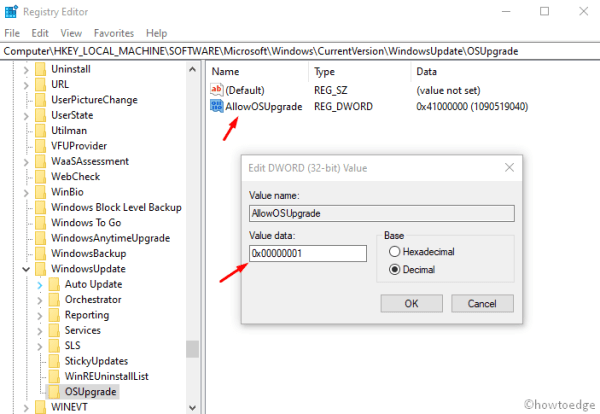
- After coming into the newly created key, right-click wherever and choose
New > DWORD (32-bit) worth. - Rename this entry as “AllowOSUpgrade” and set its worth to “0x00000001” with out quotes.
- Restart your PC in order that the adjustments made to this point come into impact.
That’s it, I hope this put up lets you eliminate the nagging replace bug test 0x80240020. If in case you have any queries or strategies associated to this text, do convey us by means of the remark field.