Disabling the network adapter in Windows 11 can be useful in many scenarios, such as troubleshooting connection problems or temporarily disabling the wireless network adapter. In this article, we will guide you through the steps to disable the network adapter in Windows 11.
Quick answer
To disable the network adapter in Windows 11, open Settings> Network and Internet > Advanced Network SettingsIn the department network cardsclick the button Champions.
Disable network card in Windows 11
To disable your Wi-Fi or Ethernet network adapter in Windows 11, follow these steps:
- Click the button to start.
- On the Start menu, click the icon Settings.
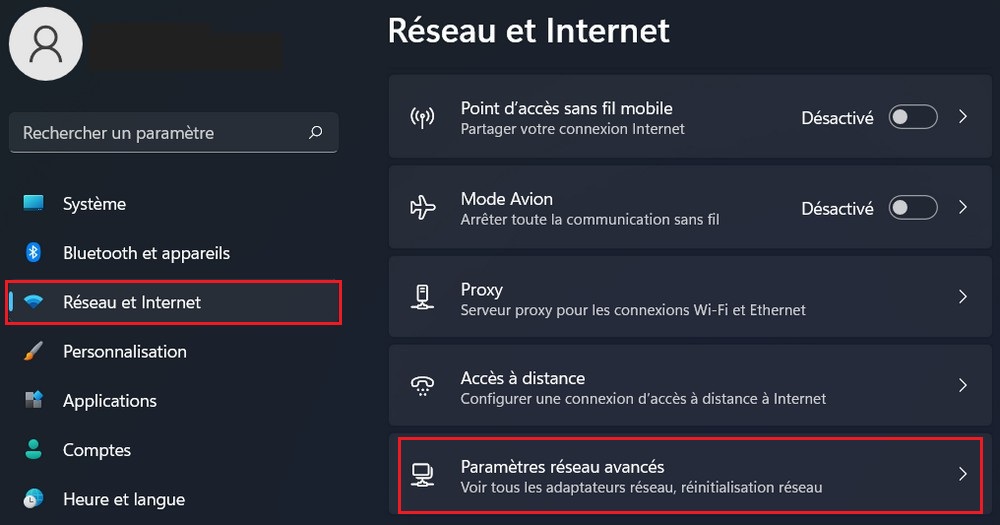
- In the settings window, click on the option Network and the Internet in the left column.
- Click on the tab Advanced network settings on the right side.
- In the Network Adapters section, click the button Champions To disable your Wi-Fi or Ethernet adapter in Windows 11.
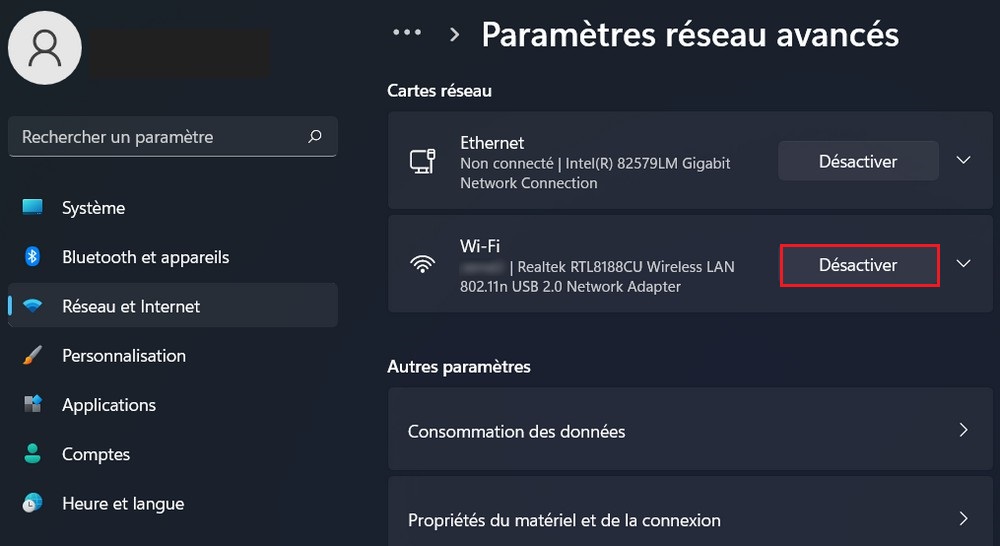
The specified network adapter will be disabled and any associated network connection will be terminated. To re-enable the network adapter, follow these steps again and click Enable in the Network Adapters section.
through network connections
To disable the network card through network connections, you can follow these steps:
- Open Windows Search (press Win + S) and type “network connections” in the search box.
- Click on Show network connections.

- In the Network Connections window, you will see a list of network adapters available on your computer.
- Right-click on the adapter you want to disable and select it Champions in the context menu.
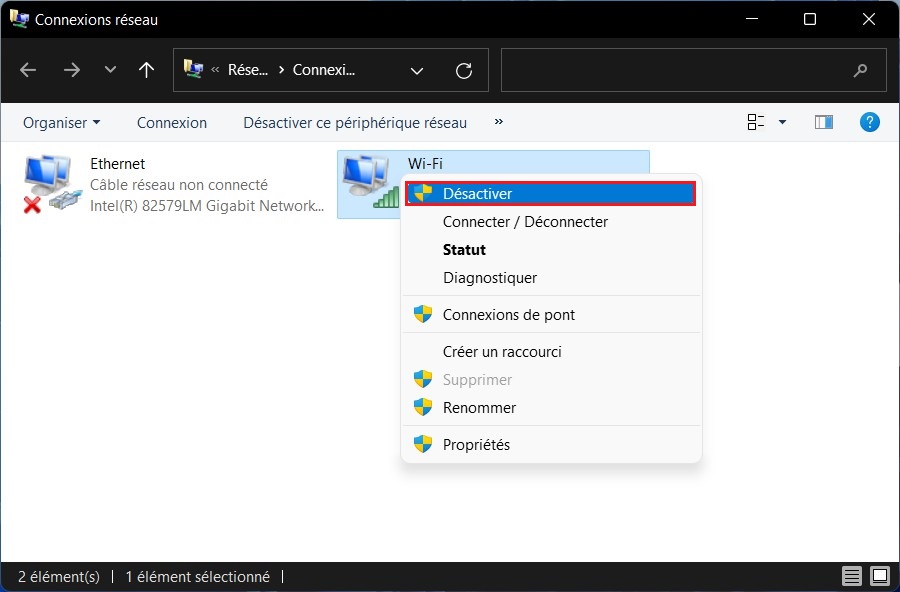
The specified network adapter will be disabled and any associated network connection will be terminated. To re-enable the network adapter, follow these steps again and select “Enable” instead of “Disable” in the context menu of the network adapter.
via Device Manager
To disable the network adapter in Windows 11 using Device Manager, follow these steps:
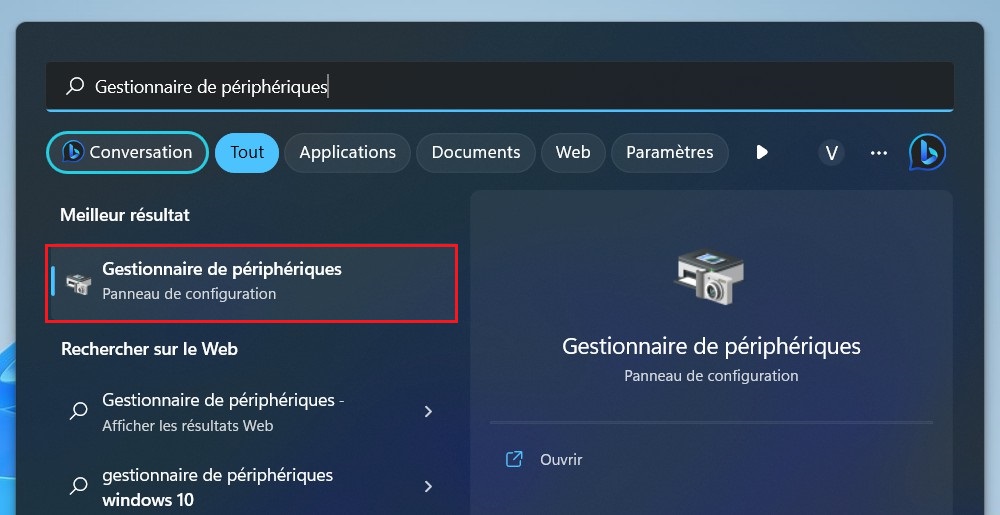
- Click the button to start.
- Look in Device Manager and click on the corresponding result.
- In Device Manager, expand the category network cards By clicking on the small arrow next to it.
- Right-click on the network adapter you want to disable and select it Device disabled.
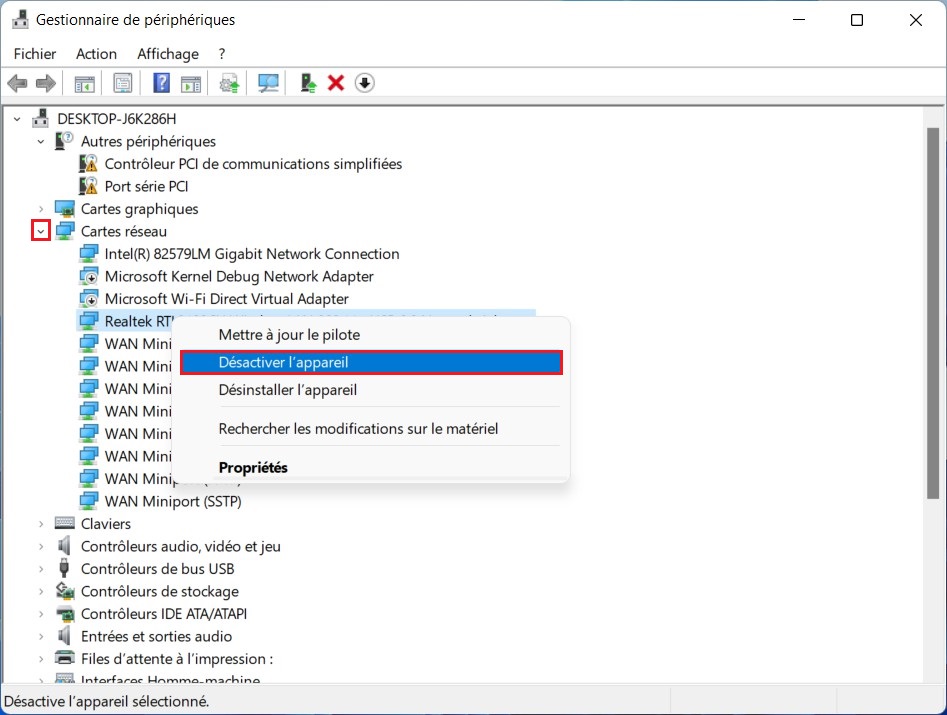
- If a confirmation dialog box appears, click Yes to confirm that the network card is disabled.
The specified network adapter will be disabled and will not work until you re-enable it.
Also read: Troubleshoot Wi-Fi problems on Windows 11
Disabling the network adapter in Windows 11 can come in handy in some situations, whether for troubleshooting connectivity issues or for security reasons. By following the simple steps in this article, you can easily disable the network adapter in Windows 11. It is important to note that when the network adapter is disabled, you will not be able to access the network connection until you reactivate it. So make sure to only disable your network adapter if you really need it.